

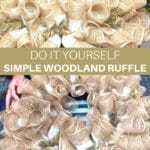
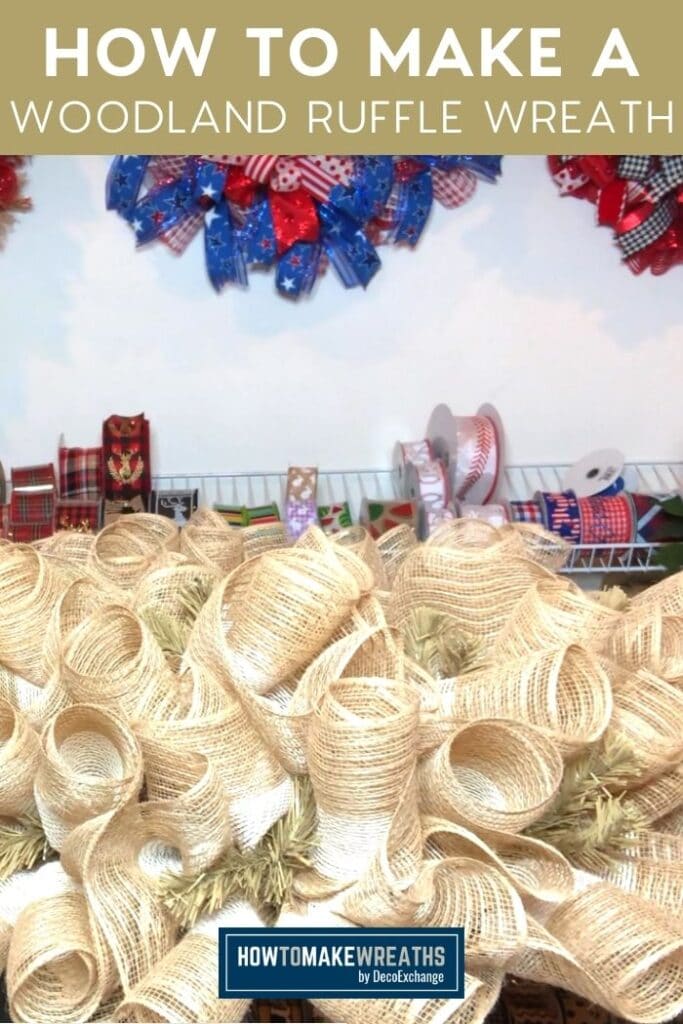
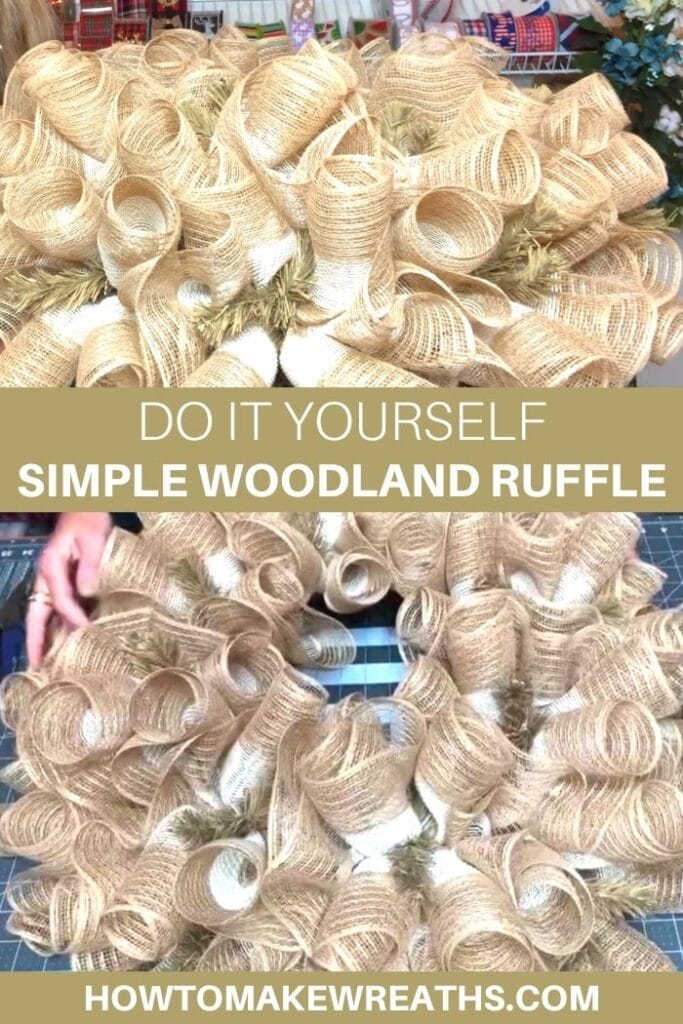
Experimenting with new wreath-making techniques is so much fun! Today, we have a new ruffle technique that will take your skills to a new level. Learn how to make a woodland ruffle wreath base to add this unique technique to your repertoire.
Hey y’all! It’s amazing how creative you guys can get. What we love about making wreaths is that there are SO many possibilities! Now, we’ve asked our friend over at Woodland Ridge Design to teach us how she makes her signature woodland ruffle wreath base.
I am really loving this new method of ruffle-making. It’s unique, fun, and the final product looks incredible! But best of all…it’s super quick and easy to do. This ruffle method is perfect for anyone who is in a hurry or loves making designs that look much more complex than they actually are.
How to Make a Woodland Ruffle Wreath
To show you this method, we’re bringing in a guest designer, Tiffany, who is a creative business owner, home décor designer, DecoExchange coaching student, and most importantly friend of the DecoExchange family.
Video Tutorial
To show us how she makes her easy woodland ruffle wreath base, Tiffany from Woodland Ridge Design, made this easy-to-follow video tutorial. Follow along as you make your own wreath. Don’t worry if you miss a step or two, you can find them written out down below (or grab our printable recipe card to take with you).
DIY Woodland Ruffle Supplies:
Here’s everything you’ll need for this project.
- 15”-24” Work wreath form
- 2 rolls of 10.5” Poly jute deco mesh (Although any 10.5” mesh will work)
- Rotary cutting tool
 or Scissors
 - Clothespin or Chip clip
- Cutting Mat

 or
or 


 or
or 

Woodland Ruffle Wreath Instructions
Just in case you missed a step or two in the video (or just prefer written directions), follow along to these instructions.
Step 1
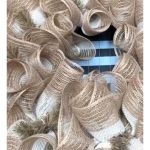
You will begin by cutting your 10.5” deco mesh. I am using poly jute deco mesh, but any 10.5” mesh will work. Since it will take almost two rolls of mesh, I cut both rolls at the same time. Cut your mesh in 35” strips.
There are 18 twist ties on a 15”-24” work wreath form, so you’ll need 18 pieces of mesh cut at the 35”. If you cut both rolls at the same time, that’s 9 cuts.
Step 2
To begin your ruffle lay the cut piece down on your table where it naturally wants to curl up on itself. Use something heavy to hold one end.
Step 3
Start by making a curl on one end. Roll the mesh about 2-3 turns, making sure that the cut end is completely hidden inside the curl. Attach your clip to the middle of the curl.
Step 4
While your clip is holding the first curl, turn your mesh around to the other end and begin curling that side. Once rolled, pinch the middle of the curl.
Step 5
Hold the second curl and begin scrunching the mesh up the middle to create a ruffle. Once you get to the other curl that’s being held together with the clip, you can un-do the clip and grip it all together.
Step 6
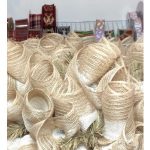
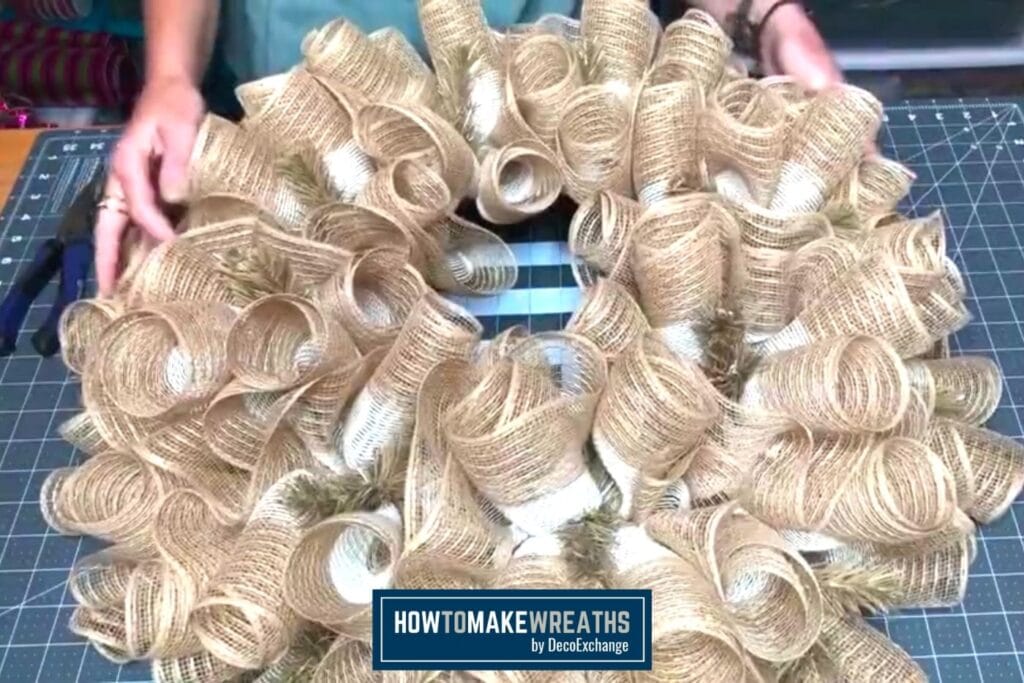
Attach your ruffles horizontally to the wreath form with the curl side up. Work your way around the bottom of the form first.
Step 7
Repeat process for each cut piece of mesh and add to each tie on the form. You want to make sure that each additional ruffle doesn’t overlap any others as you add them. Pull each piece up so that they meet each other and stand up like a bookend.
Step 8
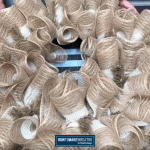
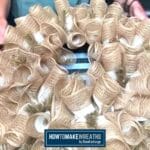
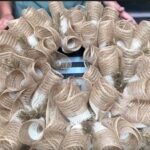
Once you fill up all 18 twist ties, just fluff out your ruffles so that your wreath looks nice and full.
Make This Wreath Yourself
That’s all there is to it, y’all! Now that you’ve made your beautiful woodland ruffle wreath base, you can dress it up however you want! Try using different colors of mesh for different seasons or holidays. Then add bows, signs, ribbon tails…whatever you want.
It really is just that easy to create a full and beautiful wreath base for all your wreath-making projects. 😁
If you loved this tutorial and would like to learn how to do this method using 21” mesh, Woodland Ridge Design offers a paid tutorial in their Etsy page.
If you love working with mesh and ruffles, be sure to check out these other wreath designs:
- How To Make A Burlap Wreath: Ruffled Burlap Wreath
- Home Wreath Kit with Coach Fancy
- How To Easily Make A Simple Burlap Wreath
If you need any help with centerpiece-making, bow-making, wreath-making, or crafting in general, be sure to check out more of our tutorials on How to Make Wreaths.
We would love to see your beautiful wreaths! Please share with us over at the How To Make Wreaths Facebook Group.
CHECK OUT MORE EZ BOW MAKER TUTORIALS
If you are interested in more info on learning how to make wreaths, where to buy supplies, and being in a community of like-minded crafters, check out our Creative Coaching Subscription Group.

Woodland Ruffle Wreath Tutorial
Materials
- Work wreath form 15"-24"
- 1 rolls 10.5" deco mesh poly jute or any other mesh
- rotary cutter or scissors
- clothes pin or chip clip
- cutting mat
Instructions
- Cut your mesh into 35" strips. You'll need a total of 18 strips, so if you double up and cut both rolls at the same time, you'll have a total of 9 cuts.
- Put a strip of mesh down on your work surface in a way so that it wants to naturally curl up. Put something heavy down to hold one end in place.
- Make a curl on one end. Roll the mesh 2-3 times, so that the cut end is entirely hidden inside the curl. Attach your clip to the middle of the curl.
- With your clip holding the first curl, turn your mesh around to the other end and begin curling that side. Once that side is rolled in, pinch the middle of the curl.
- While holding the second curl, scrunch the mesh up the middle to create a ruffle. When you reach the curl that’s being held together with the clip, un-do the clip and grip it all together.
- Attach your ruffles horizontally to the wreath form using the pipe cleaners. Make sure the curl side is up. Start attaching to the bottom of the wreath form then move to the top (or inside).
- Repeat the same process for every piece of mesh until you fill your wreath form. You want to make sure that each additional ruffle doesn’t overlap any others as you add them. Pull each piece up so that they meet each other and stand up like a bookend.
- Fluff out your ruffles to make your wreath base nice and full.
Just pin this woodland ruffle wreath tutorial to save the instructions for a later time!
If you love to craft, check out our Eat. Sleep. Craft. Repeat. t-shirts and click on the picture below!

Awesome…… absolutely my favorite mesh wreath method…. thanks for sharing
I love this method. However, does the length of the cut matter? If I were to make my cuts say at only 25 inches, how would that affect the end result?
I read another tutorial that said 20 inche cut so im assuming it would be fine.
There’s no need to decorate the wreath more. IT IS BEAUTIFUL THE WAY IT IS!!! LOVE THE SIMPLICITY!!! Thanks Jo Ann Gennaro
woodland ridge design
Absolutely awesome and easy to make
Having the worse time with this. Outside ruffles are moving (pipe cleaners) I need them stable and I’m on a time limit.