
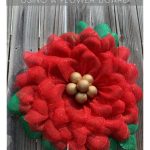


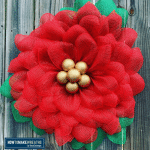
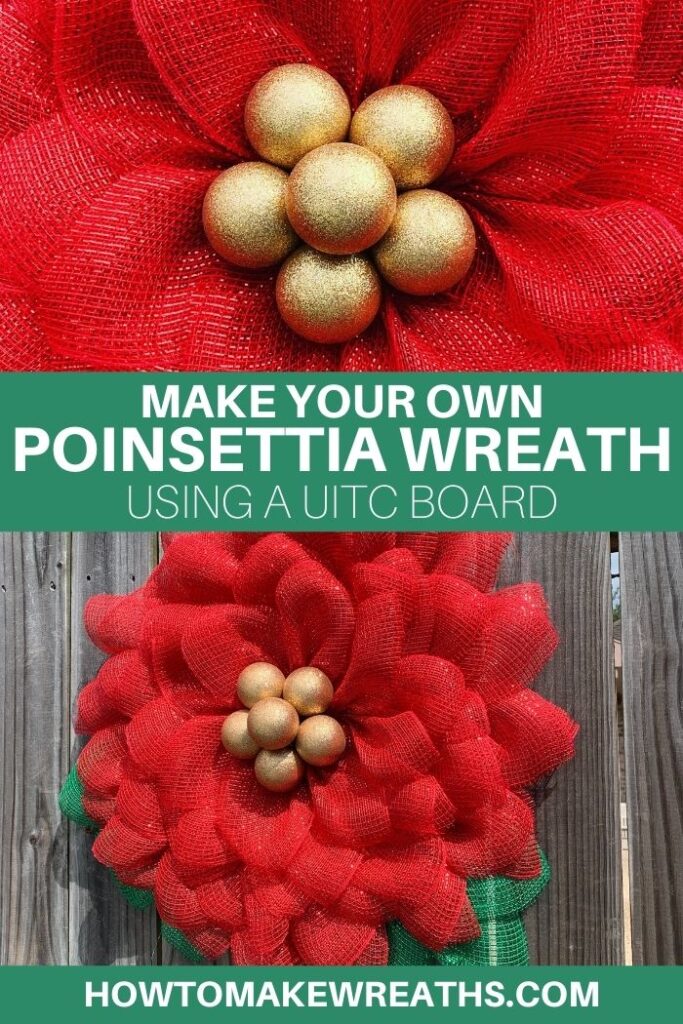
A classic symbol of the festive holiday season is the bold and colorful poinsettia flower. Today, we’re showing you step-by-step how to make a gorgeous deco mesh poinsettia wreath!
Hey, y’all! You know how much we love making Christmas wreaths! It’s one of our favorite seasons for wreath-making.
What’s more Christmas-y than a poinsettia? I can’t think of much! Naturally, that means that we simply have to share how to make a Poinsettia Wreath to adorn your door.
However, as most of you know, I don’t make flower wreaths very often. That’s why I thought it would be great to enlist the help of our friends over at Unique in the Creek (UITC) and Monkey’s Creations to deliver this amazingly simple DIY poinsettia wreath tutorial.
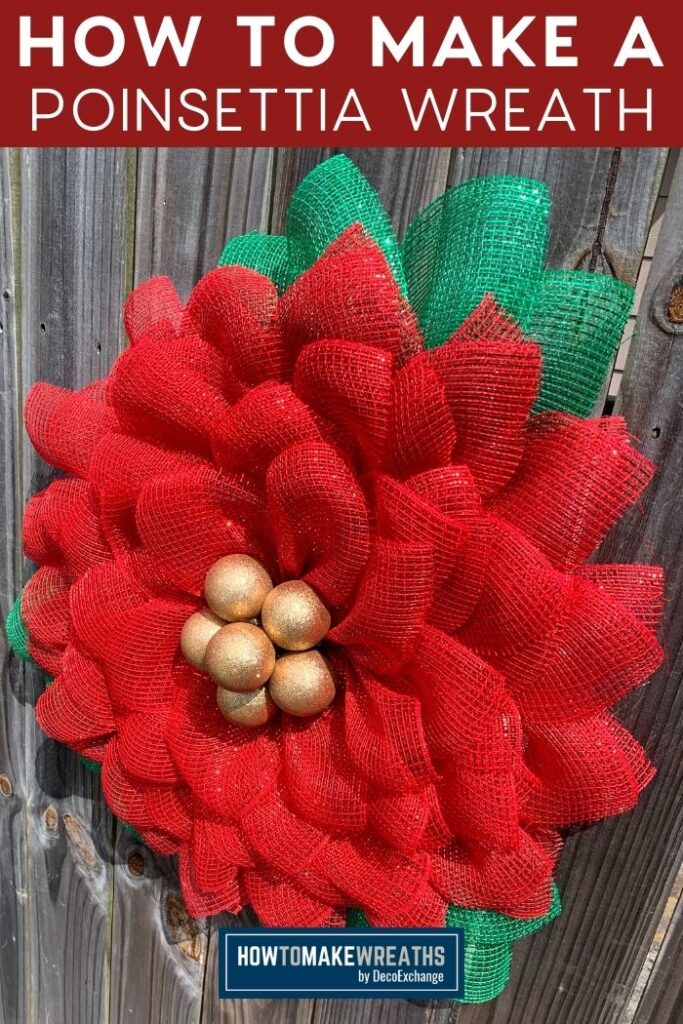
How to Make a Deco Mesh Poinsettia Wreath
Today, we have a guest wreath designer, Michele from Monkey’s Creation, to show us how to make a simple and easy poinsettia wreath tutorial.
Michele is more than just an amazing designer. She’s also a proud Air Force veteran, wife, mother, grandmother, and small business owner!
Michele loves making wreaths using several different wreath frames, and so we knew she would be a great fit for helping you learn this simple deco mesh poinsettia wreath.
This awesome holiday wreath will brighten up your whole front porch and have all of your neighbors asking where you got it. Just imagine the looks on their faces when you tell them you made it (I love that part)!
Poinsettia Mesh Wreath Supplies
This is the list of materials you’ll need to make your very own poinsettia mesh wreath.
- UITC large flower board
- 1 roll of red mesh
- 6 pieces of green mesh
- 6 small ornaments

- Zip ties for 18 lb
- Pipe cleaner
- Zip tie gun (optional)


 (optional)
Easy DIY Poinsettia Wreath Instructions
- Pre-load zip ties into your UITC board and close the zip ties, but don’t tighten them yet.
- Cut 36 pieces of red mesh for flower 10×10
- Cut 6 pieces of green mesh 11×10
- Start with mesh curve side up so it’s a diamond shape.
- Scrunch mesh from corner to corner. Pinch at the center. Flip it up, and stick in a zip tie. Make sure that your petals are even. I usually use a finger width, so that all petals are even. To save time, you can prep all the petals and stick them in a clothespin. Then you can just stick them in the zip ties.
- Tighten zip ties after you finish each row. You can use a zip tie gun which helps tighten and cuts the ties. It helps to make it easy on your hands.
- Place petal in all zip ties on rows 2,3,4, and 5 (each row is labeled on the flower board with count starting from the outside going in). You can trim any frays after you complete the flower. You don’t want to mess with the petals too much, because the more you mess with the mesh, the more it can fray.
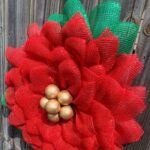
- When you finish the red petals, flip the board over to start the leaves.
- On the back of the flower board, you’ll see two holes that are close together. You can place a zip tie through that hole, so you can hang the wreath.
- When starting the leaves, insert the zip tie (flat head facing up) and leave it open.
- Fold green leaves the same way you did the red petals. You can choose how many green leaves you want, but I like to stack 2 layers, one on top of the other.
- Place the green leaves face down in row 1 with the zip ties. Make sure that the head of the zip tie is on the side so that it won’t scratch the door of your customer. Make 3 sets of leaves.
- Glue ornament tops on so that they don’t fall off.
- Put ornaments on pipe cleaner (I used 6. Five on the bottom and one on top.) and run pipe cleaner to the back of the board and tighten when you have the ornaments arranged how you want them.
- We’ll use whichever 2 corners you want the pipe cleaners to go in and snug them in there nice and tight. You don’t want them moving. Twist the pipe cleaner all the way and tuck it in one of the holes, so that it doesn’t stick out.
- Make sure you clip off the frays because they’re going to happen…no big deal.
There it is! You have a beautiful, traditional poinsettia wreath! It came together quickly and easily, right?
I hope this tutorial was helpful to you. If you enjoyed it, please check out our other tutorials (we have a huge variety!).
The Unique in the Creek flower board is a bonus because it takes out all the hard work of making flower wreaths so that they are easy to make. I also made a video for you to show you how to use the UITC board if you want to see it in action.
To watch more of Michele’s tutorials you can follow her YouTube channel!
If you love making flower wreaths you may also love our Sunflower Wreath Tutorial.
How to Make a Poinsettia Wreath with UITC Board
Materials
- 1 board UITC large flower board
- 1 roll mesh red
- 6 pieces mesh green
- 6 small ornaments
- Zip ties for 18 lb
- Pipe cleaner
- Zip tie gun (optional)
Instructions
- Load your zip ties into the UITC board and close them but don't tighten them down yet.
- Cut 36 (10×10) pieces of red mesh for flower
- Cut 6 (11×10) pieces of green mesh
- Begin by having the mesh curve side up so it's a diamond shape.
- Scrunch mesh from corner to corner. Pinch at the center and flip it up, and put it in a zip tie. Make all the petals even.
- After you finish each row, tighten the zip ties down. You can use a zip tie gun which takes the work out by tightening them and cutting off excess.
- Place petal in all zip ties on rows 2,3,4, and 5 (each row is labeled on the flower board with count starting from the outside going in).
- When you finish the red petals, flip the board over to start the leaves.
- On the back of the flower board, you'll see two holes that are close together. Place a zip tie through that hole, so you can hang the wreath.
- When starting the leaves, insert the zip tie (flat head facing up) and leave it open.
- Fold green leaves the same way you did the red petals. You can choose how many green leaves you want, but I like to stack 2 layers, one on top of the other.
- Place the green leaves face down in row 1 with the zip ties. Make sure that the head of the zip tie is on the side so that it won't scratch your customer's door. Make 3 sets of leaves.
- Glue ornament tops on so that they don't fall off.
- Put ornaments on pipe cleaner (I used 6: five on the bottom and one on top.) and run pipe cleaner to the back of the board and tighten down once you have the ornaments arranged. Twist the pipe cleaner all the way and tuck it into one of the holes to prevent it from sticking out.
- Frays are going to happen with you work with deco mesh. When your flower is done, clip off the frays and you're doen!
Video
We hope you enjoyed this poinsettia wreath tutorial! If you did, feel free to scroll down and leave us a comment or share it with a friend.
If you need extra help with bow-making, wreath making, or crafting in general, be sure to check out our other tutorials.
Share your holiday wreaths with us over at the How To Make Wreaths Facebook Group. We’d love to see all your creations!
If you are interested in more info on learning how to make wreaths, where to buy supplies, and being in a community of like-minded crafters, check out our Creative Coaching Subscription Group.

Thank you howtomakewreaths.com and Michele from Monkeys Creations! Fabulous post and tutorial!!!
Amazing! Thank you for the tutorial and the link to the supplies!!!
Michele from Monkeys creations makes learning fun. Her tutorials are very easy to follow. Load up the zip ties and grab a flower board from UITC, you will be hooked.
This is great. Wish I had one of those boaonow so I can try this out.
Me too
I love it. Thank you for sharing.
How can I make a poinsettia wreath if I don’t have the UTC board
Can’t wait to do this one., beautiful!!
Where do you purchase the flat form?
https://uniqueinthecreek.com/r?id=4d7d44
Where do you get the flower board?
https://uniqueinthecreek.com/r?id=4d7d44
Is the mesh wired on the edges?
nope
nope.
Where do you buy your flower board?
https://uniqueinthecreek.com/r?id=4d7d44
Etsy
Etsy
Where
Where do you fine the board
Hi Joyce! You can find them at UITC Boards on DecoExchange.
Thank you for easy to follow step by step instructions!