Here’s a winter grapevine snowflake wreath for this holiday season! It’s part of our wreath kit design collection and it’s terrific in every way. Whether you’re searching for an evergreen winter design or a generic holiday season wreath, this one is a clear winner.
Hey, y’all! Coach Mel is with us today to show you how to make a lovely winter wreath, which is a silvery grapevine snowflake wreath design!
This design happens to use some new items as well as make use of leftover items from other projects. The design is reminiscent of one of our recent popular winter wreath kits that sold out.
If you want to buy any of our wreath kits, you can find them on DecoExchange. Since you can’t buy this particular design as a wreath kit, we’re including a list of the supplies and the process to make this wreath so you can do it yourself.
This design is simple yet impactful. It’s visually appealing but only takes a few minutes to make. But, my favorite part about this wreath is that it’s versatile enough that it can be used all winter long if you don’t want to display holiday-specific designs.
Note: If you love winter wreath designs, be sure to also check out our Winter Silver Grapevine Wreath Kit Tutorial, Christmas Snowman Grapevine Wreath, and Winter Evergreen Wreath designs!

Supplies Needed
Here’s what you’ll need to make this glittery, sparkly winter grapevine wreath.
- 14” oval grapevine
- 2 sets of frosted greenery stems
- 1-2 additional greenery stems (or leftover sprigs from other projects)
- Wooden snowflake sign
- Pipe cleaners
- (1) 1.5” winter ribbon
- Mounting squares or staple gun
- Hot glue gun and glue sticks
- Bolt cutters
How To Make An Evergreen Snowflake Wreath
Here are the steps we used to make this design. It’ll come together quickly and be ready to hang on the door or add to your store inventory!
Step 1
Prepare your grapevine base by visually inspecting it to see if there are any excess leaves or long stems. If there are, remove them (or cut them off).
Step 2
Prepare your snowflake sign so you can attach it to your wreath. Then, use the pipe cleaners to attach the sign to your wreath on the right side of the base.
TIP: If you find that pushing the pipe cleaner through your grapevine is challenging, you can try this little tip. Push the pipe cleaners through the wreath as far as you can. Take your needlenose pliers and use them to grab the pipe cleaner on the backside of the wreath and pull the pipe cleaner the rest of the way through.
Step 3
Take your greenery stems and spread out the greenery so that it looks nice and full. Then, curve the stem slightly to make it easier to slip into the grapevine base and achieve the angle we want.
Insert one stem into the base on the left side, coming in from the bottom. Then, insert the other stem in from the top so the stems come towards each other in the middle. Secure them in place with hot glue.
We added some extra greenery pieces leftover from other projects to make the greenery even fuller-looking. This is a great way to spread your supplies even further and save money!
Step 4
Now we’re going to make a single-ribbon bow with 11 (!) loops.
Start by leaving a nice long tail to work with (curl, trim, etc). Somewhere around 20 inches should be enough.
Next, make a small loop. This will be your center loop.
Then, pinch your ribbon, twist it, and make a slightly larger loop. Continue pinching, twisting, and looping as you move from side to side of your bow. Your loops will be stacked on top of each other as you hold them, with each new layer having slightly larger loops.
Tie a pipe cleaner through the middle of the bow to secure it.
Fluff out your ribbon by taking your loops and spreading them apart to create a lovely full-looking bow.
Step 5
Attach your bow to your wreath base in the middle empty space between your greenery.
Step 6
Fluff out your entire design. Add additional small sprigs of greenery if you want to create more depth to your design.
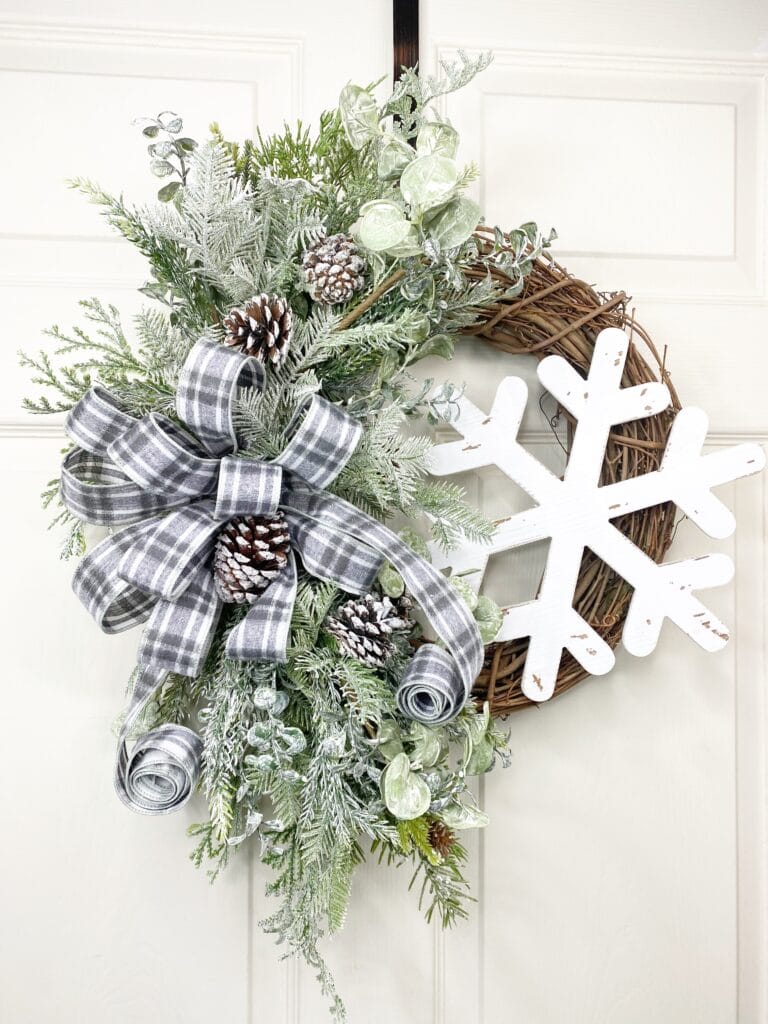
That’s it, y’all! This design is everything I love most about wreaths: quick, easy, affordable, and (most of all) beautiful. Coach Mel made this in less than 15 minutes.
That means that if you want to make some fast and simple to adorn your door or if you need a design that you can make quickly so you can fill up your seasonal inventory, this is your design!
A Holiday-Worthy Grapevine Snowflake Wreath
This design is not only gorgeous, but it’s also deceptively simple. The wooden sign, frosted greenery, and plaid print ribbon do all the hard work.
If you love a variety of holiday wreath designs, check out some of our other popular designs:
- Meet Me Under the Mistletoe Christmas Wreath
- Merry Christmas Wreath
- How To Make A Christmas Door Hanger
- Christmas Wreath with Glitter Ribbon
- I’ll Be Gnome For Christmas Grapevine Wreath
As always, if you need any help with bow-making, centerpiece-making, wreath-making, or crafting in general, be sure to check out more of our tutorials on How to Make Wreaths. We cover LOTS of different topics to help you find what you need.
We would love to see your beautiful wreaths! Please share with us over at the How To Make Wreaths Facebook Group.
If you’re interested in more info on learning how to make wreaths or being in a community of like-minded crafters, check out our Creative Coaching Subscription Group.
Wintery Grapevine Snowflake Wreath
Materials
- 14-inch grapevine oval
- 2 greenery sprays frosted
- 1-2 greenery sprays or leftover greenery pieces from another project
- Wooden Snowflake sign/attachment
- pipe cleaners
- 1.5 wired ribbon winter plaid design
- 1″ mounting squares or staple gun
- hot glue gun
- hot glue
- bolt cutter
- scissors
Instructions
- Visually inspect your grapevine base to see if there are any excess leaves or long stems. If there are, remove them (or cut them off).
- Prepare your snowflake sign for attaching to your wreath. Use pipe cleaners to add the sign to your wreath on the right side of the base.
- Spread out the greenery on your stems so that it looks full and natural. Curve the stem slightly to make it easier to slip into the grapevine base and achieve a good angle. Insert one stem into the base on the left side, coming in from the bottom. Then repeat from the other direction. Secure them in place with hot glue.
- Make a single-ribbon bow with 11 loops.Leave a nice long tail to work with (curl, trim, etc) then make a small loop. This will be your center loop.Next, pinch your ribbon, twist it, and make a slightly larger loop. Continue to pinch, twist, and loop as you move from side to side. Your loops will be stacked on top of each other as you hold them, and each new layer with have slightly larger loops.Tie a pipe cleaner through the middle of the bow to secure it. Fluff out your ribbon by spreading your loops apart to create a lovely full-looking bow.
- Attach your bow to your wreath base in the middle empty space between your greenery.
- Fluff out your entire design. Add additional small sprigs of greenery if you want to create more depth to your wreath.
Video
Just pin this winter greenery grapevine wreath below to find the tutorial later!
If you love to craft, check out our Eat. Sleep. Craft. Repeat. t-shirts and click on the picture below!


