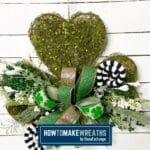
Shamrock Door Hanger
Learn how to make your own shamrock door hanger with this fun tutorial.
Yield: 1 door hanger
Materials
- Shamrock Door Hanger
- floral picks White Floral stems
- greenery stems Green Glittery Leafy Stem
- 3 2.5" wired ribbon Emerald Green Ribbon, Gold Polka Dot Ribbon, Shamrock Ribbon
- picks and sprays Black & White Curly Q stems
- Floral Wire
- Hot Glue gun
- Zip Tie
- wire cutters
- Pick machine
Instructions
- Grab your Shamrock door hanger and remove the tags. Do not remove the door hanging string
- Next grab your White Floral Stems from Deco exchange. Maneuver the flowers extra carefully to naturally divide out into 3 sections from your main bundle. Simply rip them from the main bundle and trim excess. Save the excess bundle for another project.
- Grab 2 pieces of your florals and connect the stems together and wrap tight with your 26 gauge Paddle Wire. This will help secure those wispy sections before adding to your shamrock. Set aside
- Grab your Glittery Green Leafy Stem and cut off 2 pieces from the main bundle. Place those down on your shamrock, resting out to the left and right, just above the stem of your shamrock. Layer your white floral bundle sections on top. Hold in place and with a zip tie, going directly through your base, push it through. Go right back up to the top side, and secure it tight. Trim excess zip tie. Fluff and fancy your florals to make the shamrock embellishments all 3d. Set aside.
- Next will be the Miniature Funky Bow. Grab your 3 different ribbons and cut your 6 tails all measuring 24”. You should have 2 of each color
- With your Shamrock ribbon first, fold in half, and “Wring its neck.” That just means determine how long you want your loop to be, then twist it to form a secure loop. I personally like a loop of about 5-6”. Then twist your back ribbon tail so both sides of the pretty printed design are showing. Repeat as you alternate each of your ribbon colors to form your bow. Have fun with your loops sizing, as I mixed them up as I created. I prefer a graduated look for my bows, but you do do. Twist, fluff, and adjust.
- To secure, grab your zip tie and pull tight. Trim excess. Before connecting your funky bow, move your loops to the placement you are happy with. Twist, fluff, and adjust. Place your funky bow on your shamrock base, working another zip tie down through the guts. Pull it back though the top and secure, pulling tight. Clip it at the base.
- With your ribbon tails, create some short fly away tails by making a few a little smaller than others. Then dovetails the extra. This creates a firecracker allusion for your cute little funky bow. If you wanted to leave some long tails, you could do that too! Curl those up as an added touch!
- Stop here if you want to keep a natural look for your door! Because it is just so cute!
- If you wanted to create a funky, whimsical look, think of adding in some cute Black & White Curly Q’s. Hot glue those stems in under your bow poking in and out all over. Use a pick machine if necessary. Be careful not to work your picks through your shamrock base, so they don’t poke through. You do not want to scratch up anyone’s door.
- Determine where to hang this adorable door hanger, be it in a dorm room, small door, or wherever! I just love how much cuteness is packed into this little craft!