
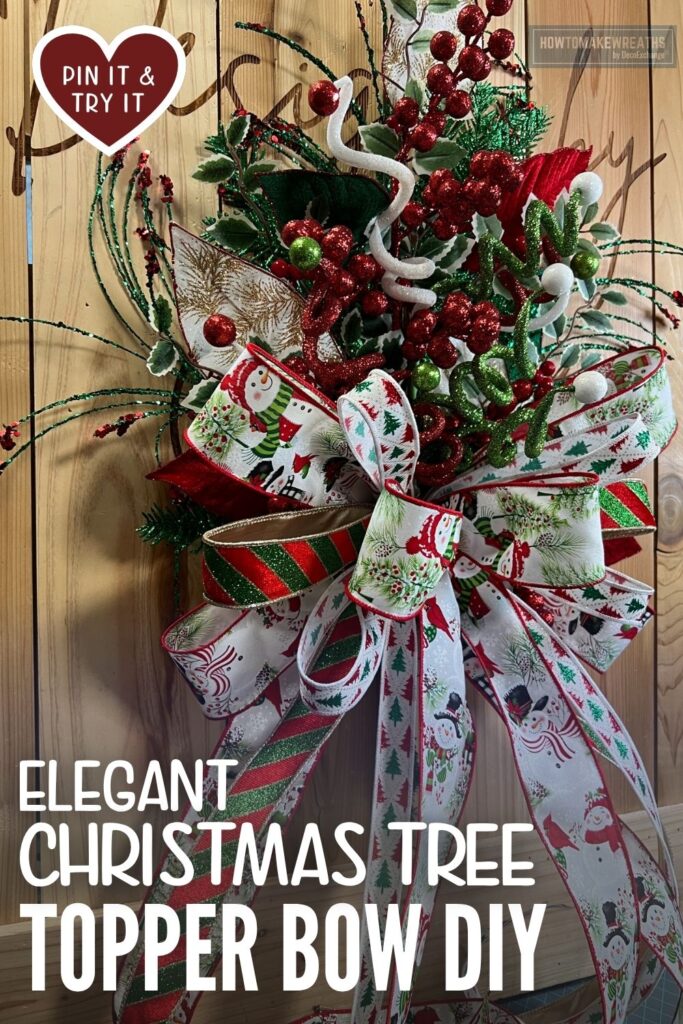
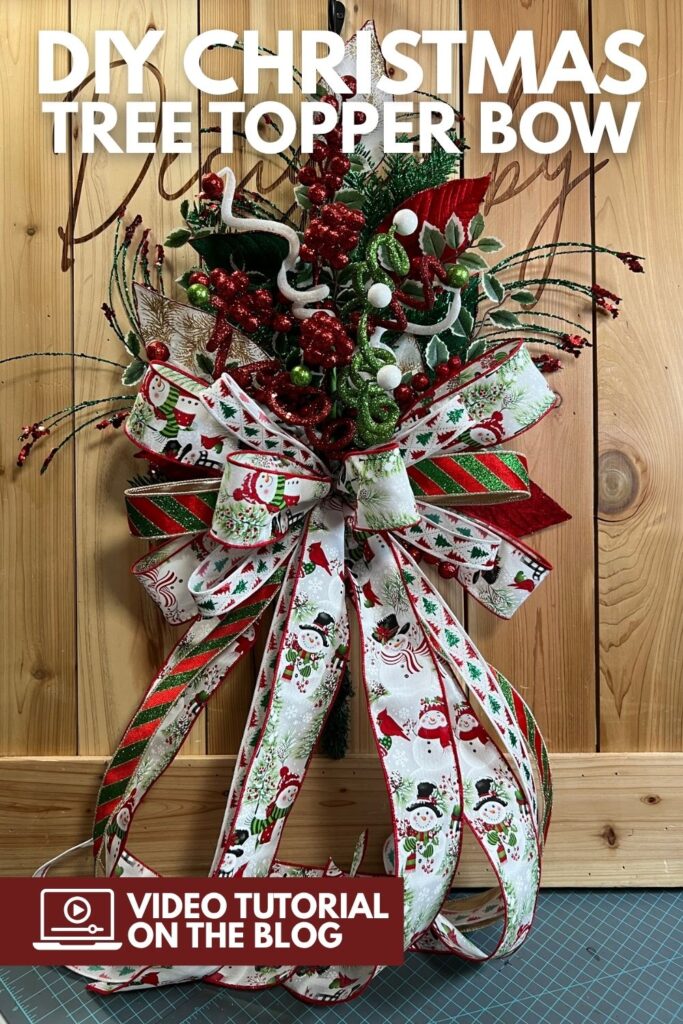
A tree topper needs to hold its own at the very top of a Christmas tree, which means it has to be full enough to read from across the room while still layering in real detail up close. In this tutorial, Jordan shows how six floral and greenery picks come together with a three ribbon bow to build a topper with that kind of presence.
Magnolia leaves and glitter hemlock form the base, red glitter clusters and holly berries add color and shine, and curly white and green wire picks give the whole piece movement before the bow ties it all together.
Supply List
Florals
- 1 Magnolia leaf spray XS2636C1
- 1 Glitter fishline spray XS144169
- 1 glitter hemlock spray, XV767406
- 1 holly berry stem, 85034SP24
- 1 red glitter cluster stem, MTX68969
- 1 curly ball spray, 82614RWG
Ribbon
- 7/8 inch Christmas tree ribbon, RGH741467: September 2026 Wreath Supply Box
- 1.5 inch velvet stripe ribbon, LX700858: September 2026 Wreath Supply Box
- 2.5 inch snowman ribbon, RGH1481RT: September 2026 Wreath Supply Box

Why Layering Order Matters on a Topper
A tree topper is viewed from below and from a distance more often than up close, so the materials at the back and center need to build real height and fullness before any of the smaller accent pieces go in. Starting with the magnolia leaves and glitter hemlock establishes that structure. The red glitter clusters, holly berries, and curly picks are added afterward specifically because they are the details meant to catch light and draw the eye once the topper is already sitting on the tree.
Step by Step Instructions
1. Prepare your base picks. Trim the stems of the magnolia leaf spray and the glitter hemlock spray to the length you want your topper to stand once it is secured to the top of the tree.
2. Build the base layer. Insert the magnolia leaf spray and glitter hemlock spray together, crossing them slightly so the ivory and gold leaves show through the greenery rather than sitting behind it.
3. Add the holly berry stem. Insert the holly berry stem into the base, positioning the sage green leaves and red berries toward the front where they will be most visible.
4. Add the red glitter cluster stem. Tuck the red glitter cluster stem in near the center of the arrangement, letting the clustered berries sit slightly forward of the holly for depth.
5. Add the curly ball spray. Insert the curly ball spray so the white and green curled wire picks rise above the rest of the greenery. These curls are what give the topper its movement, so let them extend outward rather than tucking them flat against the other stems.
6. Add the wispy spray. Insert the green and red wispy spray last among the florals, spacing the thin sprigs around the outer edge of the arrangement so they read as a soft halo around the fuller pieces.
7. Build the bow. Cut loops from the 2.5 inch snowman ribbon, the 7/8 inch Christmas tree ribbon, and the 1.5 inch velvet stripe ribbon. Layer the wide snowman ribbon as the base, then add the tree ribbon and velvet stripe ribbon on top so all three are visible in the finished bow.
8. Secure the bow. Gather all the loops tightly at the center and secure with floral wire, leaving long tails from the snowman ribbon to cascade below the arrangement.
9. Attach the bow to the topper. Position the bow at the base of the floral arrangement, where the stems meet, and secure it with wire so it sits just beneath the florals rather than covering them.
10. Final fluff and adjust. Step back and check the topper from a few feet away, since that is the distance it will typically be viewed from once it is on the tree. Fluff the greenery and curls, and let the ribbon tails fall naturally.
Tips for This Design
Build the base before the accents. Placing the magnolia and glitter hemlock first gives you the structure to build everything else into. Adding the berries, holly, and curly picks before the base is established usually results in a topper that looks cluttered instead of full.
Let the curly picks do the work of catching light. The white and green curled wire in the curly ball spray is the most eye catching texture in this build. Letting those pieces extend above and beyond the rest of the greenery, rather than tucking them in flush, is what gives the topper its sparkle from a distance.
Layer the widest ribbon on the bottom of the bow. The 2.5 inch snowman ribbon anchors the bow and carries the long cascading tails, while the narrower tree and velvet stripe ribbons add pattern and color on top without overwhelming the base.
Where to Use This Christmas Tree Topper
This tree topper works well for:
- The top of a live or artificial Christmas tree
- A large mantel garland as an oversized centerpiece bow
- The top of a staircase newel post for a holiday entryway
- A craft show booth as a premium piece alongside wreaths and swags
Shop the Supplies
- Magnolia leaf spray (XS2636C1)
- Glitter fishline spray (XS144169)
- Glitter hemlock spray (XV767406)
- Holly berry stem (85034SP24)
- Red glitter cluster stem (MTX68969)
- Curly ball spray (82614RWG)
- 7/8 inch Christmas tree ribbon (RGH741467): September 2026 Wreath Supply Box
- 1.5 inch velvet stripe ribbon (LX700858): September 2026 Wreath Supply Box
- 2.5 inch snowman ribbon (RGH1481RT): September 2026 Wreath Supply Box