
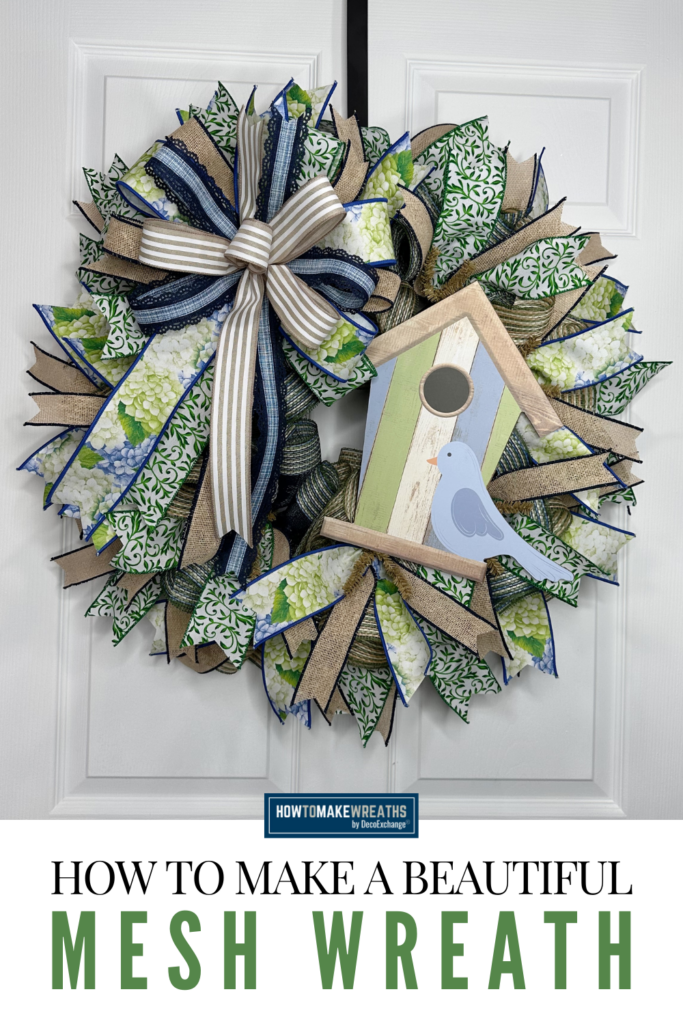
If you love soft spring colors, layered ribbon, and sweet seasonal signs, this spring birdhouse wreath is a beautiful project to add to your front door. In this tutorial, Melissa shows you how to build a full mesh wreath using border mesh, hydrangea ribbon, and a wooden birdhouse sign from the February Wreath Supply Box.
This design is perfect for spring porch decor, Easter decorating, and even craft show inventory.

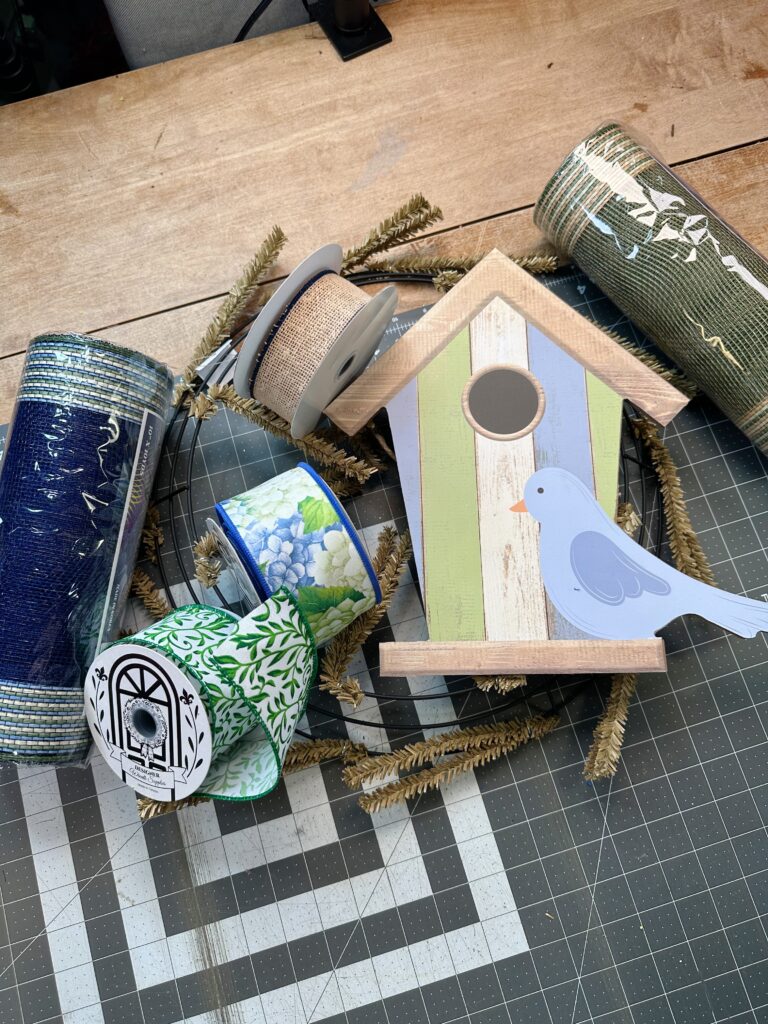
Supplies
- 15-inch frame, XX7504W4, DecoExchange February WSB
- Wood birdhouse sign, AP7445H3, DecoExchange February WSB
- 10-inch blue border mesh, RE85062W, DecoExchange February WSB
- 10-inch green border mesh, RE85062X, DecoExchange February WSB
- 2.5 inch hydrangea ribbon, LS123203, DecoExchange February WSB
- 2.5 inch green vine ribbon, RGH129727, DecoExchange February WSB
- 1.5 inch burlap with blue edge ribbon, RGE140119, DecoExchange February WSB
- 1.5 inch blue lace edge ribbon, RGC829719, DecoExchange February WSB
- 1.5 inch cabana white and tan ribbon, 28848, Sams Club
- Zip ties
- Staples
- Wire
If you missed the February Wreath Supply Box, join now so you do not miss the next one. These coordinated kits make designing so much easier.
Step-by-Step Instructions and Video Tutorial
Step 1: Prep Your 15 Inch Wreath Frame
Start with your 15 inch wire frame. Secure zip ties evenly around the frame if it does not already include pre attached ties. Space them consistently so your mesh will be balanced all the way around.
This smaller frame size makes a wreath that is easy to ship and great for craft shows.
Step 2: Add the Blue and Green Border Mesh
Cut your 10 inch blue border mesh and green border mesh into equal lengths. Melissa alternates colors around the frame to create depth and contrast.
- Gather the mesh in the center.
- Place into the zip tie.
- Fluff outward to create a ruffled, petal effect.
Continue alternating blue and green until the entire frame is full. The border mesh gives the wreath a polished, finished edge without needing extra trim.
Tip: Keep your ruffles consistent in size so your wreath looks full but not bulky.
Step 3: Secure the Wooden Birdhouse Sign
Position the wood birdhouse sign slightly above center. This creates a natural flow and gives room for ribbon and bow placement.
Use wire through the frame to attach the sign securely. Tighten it enough so it does not shift but avoid pulling the mesh too tight.
A slightly elevated sign placement creates dimension and allows your bow to frame the focal point.
Step 4: Create a Layered Spring Bow
Melissa combines several ribbon styles to give this wreath a soft spring garden feel:
- 2.5 inch hydrangea ribbon
- 2.5 inch green vine ribbon
- 1.5 inch burlap with blue edge
- 1.5 inch blue lace edge
- 1.5 inch cabana white and tan
Layer the ribbons and create loops in alternating patterns. Allow tails to cascade down and slightly angle them for movement.
Secure the bow with wire and attach it at the top of the sign.
Tip: Mix floral ribbon with texture ribbons like burlap and lace to create contrast without overwhelming the design.
Step 5: Final Fluff and Adjustments
Once everything is attached:
- Adjust mesh ruffles.
- Separate ribbon tails.
- Angle loops for fullness.
- Check that the sign is centered visually.
The result is a balanced spring birdhouse wreath with soft blues, greens, and hydrangea accents that feel fresh and welcoming.
Why This Spring Mesh Wreath Sells
This design works beautifully for:
- Spring front door decor
- Easter porch decorating
- Mother’s Day gifts
- Craft show inventory
- Online shop listings
The coordinated mesh and ribbon make it visually cohesive, and the birdhouse sign adds charm that appeals to a wide range of customers.
Ready to Take Your Designs Further?
If you love projects like this and want step by step training, seasonal design ideas, and access to weekly tutorials, you do not have to figure it out alone.
👉 Join Design School inside Makers Lab to grow your skills and your creative business.
Let’s keep creating designs that make your front door and your business bloom.

