
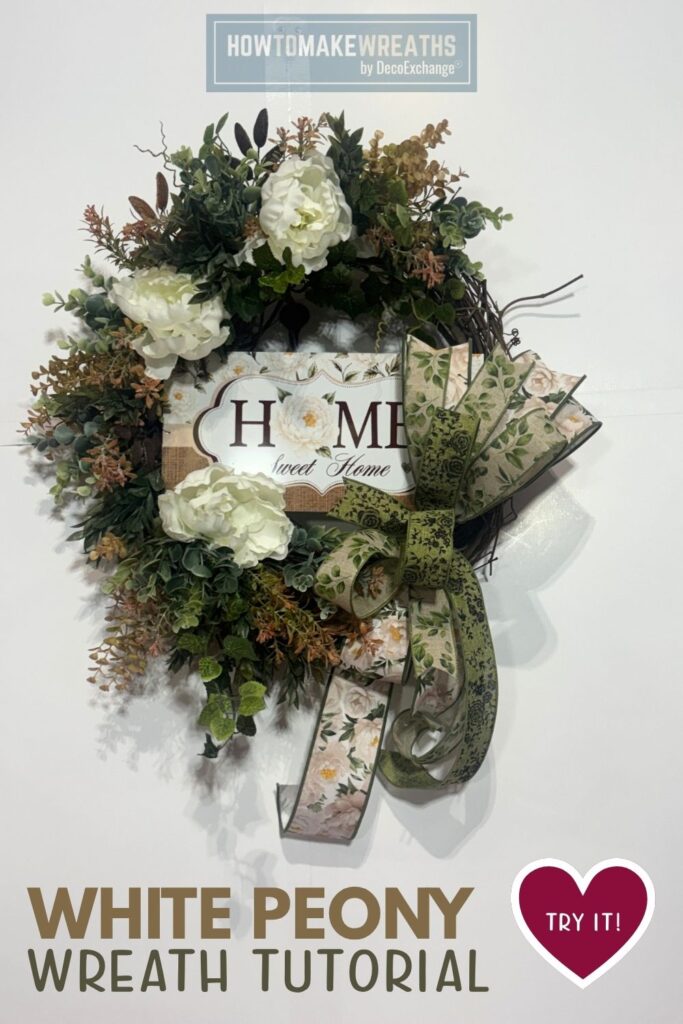
If you want a front door wreath that feels lush, romantic, and right at home in summer, this white peony grapevine wreath is a project worth making.
In this tutorial, Tammy shows how to build a full, layered wreath on a grapevine base using mixed greenery.
This style works well for year round front door decor, porch displays, and craft show inventory where a romantic, floral aesthetic is a strong seller.
Why White Peonies Work So Well on a Grapevine Wreath
Peonies are one of the most sought-after flowers in home decor, and for good reason. Their large, full blooms have enough visual presence to anchor a wreath on their own, but they also layer beautifully with greenery and filler stems without looking overdone. White peonies in particular read as clean and sophisticated against the warm brown texture of a natural grapevine base.
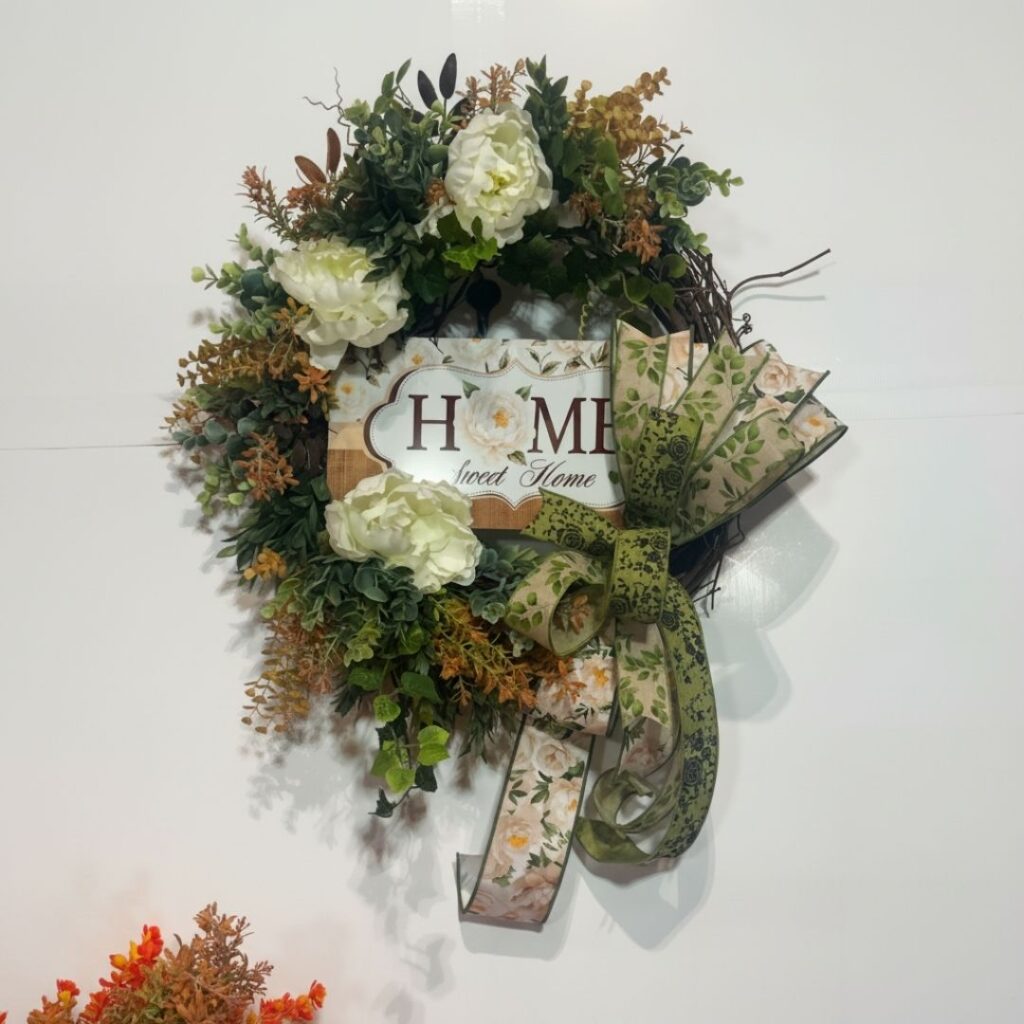
The combination of multiple greenery sources, including mixed stems, fern, and the green tones in the ribbon, gives this wreath the layered, garden-fresh look that makes peony wreaths so popular on Pinterest and in craft shows. The sign from the WSB June 2026 box grounds the design and gives the wreath a clear focal point so the florals have something to frame.
How to Make a White Peony Grapevine Wreath
Supply List
- 1 grapevine wreath base (DecoExchange)
- Mixed greenery stems (Amazon)
- White peony stems (Michaels)
- Fern greenery (Hobby Lobby)
- 1 sign (WSB June 2026, DecoExchange)
- 1 roll 1.5-inch green roses ribbon (RGH13022Y, WSB June 2026, DecoExchange)
- 1 roll 2.5-inch deluxe peonies ribbon (LS1216H2, WSB June 2026, DecoExchange)
- 1 roll 5/8-inch green ribbon (RGF1682EW, DecoExchange)
- Hot glue gun and glue sticks
- Wire cutters
- Floral wire or zip ties
Step 1: Prepare Your Grapevine Base
Lay the grapevine base flat on your work surface and decide which end will be the top before adding anything. Oval and round grapevine bases both have a natural orientation, and choosing the top first keeps the whole arrangement balanced as you build.
Attach a loop of floral wire or a zip tie to the top back of the base now as a hanger. It is much easier to do this before the base is covered in greenery and florals.
Fluff the natural vines if any sections have been compressed during storage. A full, textured grapevine base makes everything placed on top of it look more intentional.
Step 2: Build Your Greenery Base
Begin with the mixed greenery from Amazon. Cut or separate the stems and insert them into the grapevine, spacing them around the base to establish the overall shape and coverage. Greenery from multiple sources is what gives this wreath its layered, garden look, so work the Amazon stems in first as the foundation layer.
Follow with the fern greenery from Hobby Lobby. Fern has a different texture and a lighter, more delicate feel than most mixed greenery stems, which adds visual variety when the two are layered together. Tuck fern stems in between the mixed greenery sections rather than clustering them all in one spot. The contrast between the fuller mixed stems and the feathery fern fronds is part of what makes the wreath look lush rather than flat.
Hot glue each stem securely into the grapevine base. On a natural vine base, inserting the stem end into a gap in the vine before gluing gives a more secure bond than surface gluing alone.
Step 3: Place the White Peonies
Cut the white peony stems into individual blooms or small clusters and begin placing them on the wreath. Position the largest peony blooms first to establish your focal points, then fill in with smaller blooms or bud stems.
Cluster peonies in two or three main groupings rather than spreading individual stems evenly all the way around the wreath. Grouping creates a natural, garden-picked arrangement and gives the white flowers enough mass to read clearly against the greenery from across a room or porch.
Leave a clear space at the center or in one quadrant of the wreath for the sign. It is easier to plan the sign placement now than to try to reposition florals after the glue has set.
Hot glue each peony stem firmly into the greenery base and grapevine.
Step 4: Attach the Sign
Position the WSB June 2026 sign in the cleared space at the center or focal point of the wreath. Hot glue it firmly to the grapevine base and press and hold for at least 30 seconds. If the sign has holes or a hanging slot, use floral wire threaded through the sign and twisted around the vine for added security alongside the hot glue.
The sign is the piece that gives the wreath its identity and purpose beyond being a purely floral arrangement. Make sure it is centered and level before the glue sets.
Step 5: Build and Attach the Bow
This wreath uses three ribbons for the bow. Build a layered bow using the following approach:
- Use the 2.5-inch deluxe peonies ribbon (LS1216H2) for the largest outer loops. This ribbon is the widest and most decorative, and the peony print ties directly back to the florals in the wreath.
- Add loops of the 1.5-inch green roses ribbon (RGH13022Y) for the mid-size layers. The green roses ribbon bridges the green of the foliage and the floral theme of the peony ribbon.
- Use the 5/8-inch green ribbon (RGF1682EW) as bow tails and accent loops tucked into the center. The narrow green ribbon is a finishing detail that adds a clean pop of solid color without competing with the wider printed ribbons.
Secure all loops at the center with floral wire and fluff each loop after tying. Attach the finished bow to the wreath near the sign, at the base or side of the floral grouping, using wire or hot glue.
Step 6: Final Adjustments
Step back and check the overall shape from a distance. Fluff any greenery that has settled flat, reposition peony clusters if one side looks heavier than the other, and adjust the bow loops so they fan out evenly. Tuck any exposed wire or glue strings out of sight behind the greenery. Make sure the sign is clearly visible and the bow tails fall naturally alongside the florals.
Tips for This Project
Source greenery from multiple places on purpose. Using Amazon greenery, Hobby Lobby fern, and the green in the ribbon rather than one single greenery source is what gives this wreath its layered, garden look. Different greenery styles have different leaf shapes, textures, and shades of green, and the variety makes the finished wreath look more natural and expensive than a single-source design.
Cluster the peonies, do not spread them. White peonies are a statement flower. Three peonies clustered together in two spots on the wreath have far more visual impact than six peonies spread one by one all the way around the base. Clustering also makes the arrangement look more like a real garden bouquet.
Let the peony ribbon repeat the floral theme. The 2.5-inch deluxe peonies ribbon is doing two jobs in this wreath: it adds volume to the bow and it repeats the peony motif in a way that ties the bow to the florals. Make sure the peony print on the ribbon faces forward in the bow so the connection between the bow and the wreath design is visible.
Use the narrow green ribbon as a finishing detail only. At 5/8 inch wide, the green ribbon will not read as a full bow loop from a distance. Use it for bow tails and one or two small accent loops tucked into the center, not as a structural ribbon. Keeping it as an accent makes it more visible and intentional than using it throughout.

White Peony Grapevine Wreath
Equipment
- Glue sticks
- Floral wire or zip ties
Materials
- 1 grapevine wreath base DecoExchange
- Mixed greenery stems Amazon
- White peony stems Michaels
- Fern greenery Hobby Lobby
- 1 Home Sweet Home sign WSB June 2026, DecoExchange
- 1 roll 1.5-inch green roses ribbon RGH13022Y (WSB June 2026, DecoExchange)
- 1 roll 2.5-inch deluxe peonies ribbon LS1216H2 (WSB June 2026, DecoExchange)
- 1 roll 5/8-inch green ribbon RGF1682EW (DecoExchange)
Instructions
Prepare the grapevine base.
- Attach a loop of floral wire to the top back of the base as a hanger.
- Fluff and reshape the vines as needed before adding any greenery.
Build the greenery base.
- Insert and hot glue the mixed greenery stems around the entire grapevine base to establish shape and coverage.
- Follow with the fern, tucking fern stems in between the mixed greenery sections to add texture and variety.
Place the white peonies.
- Cut peony stems into individual blooms or small clusters.
- Position the largest blooms first to establish focal points, then fill in with smaller blooms.
- Cluster peonies in two or three groupings rather than spreading them evenly around the wreath.
- Leave a clear space for the sign.
- Hot glue each stem firmly in place.
Attach the sign.
- Position the Home Sweet Home sign at the center focal point of the wreath.
- Use floral wire or pipe cleaners through any sign holes to attach.
Build the bow.
- Make a layered bow using the 2.5-inch deluxe peonies ribbon for the largest outer loops, the 1.5-inch green roses ribbon for mid-size layers, and the 5/8-inch green ribbon as tails and accent loops.
- Secure all loops at the center with a zip tie or pipe cleaner and fluff each loop.
- Attach the bow.
Final adjustments.
- Step back and check the overall shape. Fluff flat greenery, reposition any uneven peony clusters, and tuck all exposed wire or glue strings out of sight behind the greenery.
Video
Where to Display This Wreath
This white peony grapevine wreath works well for:
- A front door for summer display
- A covered porch wall or fence
- A fireplace mantel or entryway table as a seasonal accent
- A craft show booth as a romantic, garden-style feature piece
The grapevine base holds its shape well and stores flat between seasons. White peonies are one of the most consistently popular floral choices for craft show wreaths, making this a strong inventory piece from late spring through early fall.

