
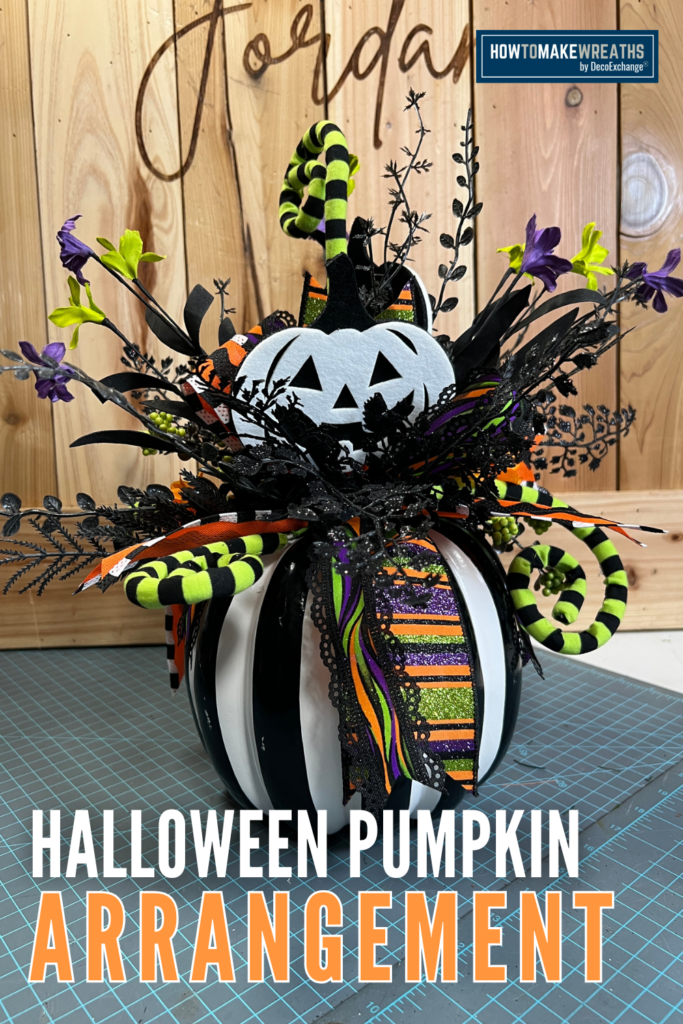
If you want a Halloween accent piece that works on a tiered tray, a porch entry table, or a mantel without taking up the space a full wreath would, this Halloween pumpkin arrangement is exactly the project to make.
In this tutorial, Jordan shows how to build a full, layered floral arrangement directly into a foam pumpkin base using Halloween florals, black glitter maidenhair fern, a lime and black curl spray, and a three-ribbon bow in a Halloween wave, ric rac, and stripe combination. The finished piece is bold, dimensional, and ready for Halloween display from early October through the end of the month.
Why a Foam Pumpkin Makes a Great Arrangement Base
Foam pumpkins are one of the most versatile bases in seasonal decor making. Unlike a real pumpkin, a foam base accepts picks, stems, and hot glue without deteriorating, which means the finished arrangement will last for multiple seasons. The pumpkin shape also gives the arrangement a built-in Halloween identity that no round or oval base can replicate.
Using a foam pumpkin as a floral arrangement base is a technique that translates directly from wreath making. The same principles apply: establish a greenery or filler base first, add focal florals, and finish with accent sprays and a bow. The result is a tabletop piece that looks as considered and finished as any wreath but works in spaces where a wall or door display is not practical.
This style is also a strong craft show piece. Pumpkin arrangements are easy to display on a table or shelf, quick to photograph, and appeal to buyers who want Halloween decor for interior spaces rather than front door display.
Supply List
- 1 foam pumpkin (23066-BKWT)
- 3 Halloween floral picks (FH8266AH)
- 1 black glitter maidenhair fern (XS236602)
- 1 lime and black curl spray (57055GNBK)
- 1 roll 1.5-inch Halloween wave ribbon (RGC8298RW)
- 1 roll 1.5-inch Halloween ric rac ribbon (RG2100P2)
- 1 roll 2.5-inch Halloween stripe ribbon (RGH129520)
- Hot glue gun and glue sticks
- Wire cutters
- Scissors
- 24 gauge wire or pipe cleaner

How to Make a Halloween Pumpkin Arrangement
Step 1: Prepare Your Foam Pumpkin
Set your foam pumpkin upright on your work surface. Decide which side will be the front of the arrangement before adding anything. Most foam pumpkins have a slight lean or a more finished side that looks best facing forward.
The stem of the foam pumpkin is typically the natural attachment point for a bow, so plan for the bow to sit at the top near or around the stem. The floral arrangement will build outward and upward from the upper portion of the pumpkin face.
Step 2: Add the Black Glitter Maidenhair Fern
Begin with the black glitter maidenhair fern (XS236602) as your base layer. Cut or separate the fern into individual fronds and insert them into the foam pumpkin by pressing the stem ends firmly into the foam. No hot glue is needed for the initial placement since the foam holds stems well on its own, but a small dab of glue at the base of each stem will prevent shifting over time.
Fan the fern fronds outward from the top of the pumpkin, allowing them to arch away from the pumpkin surface at natural angles. The black glitter fern adds a dramatic, slightly eerie quality that sets the Halloween tone immediately and gives the florals a dark, contrasting background to sit against.
Position fern fronds across the upper half of the pumpkin face and allow a few to drape down along the sides for a cascading look.
Step 3: Add the Lime and Black Curl Spray
Insert the lime and black curl spray (57055GNBK) into the foam pumpkin near the center of the fern arrangement. Curl sprays add vertical height and movement to an arrangement, and the lime green color creates a striking contrast against the black fern that reads as distinctly Halloween.
Press the stem of the curl spray firmly into the foam and adjust the curls so they spiral outward and upward rather than lying flat. If any curl sections are pointing in an unhelpful direction, gently bend them with your fingers. The wire inside the curl spray holds whatever shape you set it to.
Step 4: Add the Halloween Florals
Insert your three Halloween floral picks (FH8266AH) into the foam pumpkin among the fern and curl spray. Position the first pick at the center of the arrangement as the main focal point. Place the second and third picks on either side of the center pick, angling them slightly outward so the arrangement fans into a full, layered shape rather than stacking vertically.
Press each pick stem firmly into the foam. If the pick stems are too short to anchor securely in the foam depth, trim the stem at an angle with wire cutters to create a sharper point that pushes into the foam more easily. A small dab of hot glue at the base of each stem adds security for display pieces that will be moved or transported.
Adjust the floral positions so all three picks are visible from the front and the arrangement looks balanced between the left and right sides.
Step 5: Build the Three-Ribbon Bow
This arrangement uses three ribbon styles at two widths. Build a layered bow using the following approach:
- Use the 2.5-inch Halloween stripe ribbon (RGH129520) for the largest outer loops. This is your widest ribbon and the one that gives the bow its structure and size. Make two to three loops and position them so the stripe pattern faces forward.
- Add loops of the 1.5-inch Halloween wave ribbon (RGC8298RW) for mid-size layers, working them between the stripe loops. The wave edge adds texture and a slightly playful quality that suits the Halloween theme.
- Use the 1.5-inch Halloween ric rac ribbon (RG2100P2) as accent loops tucked into the center of the bow and as tail lengths. The ric rac zigzag edge is a classic Halloween ribbon detail that adds a handmade, festive quality to the finished bow.
Secure all loops at the center with 24 gauge wire or a pipe cleaner twisted tightly at the back. Fluff each loop after securing so the bow opens fully and all three ribbon styles are visible from the front.
Step 6: Attach the Bow to the Pumpkin
Attach the finished bow to the top of the foam pumpkin near the stem. Hot glue the bow center directly to the pumpkin surface and hold firmly for at least 30 seconds. If the pumpkin stem is sturdy, you can also wire the bow around the base of the stem for added security.
Adjust the bow loops from the front so they fan out over the top of the floral arrangement. The bow should frame the florals and fern without covering them.
Step 7: Final Adjustments
Step back and look at the arrangement from the front and from the sides. Adjust any fern fronds that have shifted during the bow attachment. Make sure all three floral picks are visible from the front. Reposition the curl spray if any sections have folded inward during handling.
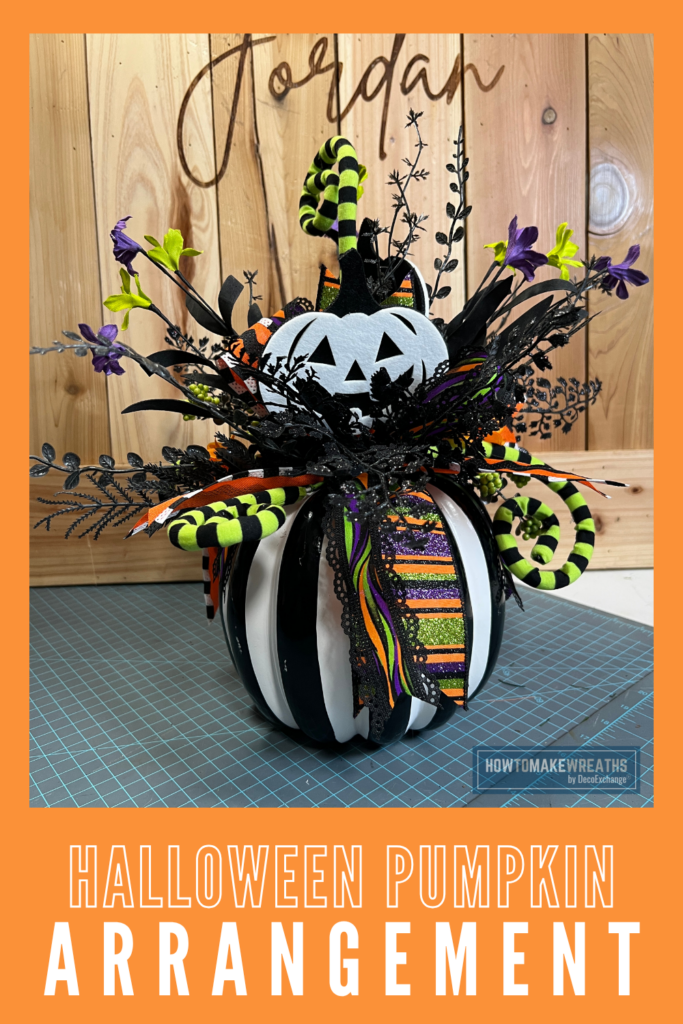
The finished arrangement should look full and layered from the front, with the black fern as the base, the florals as the focal element, the curl spray adding height and movement, and the bow completing the top of the piece.
Tips for This Project
Use the foam pumpkin as the anchor, not a decoration. A foam pumpkin in an arrangement like this is a structural base, not an accent. Most of the pumpkin face will be partially covered by the arrangement, and that is exactly as it should be. The pumpkin shape reads from the sides and the lower portion of the piece, and the floral arrangement builds upward from there.
Press pick stems in at an angle. Stems inserted straight down into a foam pumpkin tend to pull out when the arrangement is moved or displayed on a surface that vibrates. Inserting each stem at a slight inward angle, leaning toward the center of the pumpkin, gives the foam more grip on the stem and keeps picks from pulling out over time.
Let the curl spray do the height work. On a tabletop arrangement, height is what creates dimension and makes the piece visible from across a room. The lime and black curl spray is the tallest element in this arrangement on purpose. Let it extend well above the floral picks rather than trimming it down to match their height.
Balance lime green and black throughout. The lime and black curl spray introduces lime green to the palette, and keeping that color present in other elements, including looking for lime green in the Halloween floral picks or wave ribbon, ties the arrangement together. If the lime green reads as isolated to only the curl spray, the color feels random. If it appears in two or three spots, it reads as intentional.
Where to Display This Arrangement
This Halloween pumpkin arrangement works well for:
- A tiered tray as a seasonal Halloween accent
- A fireplace mantel grouped with candles or lanterns
- A porch entry table or console table near the front door
- A craft show booth as a tabletop piece at an accessible price point
- A kitchen counter or buffet for an interior Halloween display
Because the arrangement is built on a foam base rather than a real pumpkin, it stores easily between seasons and can be refreshed with new picks and ribbon each year without replacing the pumpkin base.
Halloween Pumpkin Arrangement
Equipment
- Hot Glue Gun and Glue Sticks
- 24 gauge wire or pipe cleaner
Materials
- 1 foam pumpkin 23066-BKWT
- 3 Halloween floral picks FH8266AH
- 1 black glitter maidenhair fern XS236602
- 1 lime and black curl spray 57055GNBK
- 1 roll 1.5-inch Halloween wave ribbon RGC8298RW
- 1 roll 1.5-inch Halloween ric rac ribbon RG2100P2
- 1 roll 2.5-inch Halloween stripe ribbon RGH129520
Instructions
Prep the Pumpkin
- Choose the front of your foam pumpkin. Plan to build the arrangement around the top and upper front of the pumpkin.
Add the Fern
- Cut the black glitter fern into smaller stems. Insert the stems around the top of the pumpkin, fanning them outward and allowing a few pieces to drape down the sides.
Add the Curl Spray
- Insert the lime and black curl spray near the center. Bend and shape the curls so they extend upward and outward to add height.
Add the Florals
- Place one Halloween floral pick in the center. Add the other two on each side, angled slightly outward. Adjust until all three are visible and the arrangement feels balanced.
Make the Bow
- Layer the three ribbons to create your bow:
- 2.5″ striped ribbon for the larger loops
- 1.5″ wave ribbon for the middle loops
- 1.5″ ric rac ribbon for accent loops and tails
- Secure the center with wire or a pipe cleaner, then fluff the loops.
Attach the Bow
- Secure the bow near the pumpkin stem with hot glue or wire. Fluff and position the loops so they frame the florals without covering them.
Fluff & Finish
- Step back and check your arrangement. Adjust the fern, florals, curls, and bow until everything looks full and balanced.

