
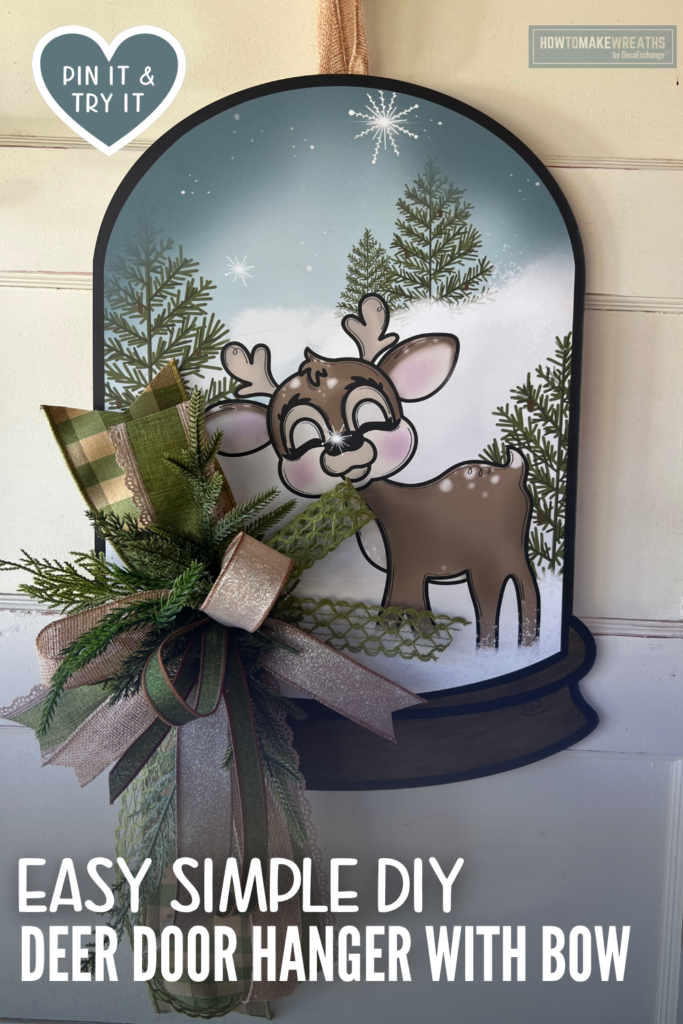
A printed sign with a strong focal point does not need much else to look finished, and this deer door hanger is a good example. In this tutorial, Jordan shows how to build one full bow from six ribbons and attach it with a bundle of greenery to the lower corner of a snow globe shaped deer sign.
The palette stays simple. The greens, taupe and burlap pull from the colors already in the artwork, so the bow looks like part of the sign instead of something added on top of it.
Supply List
- 1 deer door hanger sign: October 2026 WSB
- 5/8 inch green ribbon with brown glitter, RGF10963Y
- 1.5 inch burlap ribbon
- 1.5 inch glittered taupe ribbon, RGE13803M
- 1.5 inch green open weave ribbon, 67348-09-08
- 2.5 inch green scallop edge ribbon, RGA15424M
- 4 inch green and cream plaid ribbon, DS87-1495
- 1 bundle of greenery, taken from a garland
- Floral wire or zip ties
- Hot glue gun
- Scissors

Why Build the Bow From Six Ribbons
Each ribbon in this bow does a different job. The 4 inch plaid is the widest piece and gives the bow its size. The 2.5 inch scallop edge ribbon adds a lace trim. The taupe glitter and the burlap bring in neutral tones and texture, while the open weave and the narrow glitter ribbon add smaller details that fill in the gaps. Using one wide ribbon, a few mid sized ones and one narrow accent keeps the bow full without any single ribbon taking over.
Step by Step Instructions
1. Prepare the sign. Lay the deer door hanger flat. Check the hanger at the top and make sure it is secure before adding anything to the front.
2. Cut your ribbon loops and tails. Cut loops and tails from all six ribbons. Make the loops from the wider ribbons larger, and keep the narrow ribbons shorter so they sit between the bigger loops.
3. Layer the bow. Start with the 4 inch plaid as the base. Add the scallop edge ribbon, then the taupe glitter and the burlap. Finish with the open weave and the 5/8 inch glitter ribbon on top so the narrow pieces stay visible.
4. Secure the center. Gather the loops at the center and wire them tight. Leave the wire tails long enough to attach the bow to the sign.
5. Add the greenery. Cut the greenery bundle from the garland and tuck the stems into the center of the bow so they fan out in several directions. Let a few pieces extend past the ribbon.
6. Attach to the sign. Place the bow at the lower left edge of the sign, where the base of the snow globe meets the glass. Secure it with wire or glue so the bow overlaps the frame but leaves the deer’s face clear.
7. Fluff and adjust. Spread the loops, turn the tails so they hang at different lengths, and check from a few feet away. Make sure no ribbon covers the deer.
Tips for This Design
Pull colors from the artwork. The green in the pine trees and the brown and taupe of the deer are the same tones used in the ribbon. Choosing ribbon that repeats the colors in a printed sign is the easiest way to make a bow look planned.
Mix flat and textured ribbon. The burlap, glitter and open weave all have a different surface. Putting them next to the smoother plaid and scallop ribbon gives the bow depth.
Keep the face clear. The deer is the focal point of the sign. Place the bow off to the side and let the tails hang down so the face stays fully visible.
Use greenery from a garland. A single bundle cut from a garland is enough here. Spread the stems out so the greenery reads as part of the bow instead of a separate piece.
Where to Display This Door Hanger
This deer door hanger works well for:
- A front door for the winter season
- A covered porch or entryway
- An interior door or wall for a Christmas look that stays up after the holidays
- A craft show booth as a sign with a bow that buyers can see in person