
A printed door hanger looks good right out of the box, and a little texture makes it look finished. In this tutorial, Stacy shows how to add Snow-Tex to a wooden snowman door hanger so the hat, holly, scarf and edges look like they have real snow on them.
The project uses a few basic supplies and no florals, so it works for beginners and for makers who want to add a handmade detail to a sign they already have.
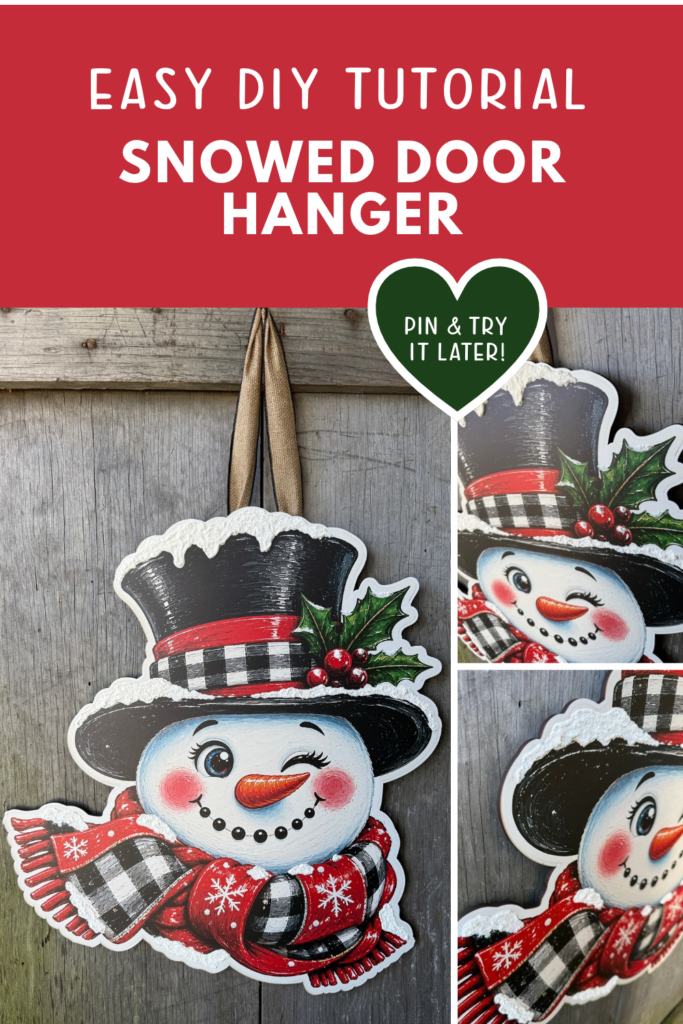
Supply List
- Wooden door hanger or wooden sign (check out our snowman door hangers)
- Snow-Tex
- Paint brush
- Popsicle stick
- Ribbon, for the hanger
- 1/4 inch staples and a staple gun

What Is Snow-Tex?
Snow-Tex is a textured snow medium that you apply by hand to the surface of a sign. It dries with a raised, bumpy finish that looks like snow. On a printed design, it adds depth and a handmade look that a flat print does not have. The raised texture also catches the light, so the snow shows from a distance.
Step by Step Instructions
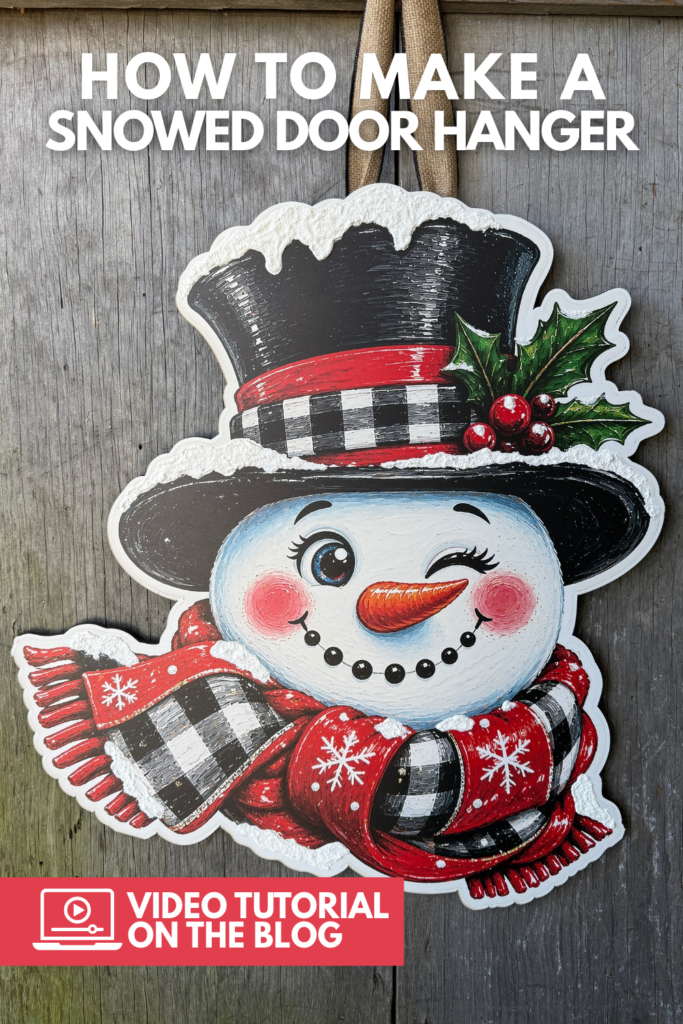
1. Choose where the snow goes. Lay the door hanger flat and look at the design before you start. Snow collects on top surfaces, so the best places are the brim and top of the hat, the holly leaves and berries, the folds of the scarf, and the outer edge of the sign.
2. Scoop the Snow-Tex. Use the popsicle stick to scoop a small amount of Snow-Tex from the container. Start with less than you think you need. You can always add more.
3. Apply with the popsicle stick. Spread the Snow-Tex onto the sign with the popsicle stick. Use it to build up thicker areas, like the snow along the edge of the hat and the top of the scarf.
4. Use the brush for small details. Use the paint brush to dab Snow-Tex onto smaller areas, such as the tops of the holly berries and the leaf tips. Dabbing instead of brushing keeps the raised texture.
5. Vary the thickness. Make the snow thicker in some places and thinner in others. Snow that is the same depth everywhere looks flat, and a mix of both looks more natural.
6. Let it dry. Set the door hanger flat and let the Snow-Tex dry completely before you move it. Follow the drying time on your container.
7. Attach the ribbon hanger. Cut a length of ribbon, fold it into a loop and staple the ends to the back of the door hanger at the top with 1/4 inch staples. Use two or three staples so the hanger holds the weight.
8. Check and adjust. Hang the sign and look at it from a few feet away. If a spot needs more snow, add it once the first layer is dry.
Tips for This Design
Follow the artwork. Put the Snow-Tex where the picture already shows snow, such as the edge of the hat, the berries, and the scarf folds. This makes the texture look like part of the design.
Start small. It is easier to add more Snow-Tex than to take it off, so apply a thin amount first.
Dab instead of wipe. Pressing the brush straight down keeps the raised, bumpy finish. Wiping flattens it.
Keep it off the face. The snowman’s face is the focal point, so leave it clear and add the snow around it.
Use short staples. 1/4 inch staples hold the ribbon without going through the front of a thin wooden sign.
Where to Display This Door Hanger
This snowman door hanger works well for:
- A front door for the winter season
- A covered porch or entryway
- An interior door or wall for a Christmas look
- A craft show booth as a way to add a handmade touch to a printed sign