
A shaped door hanger only needs a small cluster of florals to look finished, and this owl is a good example. In this tutorial, Melissa shows how to build a bow from two glitter ribbons and place it with magnolia leaves, flocked pine and pine cones at the base of an owl door hanger.
The owl sits on a log with orange mushrooms, so the florals go where the branch is. The greens and champagne in the ribbon match the owl’s feathers, and the pine cones tie in with the browns in the artwork.
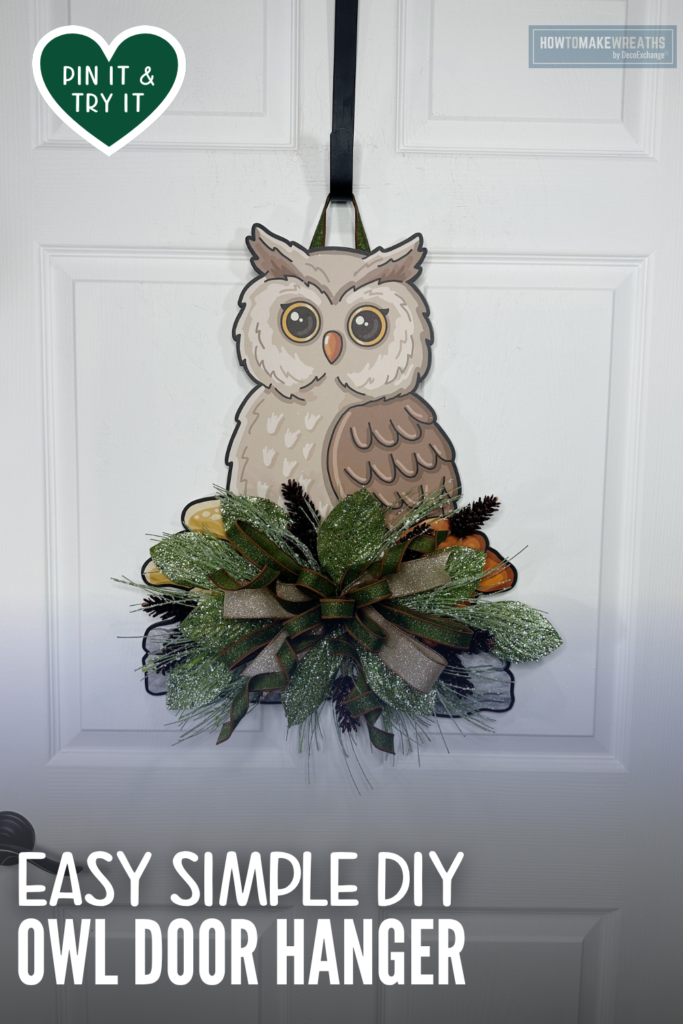
Supply List
- Owl door hanger: DecoExchange
- 7/8 inch green ribbon, RGF10963Y: DecoExchange October Wreath Supply Box
- 1.5 inch champagne glitter ribbon, RGE13803M: DecoExchange October Wreath Supply Box
- Green glitter magnolia spray, XS257631: DecoExchange October Wreath Supply Box
- Long pine flocked spray: DecoExchange October Wreath Supply Box
- Pine cone spray, XD328304: DecoExchange October Wreath Supply Box
- Long pine spray, XS6029: DecoExchange October Wreath Supply Box
- Staples and a staple gun
- Wire cutters
- Scissors

Why Put the Florals at the Base
On a shaped sign like this, the best place for florals is where the artwork already has a surface for them. The owl’s face and body are the focal point, so they stay clear. The log and mushrooms at the bottom are the part of the design that can hold a cluster, and building there gives the owl a base to sit on. It also keeps the weight at the bottom, which helps the door hanger hang straight.
Step by Step Instructions
1. Prepare the sign. Lay the owl door hanger flat on your work surface and check that the hanger at the top is secure.
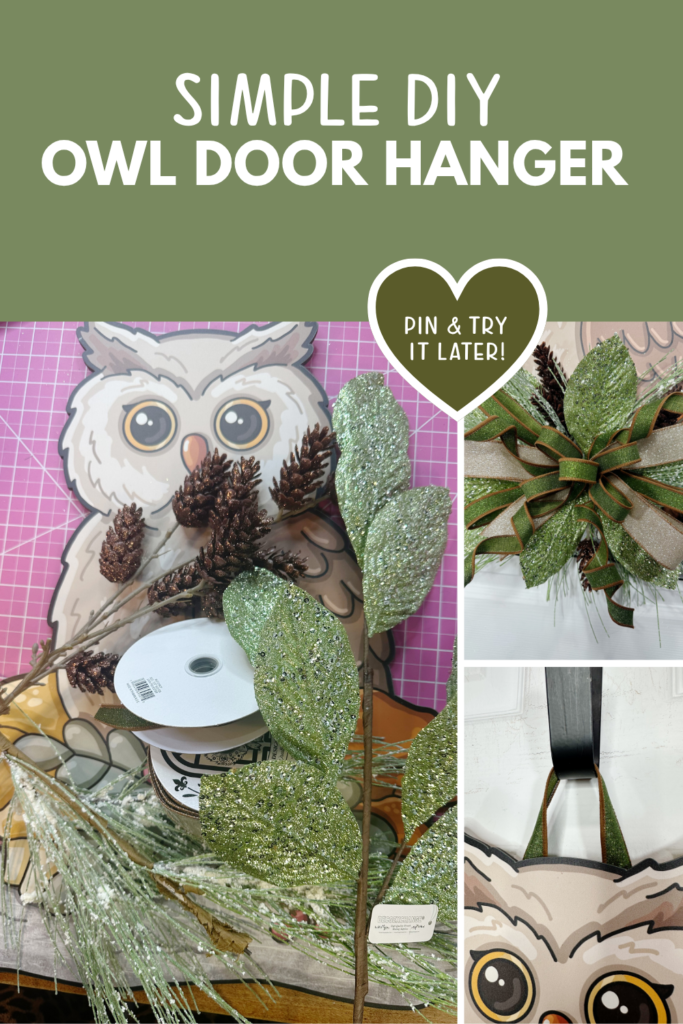
2. Cut the florals. Cut the long pine flocked spray, the long pine spray, the green glitter magnolia spray and the pine cone spray into individual stems.
3. Place the magnolia leaves. Lay the magnolia leaves across the log at the bottom of the sign, with a few pointing outward to the right and left. These form the base of the cluster.
4. Add the pine. Layer the flocked pine and the long pine over and between the magnolia leaves. Angle the stems so they radiate out from one point and extend past the edge of the sign.
5. Add the pine cones. Tuck the pine cones into the pine and magnolia, spacing them so a few sit near the center and a few reach outward.
6. Staple the florals in place. Staple the stems to the sign, working one stem at a time. Check from the front that each one sits where you want it before stapling.
7. Build the bow. Cut loops and tails from the 1.5 inch champagne glitter ribbon and the 7/8 inch green ribbon. Layer the champagne ribbon as the base and the green ribbon on top, and add a few long tails.
8. Attach the bow. Place the bow at the center of the floral cluster and staple or wire it in place. Let the longer tails curl down below the sign.
9. Fluff and adjust. Spread the loops, turn the pine stems so they fan out, and check that nothing covers the owl’s body or face.
Tips for This Design
Match the ribbon to the owl. The champagne ribbon repeats the cream and tan of the feathers, and the green ties in with the florals. A bow that repeats colors in the sign looks planned.
Keep the cluster low. The owl is the focal point, so keep the pine and ribbon below the wing.
Let the pine extend past the edge. Stems that reach beyond the sign make the cluster look larger and softer than the sign alone.
Use the narrow ribbon for tails. The 7/8 inch green ribbon works well for long, curled tails, which add movement at the bottom of the door hanger.
Check the weight. With staples as the main attachment, test that the hanger still hangs flat on a door before you finish.
Where to Display This Door Hanger
This owl door hanger works well for:
- A front door from fall through winter
- A covered porch or entryway
- An interior door in a kitchen, nursery or bedroom
- A craft show booth as a character sign that buyers can see at hand height