
Sometimes a door hanger only needs one strong bow to look finished, and this ghost door hanger is a good example. In this tutorial, Coach Tammy shows how three ribbon styles, layered into a single full bow, are enough to complete a printed sign without a large floral corner or extra embellishments.
The sign features three ghosts sitting on a pumpkin with painted florals already worked into the design, so the bow and a few floral picks are all this project needs to feel complete.
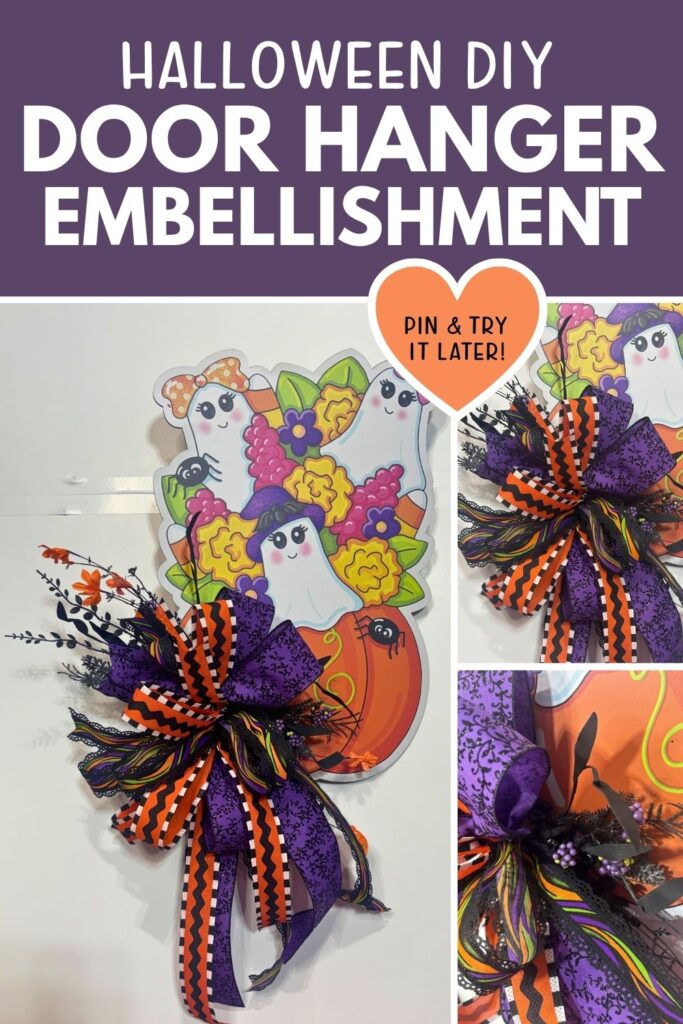
Supply List
- Ghost door hanger sign: DecoExchange WSB July 2026
- 2.5 inch purple ribbon, RGH129323: DecoExchange WSB July 2026
- 1.5 inch fancy panty swirl ribbon: DecoExchange WSB July 2026
- 1.5 inch Halloween ric rac ribbon, RG2100P2: DecoExchange WSB July 2026
- A few floral stems and black filler picks
- Zip ties
- Hot glue gun
- Scissors
Why a 3-Ribbon Bow Works Best
This sign already carries a lot of color and detail in the printed artwork, from the ghosts to the pumpkin to the painted flowers. Adding a bow with too many ribbon styles would compete with that artwork instead of framing it. Three ribbons, each with its own texture and pattern, gives enough variety to feel full without overwhelming the sign.
Step by Step Instructions
1. Attach the hanger.
Thread your hanging material through the top of the sign and secure it before building the bow, so the piece is ready to hang once everything is attached.
2. Add the floral accent.
Glue a few floral stems and black filler picks into the top left corner of the sign, angling a couple of stems outward past the edge so the arrangement does not look boxed in.
3. Cut loops for the bow.
Cut loops from the 2.5 inch purple ribbon, the fancy panty swirl ribbon, and the Halloween ric rac ribbon. Cut two to three loops of each so all three prints are represented evenly in the finished bow.
4. Layer and secure the bow.
Build the bow with the wider purple ribbon as the base layer, then add the swirl ribbon and the ric rac ribbon on top. Gather the center tightly and secure with floral wire or a zip tie.
5. Attach the bow.
Glue the finished bow into the floral corner, positioning it so the loops fan out over the base of the stems rather than sitting flat against the sign.
6. Fluff and adjust.
Separate the ribbon loops and tails so all three patterns are visible from the front. Check that no loop covers a ghost’s face before the glue fully sets.
Tips for This Design
Let the widest ribbon anchor the bow. The 2.5 inch purple ribbon is the largest print in this set, so building it in as the base layer keeps the bow from looking thin once the narrower ribbons are added on top.
Keep floral accents minimal. Because the sign already has painted flowers built into the design, a small floral cluster is enough. Adding too much greenery here would repeat what the sign is already doing.
Check ribbon placement against the ghosts’ faces. With a bow this full, loops can drift over a painted face without you noticing until the glue is set. Step back and check from a few feet away before the bow is fully secured.
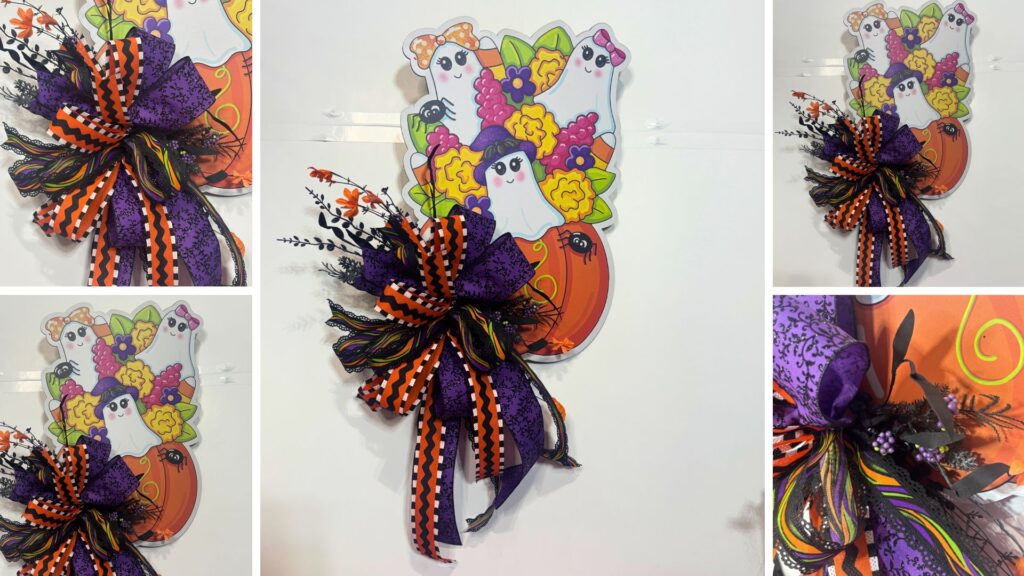
Where to Display This Door Hanger
This ghost door hanger works well for:
- A front door for the full month of October
- A covered porch or entryway for trick-or-treaters to see up close
- A craft show booth as a character-driven piece for buyers shopping for kids’ rooms or family-friendly decor
- A classroom or office door for a seasonal touch that is not too spooky
Bow Embellishment for Door Hangers
Equipment
Materials
- Ghost door hanger sign: DecoExchange WSB July 2026
- 2.5" purple ribbon RGH129323: DecoExchange WSB July 2026
- 1.5" fancy panty swirl ribbon: DecoExchange WSB July 2026
- 1.5" Halloween ric rac ribbon RG2100P2: DecoExchange WSB July 2026
- A few floral stems and black filler picks
- Zip ties
Instructions
- Attach the hanger.
- Thread your hanging material through the top of the sign and secure it before building the bow, so the piece is ready to hang once everything is attached.
- Add the floral accent.
- Glue a few floral stems and black filler picks into the top left corner of the sign, angling a couple of stems outward past the edge so the arrangement does not look boxed in.
- Cut loops for the bow.
- Cut loops from the 2.5 inch purple ribbon, the fancy panty swirl ribbon, and the Halloween ric rac ribbon. Cut two to three loops of each so all three prints are represented evenly in the finished bow.
- Layer and secure the bow.
- Build the bow with the wider purple ribbon as the base layer, then add the swirl ribbon and the ric rac ribbon on top. Gather the center tightly and secure with floral wire or a zip tie.
- Attach the bow.
- Glue the finished bow into the floral corner, positioning it so the loops fan out over the base of the stems rather than sitting flat against the sign.
- Fluff and adjust.
- Separate the ribbon loops and tails so all three patterns are visible from the front. Check that no loop covers a ghost’s face before the glue fully sets.
Video
Notes
Want to grow your design skills?
Come join us at The Makers University’s Design School! Stop guessing and start creating with our design coaches.