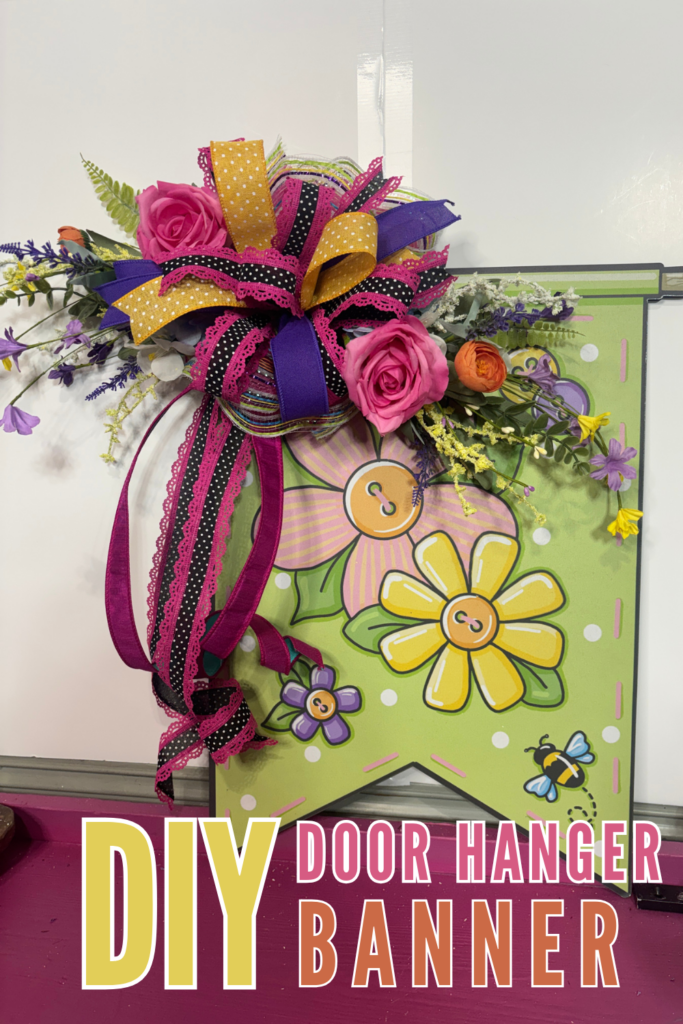
If you are looking for a bright and easy spring project, this door hanger styled for spring is such a fun one to make.
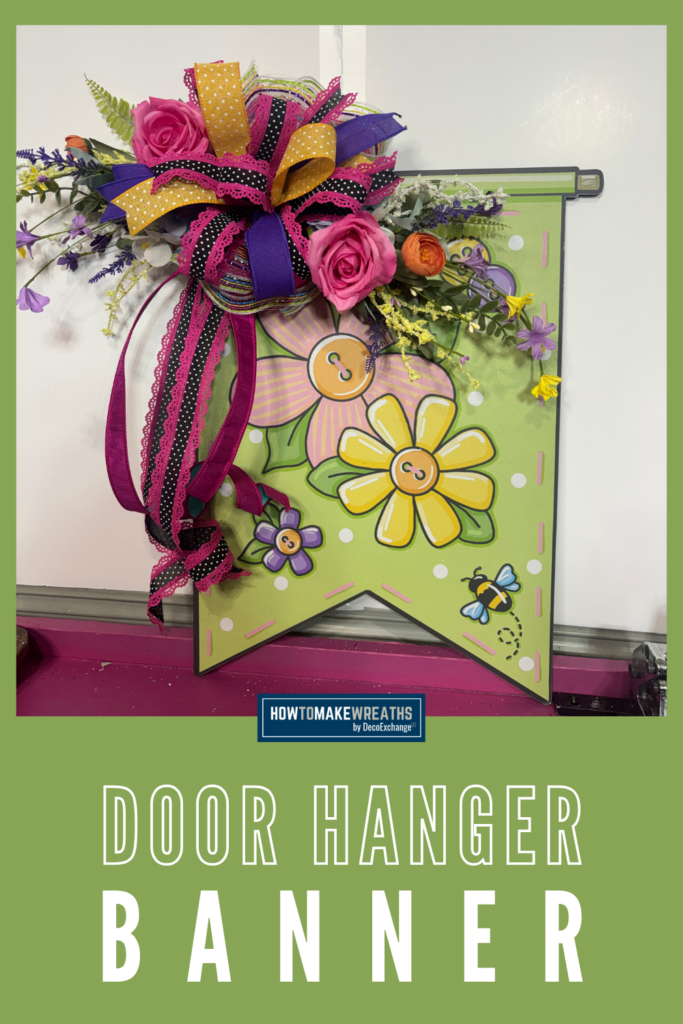
In this tutorial, Tammy shows how to decorate a door hanger from the Monthly Wreath Supply Box using striped mesh, layered ribbon, and floral picks. The finished design is colorful, cheerful, and a great option if you want something cute for your front door without making a full wreath.
This is the kind of project that works really well for:
- Spring front door decor
- Seasonal craft shows
- Beginner wreath makers
- Quick and easy handmade gifts
Why Door Hangers Are Great for Quick Seasonal Decor
Door hangers are such a fun alternative to traditional wreaths.
They are:
- Easier to make than full wreaths
- Lightweight and easy to hang
- Great for layering ribbon and florals
- Perfect for smaller spaces or storm doors
- Easy to customize for any season
How to Make a Spring Door Hanger
This design is especially cute because the mix of striped mesh, soft ribbon, and floral picks gives it that fun spring look without needing a lot of extra supplies.
Supplies Needed
- Door hanger, Monthly Wreath Supply Box
- 1.5 inch purple ribbon, RW827123, DecoExchange March WSB
- 1.5 inch polka dot ribbon with pink lace edge, RG0886983, DecoExchange March WSB
- Striped mesh, DecoExchange
- Floral picks, DecoExchange
Step 1: Prep Your Door Hanger Base
Start with your door hanger from the Monthly Wreath Supply Box.
Before attaching anything, take a minute to make sure your hanging rope or wire is secure and that the base is ready to decorate.
This is also a good time to decide where you want your mesh, ribbon, and florals to sit. A quick layout before attaching anything can help your design feel more balanced.
Tip: If your design is going to be heavier on one side, plan for that early so the finished hanger still hangs straight.
Step 2: Add the Striped Mesh
Next, start adding your striped mesh to the door hanger.
You can use the mesh to create soft ruffles or gathered sections depending on how full you want the finished piece to look.
The striped mesh helps add texture and visual interest while also giving the design a little more volume. Since door hangers do not have the same depth as a full wreath, mesh is a great way to build fullness without making the project feel bulky.
Attach the mesh securely and fluff it as you go so it does not sit too flat.
Tip: Keep your mesh placement slightly loose and airy so the ribbon and florals still have room to stand out.
Step 3: Layer the Ribbon
Now it is time to bring in the ribbon.
Use:
- 1.5 inch purple ribbon
- 1.5 inch polka dot ribbon with pink lace edge
These two ribbons work beautifully together because one adds solid color while the other adds personality and detail.
Cut your ribbon into even lengths and create layered ribbon bundles or small loops. Attach them throughout the design where you want extra color and softness.
If you have ever searched for how to layer ribbon on a door hanger, the easiest method is to let one ribbon act as your base and use the second one as your accent.
The purple ribbon helps ground the design, while the polka dot ribbon adds that playful spring look.
Tip: Let your ribbon tails overlap slightly, but make sure each pattern still has room to be seen.
Step 4: Add the Floral Picks
Once your mesh and ribbon are in place, start adding your floral picks.
This is where the design really comes to life.
Place your floral picks around the mesh and ribbon to soften the edges and add movement. You can tuck them into the top, sides, or lower portion of the design depending on how full you want it to feel.
Instead of spacing the florals perfectly evenly, try placing them in little groupings. This usually creates a more natural, designer-style look.
The floral picks help pull the whole spring theme together and give the door hanger that finished, polished feel.
Tip: Start with your larger floral picks first, then fill in with smaller accents where needed.
Step 5: Fluff and Finish
Once everything is attached, step back and shape the finished design.
Adjust:
- Mesh that looks flat
- Ribbon loops that are hidden
- Floral picks that need more movement
- Any empty spots that need filling
Because this is a flatter project, shaping matters a lot. Even small adjustments can make the final piece look much fuller and more intentional.
Tip: Hang the door hanger up before you call it finished. It is easier to see gaps and balance issues when it is upright.
How to Style a Door Hanger for Spring
Materials
- Door hanger Monthly Wreath Supply Box
- 1 1.5 inch purple ribbon RW827123, DecoExchange March WSB
- 1 1.5 inch polka dot ribbon with pink lace edge RG0886983, DecoExchange March WSB
- 1 Striped mesh DecoExchange
- Floral picks DecoExchange
Instructions
- Prep the door hanger base.
- Add the striped mesh for fullness.
- Layer in the purple ribbon and polka dot ribbon.
- Add floral picks around the design.
- Fluff, shape, and finish the door hanger.
Video
Design Tips for Spring Door Hangers
Use mesh to build fullness
Even a little mesh can make a flatter door hanger look more dimensional.
Mix one solid and one playful ribbon
This keeps the design fun without making it look too busy.
Add florals in clusters
Small grouped florals almost always look more natural than evenly spaced stems.
Keep the shape balanced
Door hangers can look lopsided quickly, so always step back and check your placement.
Where to Use This Door Hanger
This spring project would look beautiful on:
- A front door
- A porch wall
- A craft show display
- A classroom or office door
- A spring gift basket or decor setup
It is also a great option if you want to create a handmade piece that is easy to store and easy to recreate.
Why This Spring Door Hanger Works So Well
This design works because it keeps things simple while still feeling finished.
It combines:
- A clean door hanger base
- Textured mesh
- Coordinating ribbon
- Bright spring florals
- A flatter, easy-to-hang shape
It is beginner friendly, colorful, and easy to customize with whatever spring colors or florals you love most.
Simple Spring Door Hanger
If you have been looking for a simple spring door hanger tutorial, this is such a great one to try.
It is easy enough for newer makers, but still has enough layering and detail to feel polished and fun. Projects like this are also perfect if you want something quicker than a full wreath but still want that same seasonal impact.
And if you enjoy projects like this and want more tutorials, fresh design ideas, and step-by-step creative inspiration, that is exactly the kind of thing we share inside The Makers University Design School. It is a fun place to keep learning, try new styles, and build confidence with every project you make.
👉 Take a peek at The Makers University Design School here!
FAQ
How do you make a spring door hanger?
Start with a decorative base, then add mesh, ribbon, and florals to build out the design.
Can you use mesh on a door hanger?
Yes. Mesh is a great way to add fullness and texture without needing a full wreath form.
What ribbon works best for spring door hangers?
Bright solids, florals, polka dots, and pastel patterns all work beautifully for spring.
Are door hangers easier than wreaths?
They can be. Door hangers often use fewer supplies and are easier to shape and store.
Can I sell spring door hangers at craft shows?
Yes. Door hangers are popular for craft shows because they are lightweight, cute, and easy for customers to display.