
If you want a small, polished wreath that works on a front door, a wall, or even as a tiered tray accent, this lemon pancake petite wreath is a great project to add to your lineup.
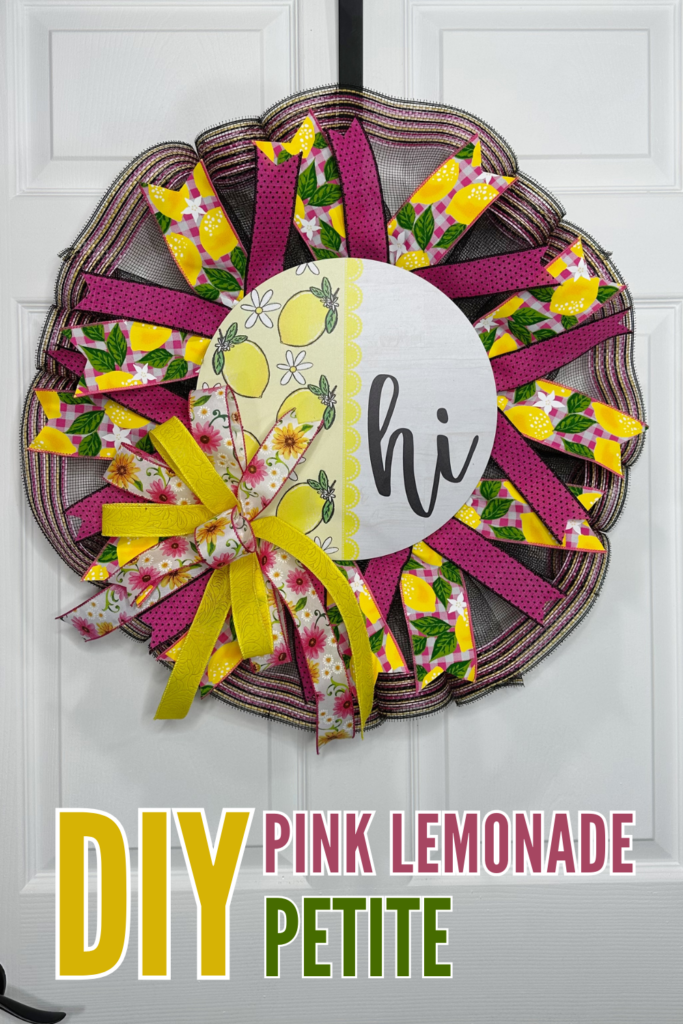
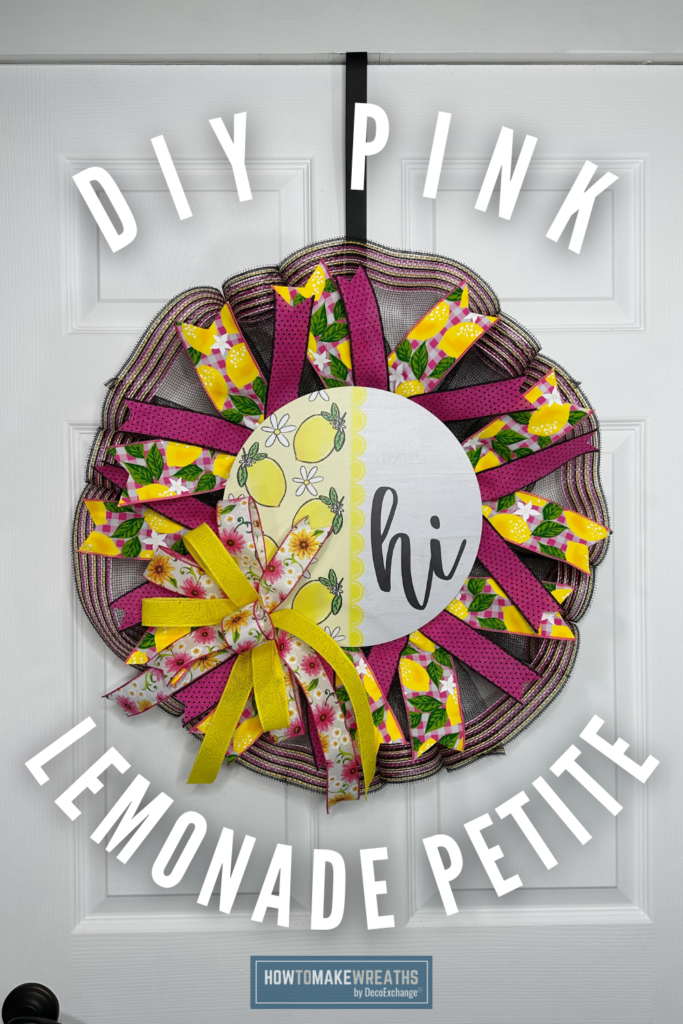
In this tutorial, Melissa shows how to build a petite pancake wreath on a 10-inch frame using black border mesh, a 12-inch round wood sign as the focal point, and four ribbon styles in a lemon and pink color palette. The finished wreath is compact, cheerful, and perfect for spring and summer decor.
What is a Pancake Petite Wreath?
A pancake wreath is built by pushing mesh and ribbon loops through the openings of a round frame so they stand straight up from the front. The result is a flat, full wreath that sits close to a door or wall without taking up much depth. A petite version uses a smaller frame, typically 10 inches, which makes it a faster build and a great option for smaller spaces, layered door displays, or lower price point craft show inventory.
Petite pancake wreaths are popular at craft shows because they are lightweight, easy to display, and approachable for customers who want something seasonal without committing to a large statement piece.
Supply List
- 1 pancake wreath frame, 10 inches (DecoExchange)
- Black border mesh (DecoExchange WSB May 2026)
- 1 round wood sign, 12 inches (DecoExchange WSB May 2026)
- 1 roll 2.5-inch lemon ribbon (RGC111307, DecoExchange WSB May 2026)
- 1 roll 1.5-inch pink polka dot ribbon (RGH131983, DecoExchange WSB May 2026)
- 1 roll 1-inch yellow ribbon (NR100029, DecoExchange WSB May 2026)
- 1 roll 1.5-inch floral ribbon (41238-09-28)
- Pipe cleaners
- 24 gauge wire
- Zip ties
How to Make a Lemon Pancake Petite Wreath
Step 1: Prepare Your Frame
Lay your 10-inch pancake frame flat on your work surface. Before adding any mesh or ribbon, attach a pipe cleaner or loop of 24 gauge wire to the top back of the frame as a hanger. It is much easier to do this now than after the frame is full.
Check that the frame sits flat and round. If any sections are bent or warped, gently reshape them before you start building.
Step 2: Add the Black Border Mesh
Cut lengths of black border mesh and push them through the frame openings using your fingers or a pencil. The black border mesh creates a bold, graphic edge around the wreath that makes the lemon yellow and pink ribbons pop against it. Work your way around the entire frame, securing each mesh section at the back with a zip tie or wire.
Fluff each mesh section forward from the front as you go so the wreath starts building fullness right away. On a 10-inch frame, the sections are small, so each piece of mesh adds up quickly. Pull each loop up enough that it stands above the frame rather than lying flat against it.
Step 3: Add Your Ribbon
This wreath uses four ribbon styles. Work them into the frame alongside the mesh, pushing ribbon loops through the openings and securing them at the back. Alternate ribbon styles as you work around the frame so the colors and patterns are distributed evenly rather than grouped by style.
Work through the ribbons in this order:
- Push loops of the 2.5-inch lemon ribbon through the frame first. This is your widest and most themed ribbon, so it carries the most visual weight. Space loops evenly so the lemon print appears throughout the wreath.
- Follow with the 1.5-inch pink polka dot ribbon and the 1.5-inch floral ribbon, tucking them into the gaps between the lemon ribbon and mesh. These two ribbons add softness and mix well together since both sit at the same width.
- Finish with the 1-inch yellow ribbon as an accent, adding it in spots where the wreath needs a clean pop of solid yellow to tie the lemon ribbon back to the mesh.
Secure all loops at the back with zip ties or wire. Pull each loop up from the front to make sure it is standing and contributing to the fullness of the wreath.
Step 4: Build and Attach the Bow
Use the remaining ribbon to build a small layered bow for the top or bottom of the wreath. Combine loops of the 2.5-inch lemon ribbon and the 1.5-inch pink polka dot ribbon for the main bow layers. Add a few loops of the 1.5-inch floral ribbon for texture and use the 1-inch yellow ribbon as bow tails for a finishing detail.
Secure all loops at the center with 24 gauge wire and fluff each loop after tying. Attach the bow to the frame with wire or a zip tie, pressing it firmly into the mesh so it sits securely.
Step 5: Attach the Round Wood Sign
Position the 12-inch round wood sign at the center of the wreath. On a 10-inch frame with a 12-inch sign, the sign will extend slightly beyond the frame edge, which gives the wreath a layered, dimensional look with the sign as the clear focal point.
Attach the sign using pipe cleaners looped through any holes in the sign or around the edge of the sign and twisted securely to the frame. Check that the sign sits flat and centered before tightening the pipe cleaners fully.
Step 6: Final Adjustments
Turn the wreath over and tuck all zip tie ends and wire tails flat against the back of the frame. Flip it back over and fluff the mesh and ribbon loops from the front. Look for gaps or flat spots and fill them in by pulling loops up with your fingers.
Step back and check the overall shape. The wreath should be round, full, and even with the wood sign clearly visible at the center.
Tips for This Project
Let the sign extend past the frame. A 12-inch sign on a 10-inch frame is intentional. The sign overlapping the mesh gives the wreath a layered look and makes the focal point impossible to miss. Do not try to squeeze the sign inside the frame edge.
Alternate all four ribbons from the start. On a small frame, it is tempting to finish one ribbon before moving to the next. Resist that and rotate through all four styles as you go. The pattern distribution will be much more even in the finished wreath.
Use the lemon ribbon generously. The lemon ribbon is the piece that communicates the theme at a glance. If shoppers at a craft show cannot see it clearly, the pink lemonade or summer lemon theme does not land. Make sure lemon ribbon loops appear in at least four or five spots around the wreath so the print reads clearly from a few feet away.
Keep the yellow ribbon as an accent. At 1 inch wide, the yellow ribbon will disappear inside a dense mesh wreath if you use it in too many spots. Two or three well-placed loops plus the bow tails are enough. Keeping it as an accent makes it more visible than spreading it everywhere.

Pink Lemonade Themed Wreath
Materials
- 1 10" pancake wreath frame DecoExchange
- 12" round wood sign DecoExchange WSB May 2026
- Black border mesh DecoExchange WSB May 2026
- 1 roll 2.5-inch lemon ribbon RGC111307 (DecoExchange)
- 1 roll 1.5-inch pink polka dot ribbon RGH131983 (DecoExchange)
- 1 roll 1-inch yellow ribbon NR100029 (DecoExchange)
- 1 roll 1.5-inch floral ribbon 41238-09-28
- Pipe cleaners DecoExchange
- 24 gauge wire
- Zip ties DecoExchange
Instructions
Step 1: Prepare Your Frame
- Lay your 10-inch pancake frame flat on your work surface. Attach a pipe cleaner or loop of 24 gauge wire to the top back of the frame as a hanger before adding anything else. It is much easier to do this now than after the frame is full. Check that the frame sits flat and round, and gently reshape any bent or warped sections before you start.
Step 2: Add the Black Border Mesh
- Cut lengths of black border mesh and push them through the frame openings using your fingers or a pencil. Work your way around the entire frame and secure each section at the back with a zip tie or wire. Pull each loop up so it stands above the frame rather than lying flat. Fluff each section forward from the front as you go to start building fullness right away.
Step 3: Add the Ribbon
- Work four ribbon styles into the frame alongside the mesh, alternating as you go so colors and patterns are distributed evenly around the wreath.
- Push loops of the 2.5-inch lemon ribbon through the frame first. Space them evenly so the lemon print appears throughout the wreath.
- Follow with the 1.5-inch pink polka dot ribbon and the 1.5-inch floral ribbon, tucking them into the gaps between the lemon ribbon and mesh.
- Finish with the 1-inch yellow ribbon as an accent in spots where the wreath needs a clean pop of solid yellow.
- Secure all loops at the back with zip ties or wire, then pull each loop up from the front to make sure it is standing and adding fullness.
Step 4: Build and Attach the Bow
- Use remaining ribbon to build a layered bow for the top or bottom of the wreath. Use the 2.5-inch lemon ribbon and the 1.5-inch pink polka dot ribbon for the main bow layers. Add a few loops of the 1.5-inch floral ribbon for texture and use the 1-inch yellow ribbon as bow tails. Secure all loops at the center with 24 gauge wire, fluff each loop, then attach the bow to the frame with wire or a zip tie. Press it firmly into the mesh so it sits securely. (Need a bow tutorial? How to Make a 3-2-1 Bow)
Step 5: Attach the Round Wood Sign
- Position the 12-inch round wood sign at the center of the wreath. The sign will extend slightly beyond the 10-inch frame edge, giving the wreath a layered, dimensional look. Attach the sign using pipe cleaners looped through the holes in the sign or around its edge, then twisted securely to the frame. Check that the sign is flat and centered before tightening the pipe cleaners fully.
Step 6: Final Adjustments
- Flip the wreath over and tuck all zip tie ends and wire tails flat against the back of the frame. Flip it back over and fluff the mesh and ribbon loops from the front. Look for gaps or flat spots and pull loops up with your fingers to fill them in. Step back and check the overall shape. The wreath should be round, full, and even with the wood sign clearly visible at the center.
Video
Where to Display this Wreath
This lemon pancake petite wreath works well for:
- A front door paired with a larger wreath or door hanger
- A covered porch wall, window, or fence
- A tiered tray or shelf display for a seasonal home accent
- A craft show booth as a smaller, accessible price point piece
- An interior kitchen or dining area wall for a cheerful summer accent
The flat profile stores easily in a flat box or wreath bag between seasons. The round wood sign is reusable and can anchor a fresh build next year with updated mesh and ribbon.

