
Coach Jordan from Makers University’s Creative Coaching dropped in to share this amazing DIY Monarch Butterfly Wreath tutorial. The wreath sign used in this design is no longer available, but keep in mind that any monarch butterfly wreath attachment will work. So take a look at your supply stash and see if you have one on hand from last year.
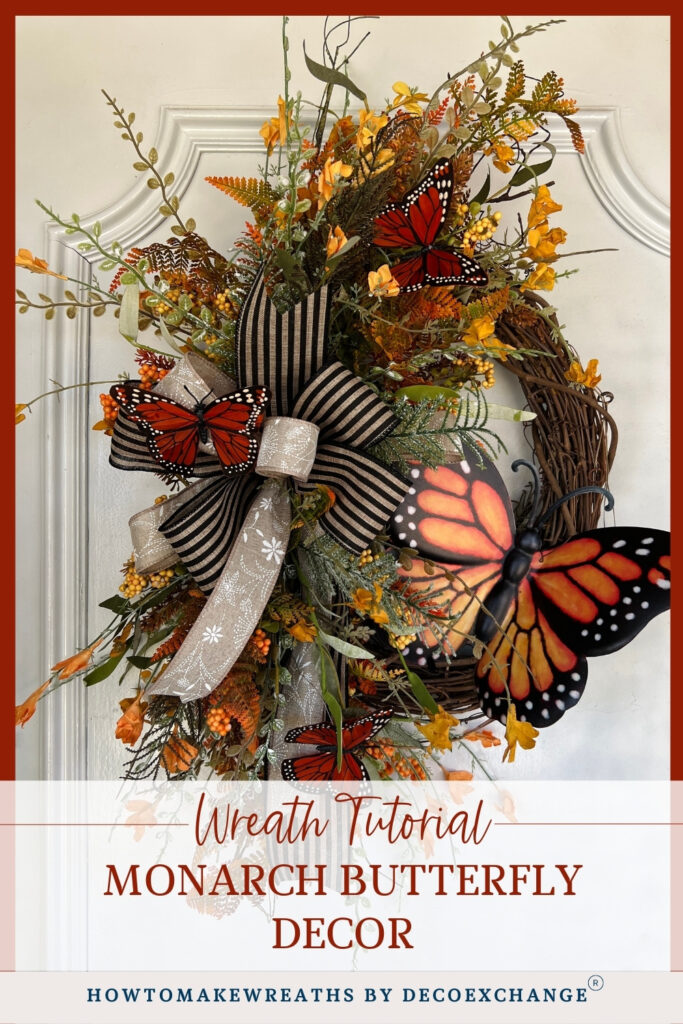
DIY Monarch Butterfly Wreath Tutorial
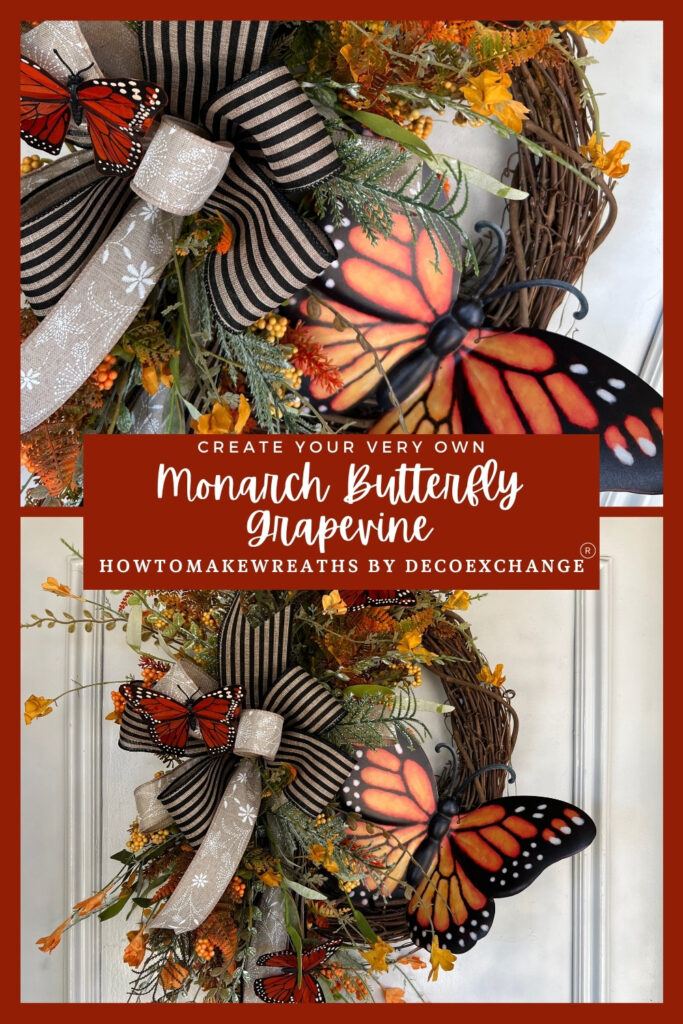
Ready to add some fluttery fun to your décor? This monarch butterfly wreath is the perfect way to do just that! With its vibrant colors and 3-D elements, this wreath will be sure to liven up any room. To make it, you’ll need a 14” grapevine wreath base as well as some faux floral bunches, a leather fern stem, a monarch butterfly metal sign, and wired ribbon. So gather your supplies and let’s get crafting!
Tools
Supplies
- 14” grapevine wreath base
- Orange filler bush (60919)
- Beige filler bush (63048)
- Pls leather fern stems (57538)
- Monarch butterfly sign
- 2 wired ribbons
- Zip ties
Quick Instructions for a Monarch Butterfly Wreath
To begin, attach the faux flowers to the grapevine wreath base with hot glue. Place them in an alternating pattern to give your wreath an extra layered look.
Next, take your leather fern stem and attach it to the wreath in a similar fashion. Make sure to spread out the leaves evenly on all sides of the wreath.
Now it’s time to add some sparkle with your monarch butterfly metal sign! Attach it to the center of your wreath using more hot glue.
Finally, finish off your wreath with some wired ribbon. Cut it into smaller strips and curl them to give your wreath an extra decorative touch.
And there you have it a beautiful monarch butterfly wreath that is sure to take flight in any space! With just a few supplies and a little bit of time, you too can make this easy and fun piece of decor. So go ahead and flutter away!
Check out the full instructions in the instructional card below.
FAQs
What do monarch butterflies symbolize?
Between their amazing 1,200 – 2,800 mile migration and their metamorphosis monarch butterflies truly represent transformation and hope.
Whether you’re a crafty entrepreneur or a hobbyist, I think we all feel that sense of transformation as we grow our skill levels.
Does butterfly décor sell well all year round?
It does! Customers who love butterfly décor love them year round. Butterfly lovers appreciate the symbolism behind this beautiful creature. So don’t get stuck in a seasonal rut because there are some flowers, animals, and insects that resonate with people.
What else could you use instead of a butterfly?
You can use any wreath sign.
If you need any help with centerpiece-making, bow-making, wreath-making, or crafting in general, be sure to check out more of our tutorials on How to Make Wreaths.
We would love to see your beautiful summer wreaths! Please share with us over at the How To Make Wreaths Facebook Group.


Monarch Butterfly Wreath
Equipment
Materials
- 1 grapevine wreath base 14"
- 2 Orange filler bush 60919
- 2 Beige filler bush 63048
- 1 Pls leather fern stems 57538
- 1 Monarch butterfly sign
- 1 2.5" wired ribbons
- 1 1.5" wired ribbon
- 1 pack Small monarch butterfly attachments from Michael's Ashland Butterfly Collection
Instructions
- Remove all the tags from your supplies.
- Fluff out orange filler bush, spreading the individual stems outward for a fuller look.
- Next, fluff out beige filler bush
- Zip tie 3 stems together mixing the beige and orange bushes. Incorporate the greenery and florals into each other.
- Repeat this process one more time.
- Trim excess zip tie tails.
- Connect the two bunches with a zip tie. The florals should be facing outward on each side.
- You will add a bow covering the gap.
- Attach to the wreath using a zip tie.
- Add any smaller stems to push out that floral design a little further.
- Use hot glue to secure.
- Shape the individual stems as need.
- Attach the monarch butterfly sign, securing with a pipe cleaner or zip tie.
Create a Bow
- Start with the 1.5" wired ribbon creating 2 x 9" loops on each side and 1 x 9" loop at the center. Make sure to leave a tail, we can trim later.
- Next, using the 2.5" wired ribbon create 4 x 10" loops (2 on each side).
- Secure with a zip tie.
- Dovetail the ribbon tails.
- Fluff out the bow and position loops and tails as desired.
- Secure to the middle of the floral bunch, where the gap is.
Finishing touches
- Trim all the individual stems of the leather ferns.
- You should have 8 in total. Glue 4 stems on each side of your floral bunch.
- Always make sure you kind of come back around with some greenery, weave it through.
- Add in some of these monarch butterflies.
Video
Just pin this DIY monarch butterfly wreath tutorial to save the instructions for later!
If you’re a dog lover or know someone who is, check out our Support Dog Rescue t-shirts and click on the picture below!


The colors are beautiful, not the typical yet I think better!