
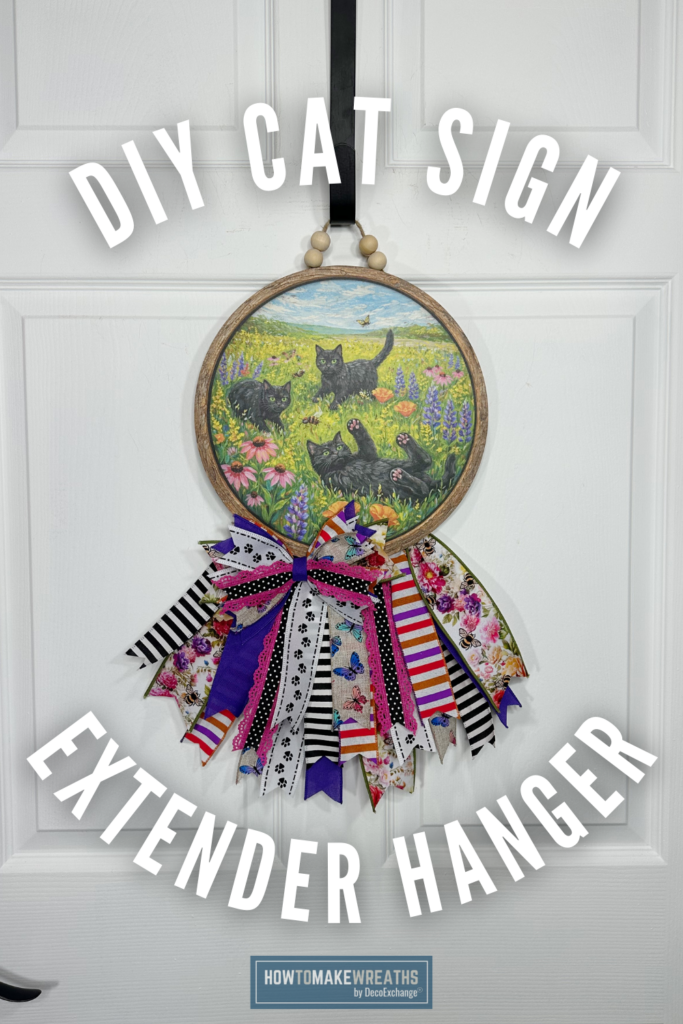
If you are looking for a creative way to decorate a door hanger using ribbon and a wood sign, this tutorial is a fun project to try. Melissa walks through how to use layered ribbon loops, a sign extender, and simple embellishments to turn a basic wood sign into a colorful statement piece for your door.
This design combines bright spring ribbon patterns with a decorative wood sign and playful details like wooden beads and rope accents. The result is a door hanger that works well for everyday decor, spring decorating, or even craft show inventory.
The best part is that this project does not require a wreath base. Instead, the ribbon creates the fullness and movement around the sign.
Door Hanger with Ribbon and a Wood Sign Tutorial
Let’s walk through the supplies and the simple steps to create this ribbon door hanger. Make a Decorative Door Hanger with Ribbon and a Wood Sign
Supplies Needed
- 11.5 inch wood sign, DecoExchange March Wreath Supply Box
- Sign extender, DecoExchange
- Rope cut from wooden signs
- Wooden beads from Hobby Lobby
- 2.5 inch floral ribbon LS1240AM DecoExchange March WSB
- 1.5 inch purple ribbon RW827123 DecoExchange March WSB
- 1.5 inch pink, purple, and orange stripe ribbon RGH1300RT DecoExchange March WSB
- 1.5 inch black and white cat paw ribbon 54447 Sams Club
- 1.5 inch black and white stripe ribbon 54447 Sams Club
- 1.5 inch polka dot ribbon with pink lace edge RG0886983 DecoExchange March WSB
- 1.5 inch butterfly ribbon 19183 Sams Club
- Scissors
- Zip ties
- Hot glue gun
To subscribe or check availability of our monthly box, head to WreathSupplyBox.com.
Step by Step Ribbon Door Hanger Tutorial
Step 1: Prepare the Wood Sign
Start by attaching the sign extender to the back of the 11.5 inch wood sign. The extender helps create a stronger hanging point and gives you a place to secure the ribbon design.
Thread rope through the top section of the extender so you have a sturdy hanger for the finished project.
This step also allows you to add wooden beads to the rope for a decorative touch.
Step 2: Cut Your Ribbon
Cut several strips of ribbon in different patterns and colors. Using a variety of ribbon designs helps create depth and visual interest.
For this project, the mix of floral, stripes, polka dots, and butterfly patterns creates a bright and playful look.
Most ribbon strips are typically cut between 10 and 14 inches depending on how large you want the loops to be.
Step 3: Create Ribbon Loops
Take each ribbon strip and form a loop by bringing the ends together in the center. Pinch the middle of the ribbon to create a gathered shape.
Secure the center with a zip tie or floral wire.
Continue making loops with different ribbon styles so you can alternate colors and patterns in the final design.
Step 4: Attach Ribbon Around the Sign
Begin attaching ribbon loops to the sign extender behind the wood sign.
Layer different ribbon styles as you work around the sign. Mixing wider and narrower ribbon adds texture and keeps the design from looking flat.
Spread the ribbon loops evenly so they frame the sign and fill the space around it.
Step 5: Add Decorative Accents
Once the ribbon loops are attached, add decorative details to enhance the design.
Melissa uses rope pieces and wooden beads to add dimension and a handcrafted look. These elements help soften the ribbon edges and bring the whole piece together.
Secure accents with hot glue as needed.
Step 6: Shape and Adjust the Ribbon
Fluff the ribbon loops and adjust their placement so the design looks balanced.
Because ribbon designs are flexible, small adjustments can make a big difference in how full and polished the final door hanger looks.
Take a step back and reposition any ribbon that looks crowded or uneven.
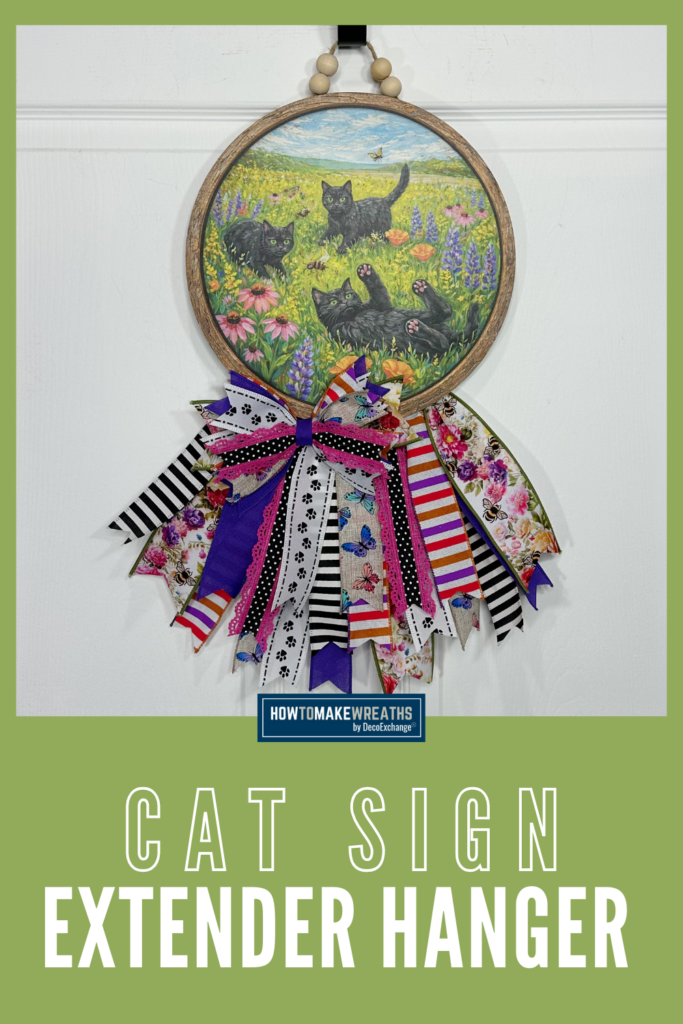
Cat Door Hanger with Ribbons
Equipment
- Zip ties
Materials
- 1 11.5" round wood sign cat design
- Sign extender DecoExchange
- Rope cut from wooden sign
- Wooden beads
- 2.5" floral ribbon
- 1.5" purple ribbon
- 1.5" pink/purple/orange stripe ribbon
- 1.5" black & white cat paw ribbon
- 1.5" black & white stripe ribbon
- 1.5" polka dot ribbon pink lace edge
- 1.5" butterfly ribbon
Instructions
Prepare the wood sign
- Attach the sign extender to the back of the 11.5″ wood sign. Thread rope through the top of the extender to create a sturdy hanger. Slide wooden beads onto the rope for a decorative touch.
Cut your ribbon
- Cut several strips from each ribbon in a variety of patterns and colors. Most strips should be 10–14 inches long depending on how large you want the loops.
Create ribbon loops
- Fold each strip into a loop by bringing the ends together. Pinch the center into a gathered shape and secure tightly with a zip tie or floral wire. Repeat with all ribbon styles.
Attach ribbon to the sign extender
- Layer ribbon loops onto the sign extender behind the wood sign. Alternate wider and narrower ribbon styles to add texture. Spread loops evenly to frame the sign on all sides.
Add decorative accents
- Hot glue rope pieces and wooden beads to soften edges and add a handcrafted dimension. These details bring the whole piece together.
Shape and adjust
- Fluff each ribbon loop and reposition as needed for a balanced, full look. Step back and adjust any ribbon that appears crowded or uneven.
Video
Notes
Design Tips for Ribbon Door Hangers
Using multiple ribbon patterns can make your door hanger stand out. Try combining florals, stripes, and playful prints for a layered look.
When working with a wood sign, use a sign extender whenever possible. It makes attaching ribbon easier and helps the design stay secure over time.
Wooden beads and rope details add personality and make the project feel more handcrafted.
If you plan to sell door hangers at craft shows, projects like this are great because they use minimal supplies while still creating a full and eye catching design.
Ribbon Door Hanger
This ribbon door hanger is a simple project that delivers a big visual impact. By combining colorful ribbon with a wood sign and a few decorative accents, you can create a piece that feels custom and unique.
Whether you are decorating your own front door or creating items for craft shows, this technique is an easy way to turn a simple sign into a finished door hanger.
If you enjoy projects like this, try experimenting with different ribbon combinations and seasonal signs to create designs for every time of year.
Want to Grow Your Design Skills?
If you love making seasonal door decor and want more creative ideas, step-by-step tutorials, and design inspiration, you might really enjoy The Makers University Design School.
It’s a great place to keep learning new techniques, try fresh project ideas, and build your confidence as a designer, whether you’re crafting for fun or hoping to sell your creations too.
👉 Take a peek at The Makers University Design School.

