
If you are looking for a colorful spring door hanger that feels cheerful, layered, and handmade, this spring daisy door hanger by Melissa is a beautiful option. This design combines bold ribbon choices with bright faux florals to create a statement piece that works for spring decorating, Easter displays, and even craft show inventory.

Spring Daisy Door Hanger Tutorial
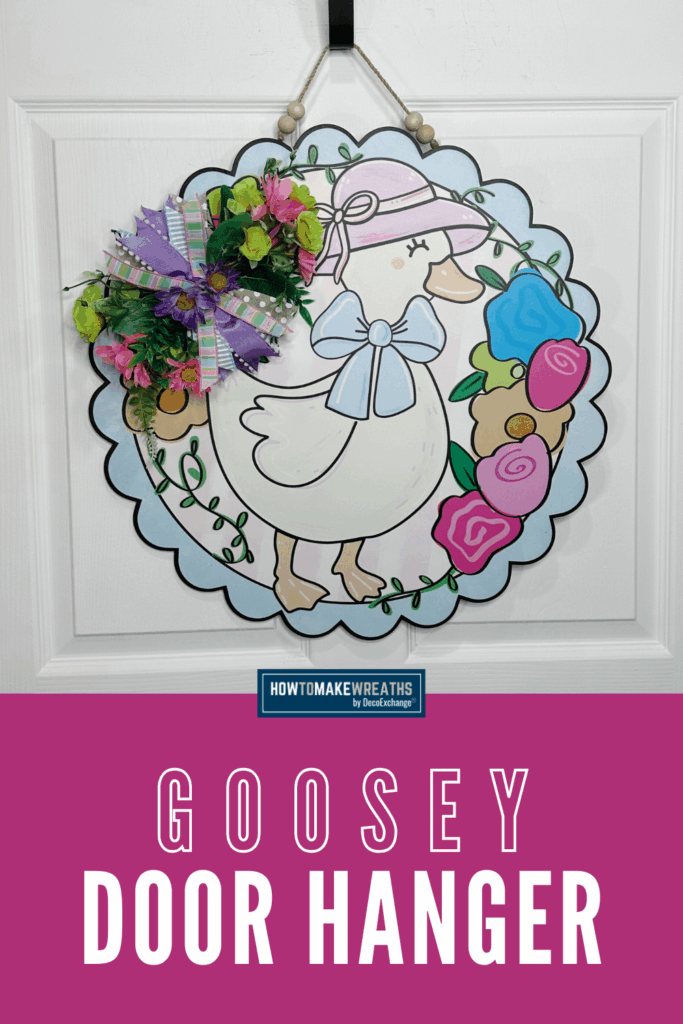
In this tutorial, you will learn how to decorate a wooden door hanger using layered ribbon, faux daisies, azaleas, and simple embellishments like rope and wood beads. The finished look is playful, balanced, and perfect for spring.
Supplies You Will Need
- Door Hanger, DecoExchange February Wreath Supply Box
- 2.5 inch green vine ribbon, RGH129727 DecoExchange February WSB
- 1.5 inch purple ribbon, 1784999 Costco
- 1.5 inch polka dot ribbon, 28843 Sams Club
- 1.5 inch blue stripe ribbon, RG1780D6 Craft Outlet
- ⅝ inch stripe ribbon, RGE1208 Nicks Seasonal Decor
- Purple daisy floral, 37344 DecoExchange
- Pink daisy floral, 37346 DecoExchange
- Yellow azalea floral, DecoExchange
- Rope, cut from previous signs
- Wood beads, Hobby Lobby
- Staples
- Hot glue
- Zip ties
If you missed the February Wreath Supply Box, be sure to join The Wreath Supply Box now so you do not miss next month’s exclusive designs and supplies.
Step-by-Step Tutorial
Step 1: Prepare Your Door Hanger Base
Start with your wooden door hanger. If it already includes a hanging rope, remove and save it if you want to reuse it later in your design.
Check the back for any loose areas and reinforce if needed. Make sure your surface is clean and ready for florals and ribbon.
Step 2: Build Your Ribbon Bow
Ribbon is a major focal point in this design. Melissa layers multiple ribbon patterns to create depth and interest.
Use the following ribbons to create a full, layered bow:
- 2.5 inch green vine ribbon for your base loops
- 1.5 inch purple ribbon
- 1.5 inch polka dot ribbon
- 1.5 inch blue stripe ribbon
- ⅝ inch stripe ribbon as an accent layer
Layer your loops so the wider ribbon frames the narrower ribbons. Alternate colors and patterns to keep the design balanced.
Secure your bow with a zip tie. Fluff the loops and adjust the tails until the bow feels even and full.
Attach the bow to the top portion of your door hanger using staples or zip ties, depending on your base.
Step 3: Add Your Faux Florals
Now it is time to bring in color and texture.
Use:
- Purple daisy floral
- Pink daisy floral
- Yellow azalea floral
Begin by inserting the larger florals first. Place them around the bow to create movement. Angle some outward and allow others to cascade slightly down the sides.
Next, fill in gaps with additional stems to create fullness. Make sure your colors are evenly distributed so one side does not feel heavier than the other.
Secure florals with hot glue or zip ties as needed.
Design Tip: Step back often and view your design from a distance. This helps you spot empty areas and keep the arrangement balanced.
Step 4: Add Decorative Details
To give this door hanger a finished look, add rope and wood bead accents.
Cut rope from previous signs and layer it into your design. Let it drape slightly for texture.
Thread wood beads onto rope or wire and attach them beneath the bow or along one side for a charming handmade touch.
These small details make your design feel intentional and polished.
Step 5: Final Adjustments
Fluff your bow again. Spread out your florals. Trim any excess stems.
Make sure the design hangs straight and that your focal point remains centered and eye catching.
You now have a spring daisy door hanger that is bright, layered, and ready for display.
Why This Spring Door Hanger Works
This design works well for:
- Spring front door decor
- Easter decorating
- Craft show inventory
- Handmade gift ideas
- Seasonal home staging
The mix of vine ribbon, daisies, and layered patterns creates a look that feels fresh and inviting without being overwhelming.
Customization Ideas
You can easily adapt this design by:
- Swapping daisies for tulips or peonies
- Using pastel ribbon for an Easter version
- Adding a name or seasonal sign to personalize it
- Adjusting color combinations to match your local craft show trends
Want to Create More Designs Like This?
If you love projects like this and want access to full tutorials, supply breakdowns, and step by step floral design training, join Design School inside The Makers University.
You can start in Makers Lab and build your skills with structured lessons designed specifically for wreath makers and creative entrepreneurs.

