
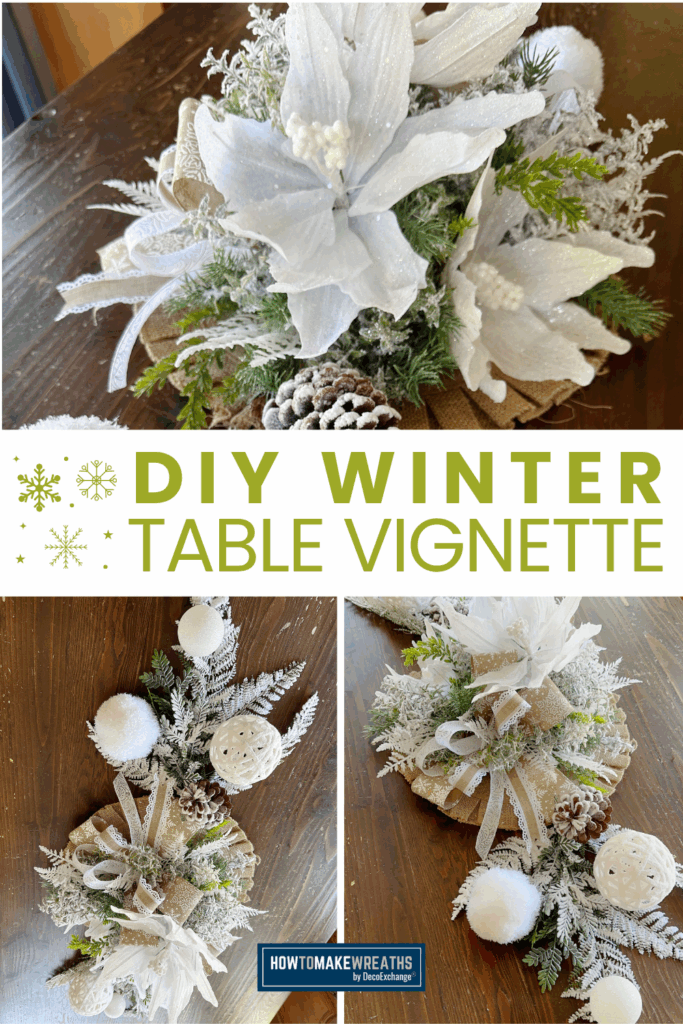
If you love creating elegant winter décor that feels high-end without the high price tag, this tutorial is for you. In this video, Coach Melissa shows how to turn a few simple supplies into a stunning winter centerpiece perfect for your dining table, mantel, or craft show booth.

DIY Winter Centerpiece
Whether you’re decorating for the holidays or looking for something that transitions seamlessly into winter, this project blends texture, sparkle, and balance beautifully.
Supplies You’ll Need
- Flocked Winter Spray – 605-642 (DecoExchange)
- Extra Ornaments – Assorted sizes and finishes
- Rattan Balls – XY5824J4 (DecoExchange)
- Centerpiece Base – Made in the Creative Coaching Group

Designer Tip: Mix matte, shiny, and glitter ornaments in different sizes to create dimension and depth.
Step-by-Step Instructions
1. Start with Your Base
Begin with your pre-made centerpiece base. Melissa used a design from The Makers University Creative Coaching Group, which provides the perfect structure for layering winter greenery and accents.
2. Add the Flocked Sprays
Insert your flocked winter sprays evenly throughout the arrangement. These create that snowy, cozy look and add instant fullness. Make sure they extend beyond your base for a soft, natural shape.
3. Layer in Rattan Balls
Next, tuck in your rattan balls. Their natural texture contrasts beautifully with the shimmer of the ornaments and gives your centerpiece an organic feel.
4. Add Ornaments for Shine
Mix in ornaments of varying sizes, balancing them across the design. Place larger ones near the center and smaller ones toward the ends to maintain proportion and movement.
5. Adjust and Secure
Step back and check for gaps. Fill in any open spaces with leftover greenery or small ornaments. Use hot glue to secure items if you plan to transport or sell the piece.
Design Tips from Melissa
- Mix Textures: Combining flocked greenery with smooth ornaments and rustic rattan keeps the design interesting.
- Stick to a Color Story: Pick 2–3 colors (like silver, gold, and natural brown) for a cohesive winter look.
- Think Beyond Christmas: This centerpiece transitions easily from Christmas to January winter décor with just a few swaps.
Why You’ll Love This Project
This winter centerpiece looks elegant and expensive, but it’s surprisingly simple to make. It’s ideal for:
- Craft show inventory
- Gifting during the holidays
- Decorating your home all winter long
It’s also a great way to use up extra ornaments or greenery left over from other projects!
If you’re ready to elevate your winter décor with a touch of sparkle and sophistication, try Melissa’s easy centerpiece tutorial. It’s proof that with the right mix of flocked greens, ornaments, and texture, you can make something truly beautiful in under an hour.
Want more floral design tutorials like this? Join our Creative Coaching Group at The Makers University, where Melissa and our team share exclusive projects and step-by-step trainings every month.

