
If you are looking for a simple project that still looks polished and intentional, this floral door hanger is a great place to start.
Easy Everyday Door Hanger Customization
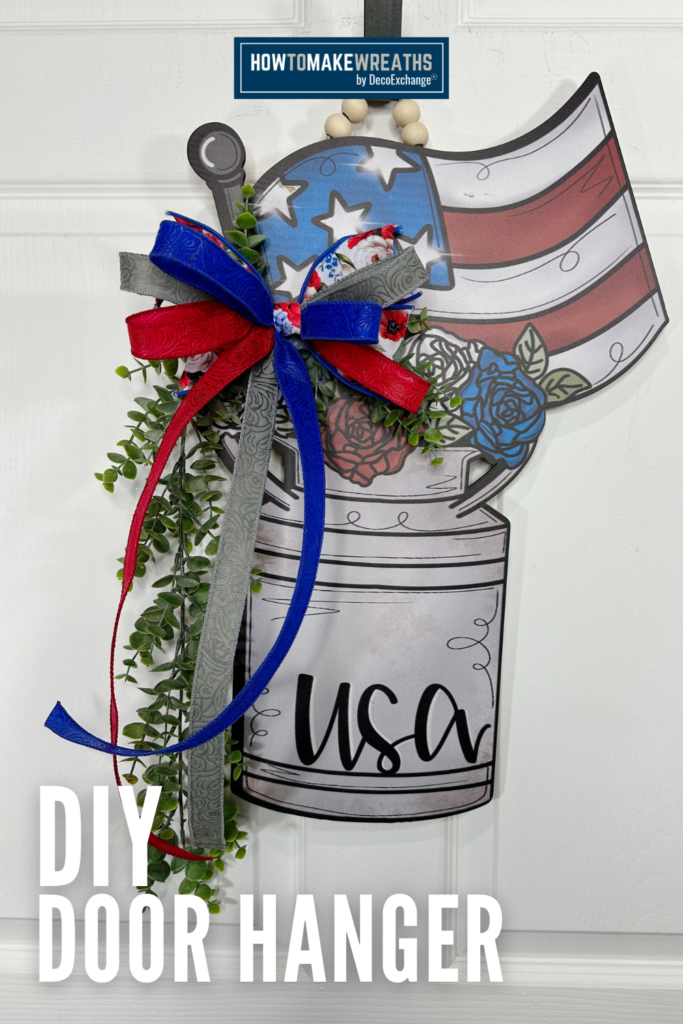
Melissa walks through a design that focuses on balance, soft greenery, and a statement bow. It is one of those designs you can easily adjust for any season just by changing your ribbon or florals.
This style works especially well if you want something lightweight for your door but still full enough to stand out.
Supplies You Will Need
Here are the supplies used in this project:
Base
Ribbon
- 2.5 inch ribbon for the main bow
- 1.5 inch coordinating ribbon for layering
Greenery
- Eucalyptus or mixed greenery stems
- Filler greenery for texture
Florals
- Coordinating floral stems in soft or seasonal colors
Tools
- Wire or pipe cleaners
- Zip ties
- Wire cutters

Step by Step Instructions
Step 1. Prepare Your Base
Start by looking at your door hanger and deciding where your focal point will sit.
Most designs work best when your bow and florals are placed slightly off center. This creates a more natural flow and keeps the design from feeling too stiff.
Step 2. Build Your Bow
Create a layered bow using your ribbon.
Use your 2.5 inch ribbon as your base to give the bow structure. Then layer in your 1.5 inch ribbon to add contrast and detail.
Make sure your loops are full and your tails are long enough to show off the patterns.
Secure the bow tightly so it holds its shape.
Step 3. Attach the Bow
Secure your bow to the door hanger using wire or pipe cleaners.
This will act as the anchor for the rest of your design, so take a moment to make sure it is positioned exactly where you want it.
Step 4. Add Greenery
Begin adding your greenery around the bow.
Start with your larger pieces to create the shape of your design. Let some greenery extend outward to add movement.
Then layer in smaller filler greenery to soften the edges and fill in gaps.
Step 5. Add Florals
Place your floral stems around the greenery and bow.
Work in small clusters instead of spreading everything out evenly. This creates a more natural and high end look.
Mix heights and angles so the design has depth and dimension.
Step 6. Final Adjustments
Step back and look at your door hanger from a distance.
Fluff your bow loops and adjust your ribbon tails so each pattern is visible. Move greenery and florals as needed to fill in empty spaces.
These final adjustments are what take your design from good to finished.
Design Tips for Door Hangers
- Use larger ribbon for structure and smaller ribbon for detail
- Place your focal point slightly off center for a more natural look
- Let greenery extend beyond the base to create movement
- Work in clusters instead of spacing florals evenly
- Step back often to check balance and shape
Ways to Customize This Design
This is one of those designs you can reuse over and over again.
Swap out your ribbon for seasonal patterns, change your florals for different holidays, or even add a small sign to match your decor style.
Once you understand the structure, you can easily adapt it for spring, summer, fall, or everyday designs.
Simple Starts
This floral door hanger is a great reminder that you do not need a complicated base to create something beautiful.
With a good bow, a few stems of greenery, and thoughtful placement, you can create a design that feels full, balanced, and ready for your front door.

Come Join Us in Design School!
If you enjoy simple projects like this and want more ideas you can actually follow and finish, The Makers University Design School is a great next step.
You will find step by step tutorials, new design ideas, and a place to keep building your skills at your own pace.

