
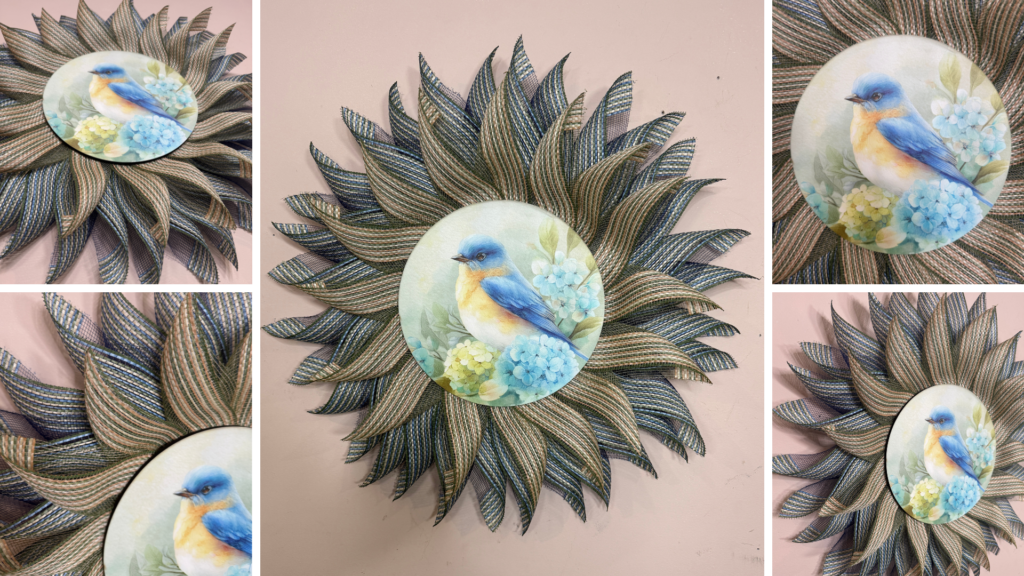
If you are looking for a simple mesh wreath tutorial that is beginner friendly and budget conscious, this small UITC board wreath is a great place to start.
In this tutorial, Stacy shows how to use a Small UITC Board, 10-inch mesh, and a 10-inch wood sign to create a compact decorative wreath that works beautifully for everyday decor, seasonal themes, or craft shows.

Supplies You Will Need
- Small UITC Board
- 6 inch zip ties
- 16 pieces of blue mesh cut at 10 inches, RE85062W
- 8 pieces of natural mesh cut at 10 inches, RE85062X
- 10 inch wood sign
- Pipe cleaners
- ¼ inch staples
This supply list keeps the wreath compact and structured without overwhelming the board.
This project is especially great if you have ever asked:
- How do I make a small mesh wreath?
- Can I use a UITC board instead of a wire wreath frame?
- What size mesh works best for a small wreath?
- How do I attach a wood sign to a mesh wreath?
Why Use a UITC Board for a Mesh Wreath
A UITC Board gives you built in placement points for your mesh and sign. It removes the guesswork and keeps your wreath symmetrical and secure.
If you have ever wondered whether a UITC board is easier than a wire frame, the answer for small decorative wreaths is yes. It keeps everything flat, stable, and balanced.
This makes it especially useful for:
- Small entry doors
- Apartments
- Interior wall decor
- Craft show inventory
Let’s walk through it step by step.
Step-By-Step Small Mesh Wreath Tutorial
Step 1: Prepare Your Mesh
Cut your mesh into:
- 16 pieces of blue mesh at 10 inches
- 8 pieces of natural mesh at 10 inches
Using 10 inch cuts creates tight, controlled ruffles instead of large poofs. This is perfect for smaller boards where space is limited.
Step 2: Attach the Mesh to the UITC Board
Take one mesh piece and gather it in the center to create a ruffle.
Secure it to the board using a zip tie through the designated holes.
Alternate between blue and natural mesh as you move around the board. This creates contrast and dimension without looking busy.
Continue attaching all 24 mesh pieces evenly around the board.
Trim excess zip tie tails for a clean finish.
Step 3: Attach the Wood Sign
Center your 10 inch wood sign on the board.
Use pipe cleaners threaded through the board or staple the pipe cleaners to the back of the sign using ¼ inch staples.
Twist the pipe cleaners securely on the back side of the board so the sign sits flat and stable.
If you have ever searched for how to attach a wood sign to a mesh wreath, this method keeps it from shifting or sagging over time.
Step 4: Final Adjustments
Fluff your mesh ruffles to fill any gaps.
Adjust the natural mesh so it softens the bold blue color and creates balance.
Because this is a small wreath, shaping makes a big difference. Take a moment to step back and adjust for symmetry.
Design Tips for Small Mesh Wreaths
If you are new to mesh wreath making, here are a few helpful tips:
- Smaller cuts create tighter, cleaner designs.
- Two mesh colors add interest without overwhelming the board.
- Always secure your sign in at least two points for stability.
- Trim zip ties flush so nothing scratches your door.
This project is a great example of how simple materials can create a polished look.
Small Mesh Wreath with a UITC Board
Materials
- Small UITC Board
- 6" zip ties
- 1 roll blue mesh RE85062W
- 1 roll natural mesh RE85062X
- 1 10" wood sign
- Pipe cleaners
- ¼" staples
Instructions
Cut the Mesh
- Cut mesh into the following pieces:
- 16 pieces of blue mesh at 10 inches
- 8 pieces of natural mesh at 10 inches
- These smaller cuts create tight ruffles that work well on a small wreath board.
Create Mesh Ruffles
- Take one mesh piece and gather it in the center to form a ruffle.
- Attach Mesh to the UITC Board
- Secure each ruffle to the board using a zip tie through the holes in the board.
Alternate Colors
- Alternate between blue mesh and natural mesh as you attach them around the board.
Continue Around the Board
- Attach all 24 mesh pieces evenly around the board.
Trim Zip Ties
- Cut off excess zip tie tails for a clean finish.
Attach the Wood Sign
- Place the 10 inch wood sign in the center of the wreath.
Secure the Sign
- Attach pipe cleaners to the back of the sign using ¼ inch staples.
- Thread the pipe cleaners through the board and twist tightly on the back.
Fluff and Adjust
- Fluff the mesh ruffles and adjust them to fill any gaps and create an even shape.
Final Check
- Step back and adjust the wreath so the mesh is balanced and symmetrical.
Video
Notes
- Smaller mesh cuts create tighter and cleaner wreath designs.
- Using two mesh colors adds dimension without making the wreath look busy.
- Always attach your sign in at least two places so it stays secure.
- Trim zip ties flush so nothing scratches your door.
Can You Sell a Small Wreath That Uses a UITC Board?
Yes.
Small mesh wreaths are excellent for:
- Seasonal craft shows
- Pop up markets
- Giftable decor
- Entry level price points
Because they use less mesh and fewer supplies, they are cost effective to produce and easy to transport.
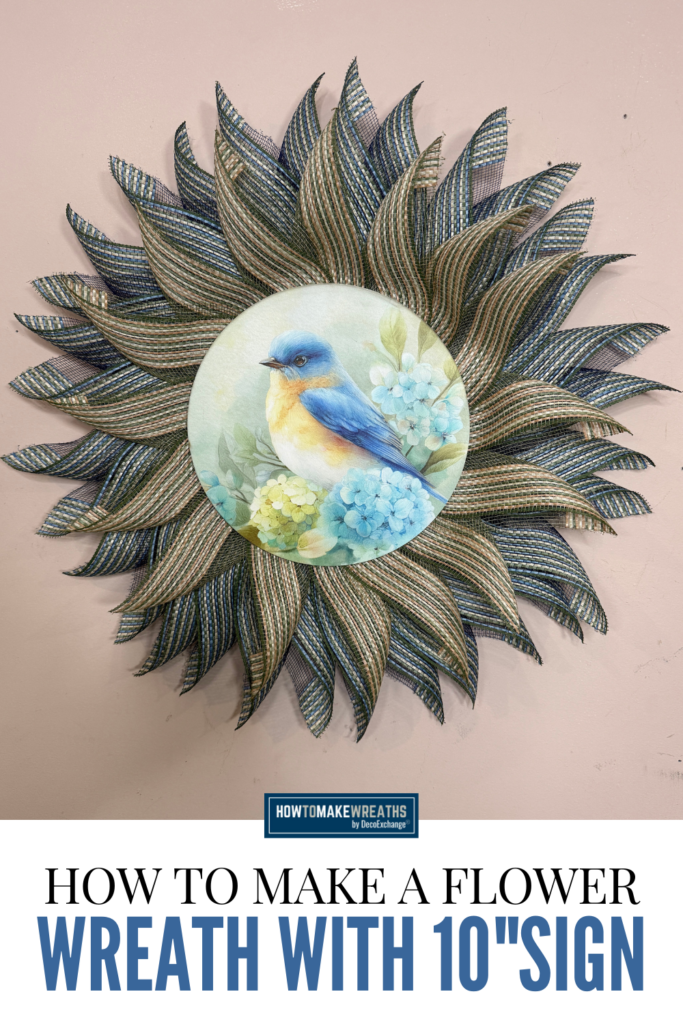
Design Wrap Up
This small mesh wreath with a UITC board and wood sign proves that you do not need a large frame or excessive supplies to create something eye catching.
By combining 10 inch mesh, secure attachment methods, and a simple color pairing, you can create a structured wreath that works for home decor or selling.
If you enjoy projects like this, join Design School at The Makers University to learn more ways to create statement pieces that sell and decorate beautifully.

