
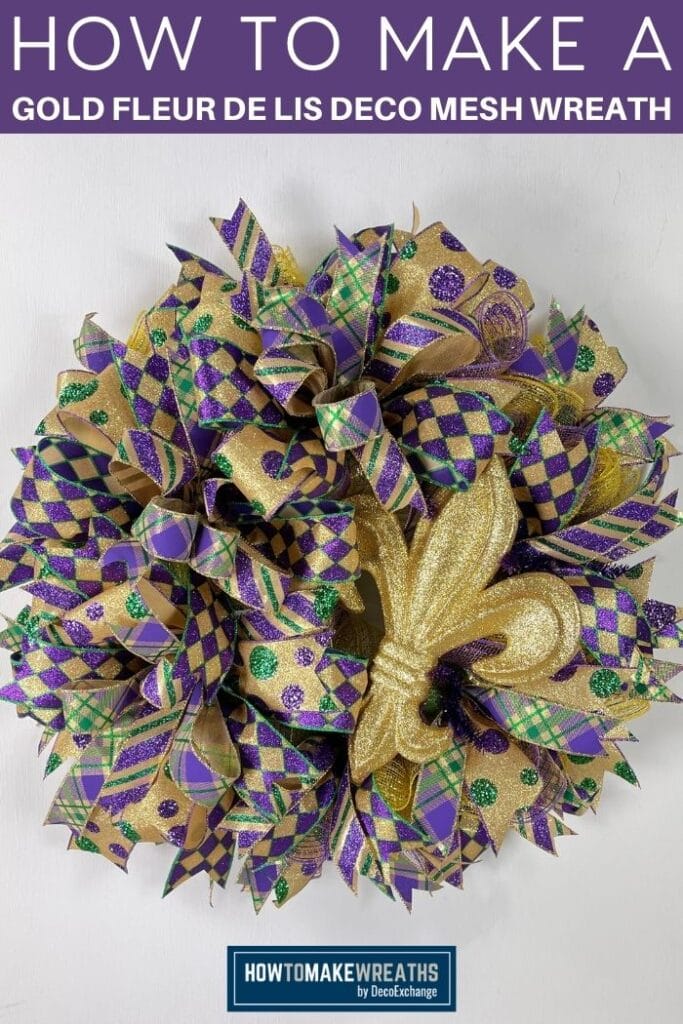
Get your home ready for Mardi Gras by creating your own Gold Fleur De Lis Deco mesh wreath to hang on your front door this Mardi Gras! With the perfect amount of gold and purple, this wreath is exactly what you are looking for!
We have all heard the term, “Life of the Party.” And we all love that friend who holds that fun title. Well, this wreath is the “LIFE of the MARDI!” And I know you are going to love it as much as you do that special friend. Imagine how glorious it would be to actually go to Mardi Gras with that friend. And then imagine how much fun it would be to make this Gold Fleur De Lis Deco Mesh Wreath together when you come home. It would serve as a reminder of that once-in-a-lifetime trip. Y’all I am excited to make this Mardi Gras-inspired wreath right now!
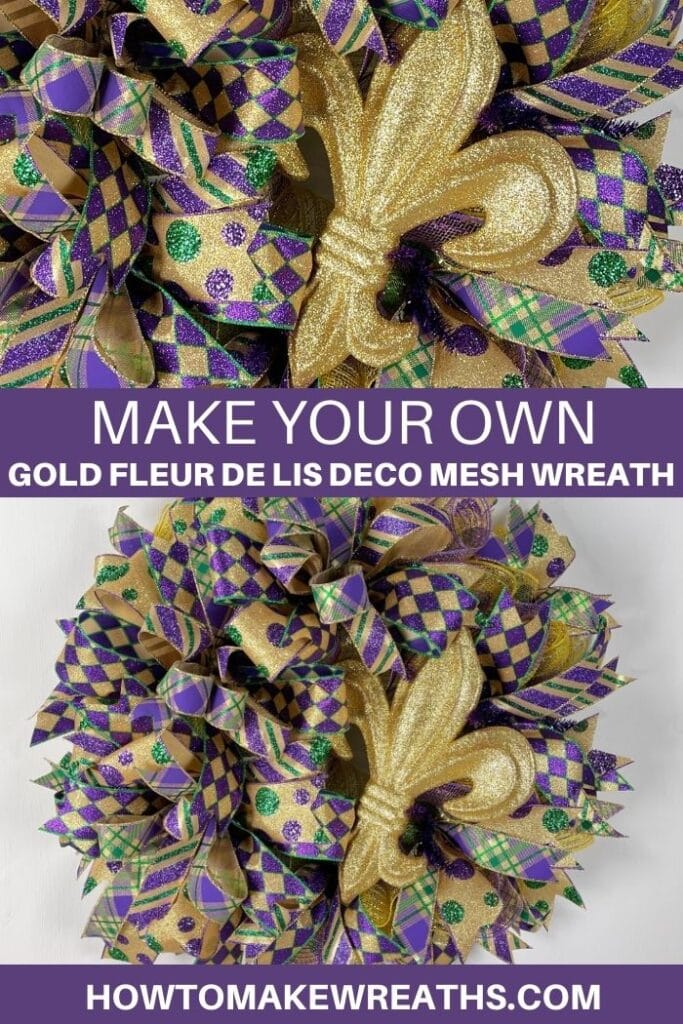
Gold Fleur De Lis Deco Mesh Wreath
Mounds of vibrant colorful mesh, a giant Gold Fleur De Lis, and Mardi Gras colored ribbon just scream a good time. You better believe I am wearing some beads and bling as I create this one-of-a-kind wreath! I don’t know if you have ever been to New Orleans for Mardi Gras and experienced the excitement of it all. But I can promise that after you make this wreath, you will want to for sure. Repeat after me, “Beads and Bling… It’s a Mardi Gras thing!”
In this step-by-step tutorial, I will walk you through how to work with mesh and a wreath form. You will learn how to use an EZ Bow Maker, and how to properly mount any embellishment your heart desires. Even if Mardi Gras isn’t your thing, I know wreath making can be. So stick around and let’s have some fun learning how to make wreaths.
Supplies for Gold Fleur De Lis Deco Mesh Wreath
- 1 wreath form – 15-24” frame, gold tines
- 30″ deco mesh, Mardi Gras Themed Mesh
- 30″ Value deco mesh, Red
- 3” Mardi Gras themed ribbon
- Gold Fleur de Lis
- rotary cutter
- cutting mat
- pipe cleaners
- hot glue gun
- EZ Bow Maker
How to Make a Mardi Gras Inspired Wreath
Step #1:Grab your Mardi Gras-themed 30” mesh and your rotary cutter. Roll out mesh to begin cutting your 18 pieces to insert later into our 18 twist ties on our wreath frame. Each piece will be about 19-20”. Set aside in a pile.
Step #2: Bring your wreath frame over and position those ties so they are ready for the mesh pieces.
Step #3 Once the frame is prepped, grab one 19-20” mesh piece. Roll it up from both ends, to hide any frayed edges. Scrunch together in the center and add 1 of these all the way around your outer edge first. Use your gold twist tines to secure in place. There is no wrong way to add a ruffle.
Step #4: Repeat adding your ruffles into the inner circle. Fluff as you go. Set aside. It should be nice and full now. Don’t you just love all of those vibrant colors?
Step #5: Let’s add our ribbon tails next. You will 9 of each ribbon you are using.
Step #6: Layer ribbon tails, make a V then push it down and pinch in the middle. Push the two sides towards each other. and start adding to your ribbon tails alternating every other one. Work your way around the wreath.
Step #7: Make your bow using the same ribbon as you did for your ribbon tails. Start with a nice little tail, Loops at 6.5, then repeat on the other side. Pull tail down and trim. Add in your second ribbon this time starting with your tail down, making loops at 6 inches, and ending with tail up. Next, add in your third ribbon making your tails about the same length and the loops a tad bit shorter than the last one. Finish off your bow by making a center loop. Secure with a pipe cleaner twisting it nice and tight.
Step #8: Attach the bow using a pipe cleaner then trim your tails up. Making a dovetail
Step #9: Attach the centerpiece to the wreath. First, trim off the string. If using glitter pieces and make sure you don’t see any bare spots. Make sure you make the backside if you see any defects in your glitter attachment. Make pipe cleaners as attachment anchors and then secure to wreath right in the middle.
Step #10: Take a look at your wreath, making any adjustments as needed. Arrange the bows, so your Gold Fleur de Lis is just how you want it. Be sure your loops and ribbon tails look fabulous!
Final Thoughts
“Beads and bling! Gold, purple, and green! I sure do love this Mardi Gras thing.” Ok, so I enhanced that phrase a little bit, but it totally works. It might even catch on. (Help me hashtag it!) Ya’ll you just completed an amazing wreath! Be proud of yourself and what you just created. It is nothing short of specular. Oh yeah… I was just wondering. Did you book your trip to New Orleans? See you and your Life of the Party friend there!
If you need any help with centerpiece-making, bow-making, wreath-making, or crafting in general, be sure to check out more of our tutorials on How to Make Wreaths.
We would love to see your beautiful Mardi Gras decor! Please share with us over at the How To Make Wreaths Facebook Group.


Gold Fleur de Lis Deco Mesh Wreath
Materials
- Wreath form Gold Tines
- Deco Mesh Mardi Gras Themed
- Deco Mesh Red
- Mardi Gras Themed Ribbon
- Gold Fleur de Lis
- rotary cutter
- cutting mat
- pipe cleaners
- hot glue gun
- EZ Bow Maker
Instructions
- Grab your Mardi Gras themed 30” mesh and your rotary cutter. Roll out mesh to begin cutting your 18 pieces to insert later into our 18 twist ties on our wreath frame. Each piece will be about 19-20”. Set aside in a pile
- Bring your wreath frame over and position those ties so they are ready for the mesh pieces.
- Once the frame is prepped, grab one 19-20” mesh piece. Roll it up from both ends, to hide any frayed edges. Scrunch together in center and add 1 of these all the way around your outer edge first. Use your gold twist tines to secure in place. There is no wrong way to add a ruffle.
- Repeat adding your ruffles into the inner circle. Fluff as you go. Set aside. It should be nice and full now. Don’t you just love all of those vibrant colors?
- Let’s add our ribbon tails next. You will 9 of each ribbon you are using.
- Layer ribbon tails, make a V then push it down and pinch in the middle. Push the two sides towards each other. and start adding to your ribbon tails alternating every other one. Work your way around the wreath.
- Make your bow using the same ribbon as you did for your ribbon tails. Start with a nice little tail, Loops at 6.5, then repeat on the other side. Pull tail down and trim. Add in your second ribbon this time starting with your tail down, making loops at 6 inches, and ending with tail up. Next, add in your third ribbon making your tails about the same length and the loops a tad bit shorter than the last one. Finish off your bow with making a center loop. Secure with a pipe cleaner twisting it nice and tight.
- Attach the bow using a pipe cleaner then trim your tails up. Making a dovetail
- Attach the centerpiece to the wreath. First trim off the string. If using glitter pieces and make sure you don’t see any bare spots. Make sure you make the back side if you see any defects in your glitter attachment. Make pipe cleaners as attachment anchors and then secure to wreath right in the middle.
- Take a look at your wreath, making any adjustments as needed. Arrange the bows, so your Gold Fleur de Lis is just how you want it. Be sure your loops and ribbon tails look fabulous!
Video
Just pin this Gold Fleur de Lis Deco Mesh Wreath tutorial to save the instructions for later!
If you’re a dog lover or know someone who is, check out our Support Dog Rescue t-shirts and click on the picture below!


