
Ready to learn how to make a simple Hydrangea Grapevine Wreath that will be great for spring, summer, or fall? With these simple steps, you will indeed be ready to create and make your own wreath using any greenery and florals. Follow along to see how you too can make beautiful wreaths in little to no time.
Y’all. You have finally found it! You have found the answer to all of your design questions and desires. No need to look anywhere else on how to create beautiful wreaths in a small amount of time. This is the design template that you have been searching for to create easy, beautiful, and customizable wreaths. You will learn how to create works of art from start to finish. The bonus is that you will still manage to have a good time crafting too. Needless to say, I am so glad you are here. Let’s get ready to work.
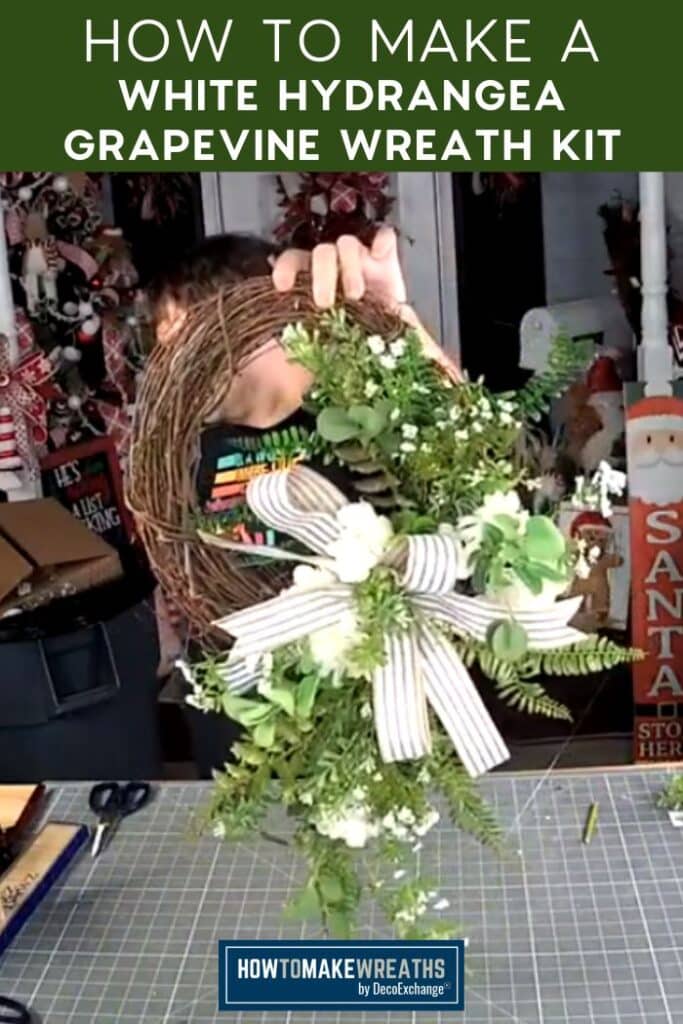
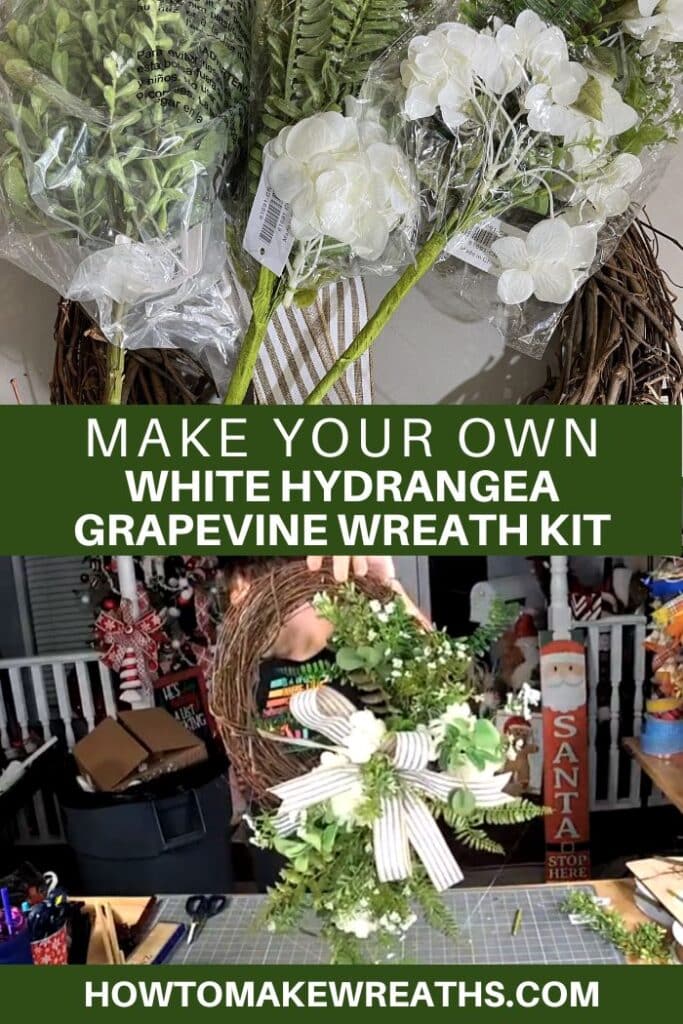
White Hydrangea Grapevine Wreath
Ferns, ribbons, greenery, and a simple little grapevine can just brighten my day. This White Hydrangea Grapevine Wreath kit seems to do that with ease. The best part about it is that you can easily create any style, season, or holiday-themed wreath using these simple steps as a guide.
You may not have the same type of picks, sprays, greenery, or ribbons, as I do. And guess what… that doesn’t matter. I will teach you how to create something beautiful and eye appealing, all with a smile on my face. You will learn how to create something that appears complex in design. But in actuality, it is so very simple and lovely. Do you believe me? I hope so!
In this step-by-step tutorial, I will walk you through how to create this DIY customizable wreath. You will learn how to make a simple bow, piece stems/sprays together, and let your imagination run wild with the possibilities for future crafts. Adding your own sign, large monogram letter, foam embellishments, etc., you can make this wreath so unique. So stick around and let’s have some fun. Hope you are feeling extra creative today!
Supplies for Hydrangea Grapevine Wreath
Here are the supplies you will need for creating this wreath:
- 1 16” oval grapevine wreath
- 5 feet of 2.5” white and burlap ribbon
- White Hydrangea Sprays
- 2 Fern Sprays
- Greenery picks
- Stem cutter
- Hot glue gun
- Cutting Mat
- 12” Pipe Cleaners
- EZ Bow Maker
How To Make Your Own White Hydrangea Grapevine Wreath
Step #1: Let’s begin with our simple bow. Grab your ribbon and measure out an 8” tail. Give it a twist, and measure out your first loop, about 6.5”. Repeat to create your next loop on the other side, pulling back through your easy bow maker. Measure out your tail and trim from the spool.
Step #2: Repeat step 1 for your next layer of the bow, just going the opposite direction this time. Make your loops for this layer a bit smaller, about 5.5-6”. Tie off with your pipe cleaner by twisting tight to hold tight in the center. The excess pipe cleaner we will use to attach to the grapevine.
Step #3: Place your bow onto your grapevine with the pipe cleaner weaved through the guts. Dovetail your ends and fluff your loops and tail so they are nice and fancy.
Step #4: Grab your fern stems and fluff them up. You will notice large gaps throughout the stem. Simply cut your stem in those gaps to give you 3 separate pieces. Work all three of those pieces as a compact bundle into a grapevine. Place it into your guts of grapevine tucked in behind your bow. Keep your angle with your greenery moving up the side of your wreath.
Step #5: With your second stem, keep it in one whole piece. Trim the length of the base of that fern stem because it is way too long to work with. Work into your grapevine on the other side of your bow. It will look bald and that is ok.
Step #6: Grab your other greenery to fill in those gaps up top. Trim pieces from the main bundle. Eyeball where you need to add some pieces in with hot glue on ends to the grapevine. Your top will look much fuller than your bottom to begin.
Step #7: Rotate your grapevine to now work on the bottom section. Repeat adding more greenery pieces into the fern spray. Fill in gaps. Don’t forget to add a tiny piece of greenery into the center of the bow using hot glue.
Step #8: Fill in any spots that are looking bare with your tiny greenery bundles. Fluff and fancy as you work. Remember to secure any spots with your hot glue.
Step #9: You will be left with an open space on your grapevine leaving you the ability to customize your wreath for whatever design/style your client or you desire.
Step #10: Step back and take a look at your wreath. Make any adjustments as needed. Determine from here on out if you want to add anything extra or leave it as is. Be sure your greenery is full and fluffed. Check that your loops and ribbon tails look fabulous!
Final Thoughts
Do you love it as much as I do? Are you already visualizing what you can add in that open space on your grapevine? Or are you pleased with the simplicity of this design? Either way, this design template leaves you with so many possibilities for future craft projects. I told you from the start that you have found the answer to all your crafting questions and desires! I wasn’t kidding. With your personal selections of different greenery, florals, picks, sprays, and ribbons, you can allow for your creative juices to run wild. So excited for all that you can create!
If you need any help with centerpiece-making, bow-making, wreath-making, or crafting in general, be sure to check out more of our tutorials on How to Make Wreaths.
We would love to see your beautiful summer wreaths! Please share with us over at the How To Make Wreaths Facebook Group.


White Hydrangea Grapevine Wreath
Materials
- grapevine wreath base 16" oval
- 2.5" wired ribbon White Burlap
- picks and sprays White Hydrangea Sprays
- greenery sprays Fern sprays, other greenery
- stem cutter
- hot glue gun
- cutting mat
- pipe cleaners
- EZ Bow Maker
Instructions
- Let’s begin with our simple bow. Grab your ribbon and measure out an 8” tail. Give it a twist, and measure out your first loop, about 6.5”. Repeat to create your next loop on the other side, pulling back through your easy bow maker. Measure out your tail and trim from the spool.
- Repeat step 1 for your next layer of bow, just going the opposite direction this time. Make your loops for this layer a bit smaller, about 5.5-6”. Tie off with your pipe cleaner by twisting tight to hold tight in center. The excess pipe cleaner we will use to attach to the grapevine.
- Place your bow onto your grapevine with the pipe cleaner weaved through the guts. Dovetail your ends and fluff your loops and tail so they are nice and fancy.
- Grab your fern stems and fluff them up. You will notice large gaps throughout the stem. Simply cut your stem in those gaps to give you 3 separate pieces. Work all three of those pieces as a compact bundle into a grapevine. Place it into your guts of grapevine tucked in behind your bow. Keep your angle with your greenery moving up the side of your wreath.
- With your second stem, keep it in one whole piece. Trim the length of the base of that fern stem because it is way too long to work with. Work into your grapevine on the other side of your bow. It will look bald and that is ok
- Grab your other greenery to fill in those gaps up top. Trim pieces from the main bundle. Eyeball where you need to add some pieces in with hot glue on ends to grapevine. Your top will look much fuller than your bottom to begin.
- Rotate your grapevine to now work on the bottom section. Repeat adding more greenery pieces into the fern spray. Fill in gaps. Don’t forget to add a tiny piece of greenery into the center of the bow using hot glue.
- Fill in any spots that are looking bare with your tiny greenery bundles. Fluff and fancy as you work. Remember to secure any spots with your hot glue.
- You will be left with an open space on your grapevine leaving you the ability to customize your wreath for whatever design/style your client or you desire.
- Make any adjustments as needed. Determine from here on out if you want to add anything extra or leave it as is. Be sure your greenery is full and fluffed. Check that your loops and ribbon tails look fabulous!
Video
Just pin this Hydrangea Grapevine Wreath tutorial to save the instructions for later!
If you love to craft, check out our Eat. Sleep. Craft. Repeat. t-shirts and click on the picture below!


