
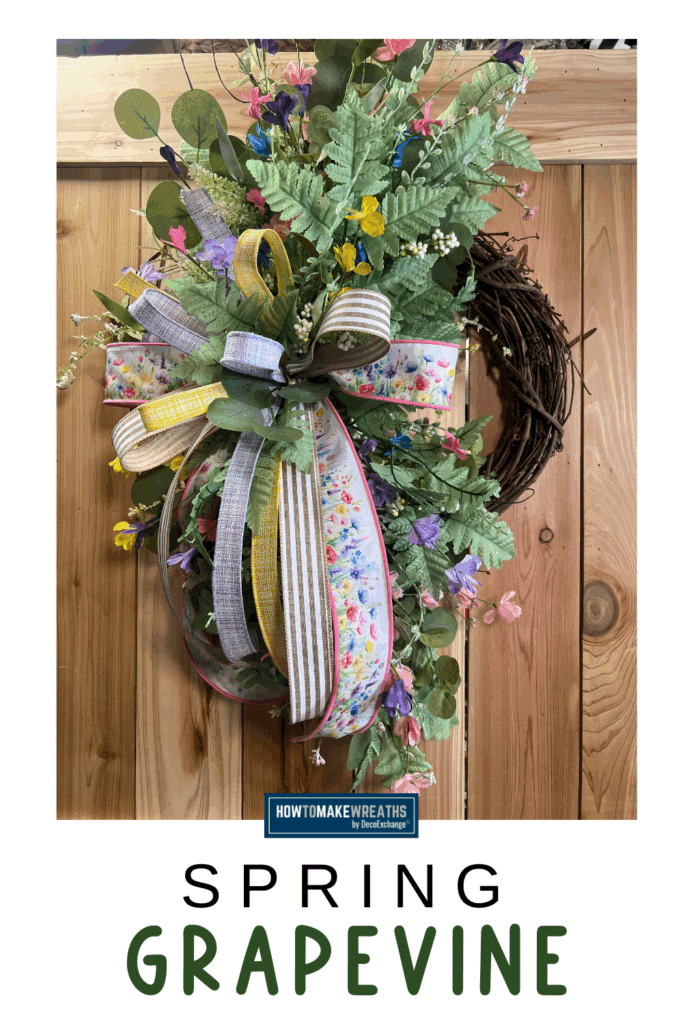
If you are looking for a fresh, lightweight wreath that works beautifully for spring and early summer, this grapevine wreath design is a great place to start. In this tutorial, Jordan walks through how to layer eucalyptus, fabric flowers, and soft ribbon to create a balanced, airy wreath that feels seasonal without being overdone.
This design is perfect for front doors, covered porches, or craft show displays. It is also easy to customize by swapping out colors or ribbon to fit different seasons.

Why Grapevine Wreaths Work So Well for Seasonal Designs
Grapevine wreaths are a favorite base for many designers because they already have natural movement and texture built in. You do not need to completely cover the base for it to look full, which makes it ideal for lighter designs like this one.
The open structure of grapevine also makes it easy to tuck in florals, greenery, and ribbon without needing extra mechanics or heavy wiring.
Supplies Used for This Grapevine Wreath
Here is everything Coach Jordan used to create this design.
Base
Florals and Greenery
- 2 – eucalyptus stems, FP1045 (FG6818E9 alternative)
- 2 – eucalyptus sprays, FH810183
- 2 – fabric flower stems, FH8071C7
- 1- pull apart leather leaf, FG629649
Ribbon
- 1″ yellow ribbon, RGF740729
- 1″ lavender ribbon, RGF740713
- 1.5″ cabana stripe ribbon, Q501809-517
- 2.5″ wild flower ribbon, LS1160
Step by Step Spring Grapevine Wreath Tutorial
Step 1: Prep the Greenery
Start by separating the eucalyptus stems and sprays into smaller sections. This makes it easier to control placement and keep the wreath from feeling bulky. Pull apart the leather leaf so you can layer it naturally throughout the design.
Step 2: Build the Greenery Base
Begin attaching eucalyptus around one section of the grapevine wreath. Work in a loose crescent shape rather than filling the entire wreath. This helps keep the design light and gives the eye a clear focal area.
Layer the eucalyptus stems first, then add the sprays for extra texture and movement.
Step 3: Add the Fabric Flowers
Place the fabric flower stems into the greenery, spacing them so they feel balanced and not clustered too tightly. Let some of the flowers extend slightly beyond the base to create depth.
The softness of the fabric flowers pairs nicely with the natural grapevine and eucalyptus.
Step 4: Create and Attach the Bow
Using all four ribbons, create a layered bow that pulls the colors together. The cabana stripe and wild flower ribbon add personality, while the yellow and lavender soften the look.
Attach the bow where the greenery and florals naturally come together to anchor the design.
Step 5: Final Adjustments
Step back and adjust any greenery or ribbon tails so the wreath looks balanced from all angles. Make sure nothing is sticking straight out or overpowering the rest of the design.
Design Tips for Customizing This Wreath
- Swap ribbon colors to match different holidays or seasons without changing the florals.
- Use this same layout for summer by switching to brighter florals or tropical ribbon.
- Keep part of the grapevine visible so the wreath does not feel too heavy.
Where This Wreath Works Best
This wreath is ideal for front doors, especially on covered porches where the soft florals and ribbon can be appreciated up close. It also works well as a craft show piece since it is lightweight, easy to transport, and appeals to a wide range of customers.
Simple, Yet Polished
This spring grapevine wreath is a great example of how simple materials can come together to create a polished, professional design. By focusing on balance, texture, and color, you can create a wreath that feels seasonal and versatile without overcomplicating the process.
If you enjoyed this tutorial and want to elevate your skills and confidence, check out our Design School Membership.

