
Y’all, Coach Mel is back with an other fabulous design. She’s showing us how to make a spring floral grapevine wreath that is so bright and beautiful!
While we are waiting for the flowers outside to make their grand entrances we can at least be playing with silk flowers in our craft rooms! In the video below, Coach Mel is showing us to made a beautiful spring floral grapevine wreath. This wreath also has a sweet sign that reads “Let love grow”. Love is definitely something we want to see bloom and grow so this sign hits the spot! Go grab your spring floral stash y’all and let’s get crafting!
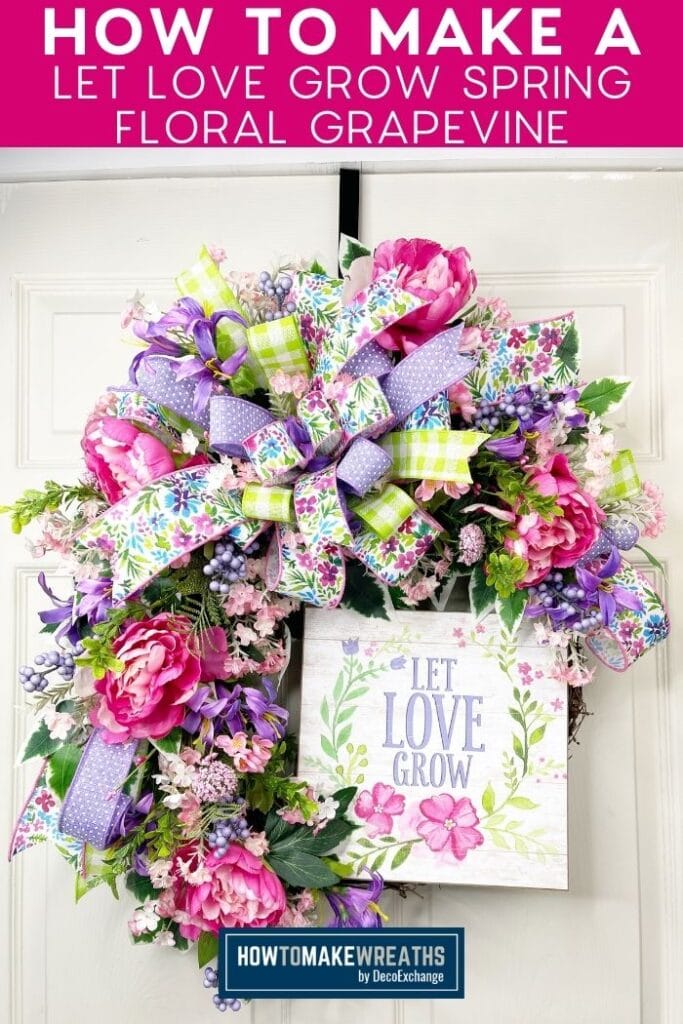
Spring Floral Grapevine Wreath
If y’all are like me you have a big ole stash of florals that you’ve collected over the years. I love hitting the craft stores after season and snagging things on clearance. Then, they go into the piles and bins until that season comes around again. In the video below you’ll see how Coach Mel combines some pieces from her stash with a fabulous sign to make a perfect spring design!
Choosing the florals you want to use is similar to selecting ribbons. You want to look at your sign and notice what colors are there. Then you plow through your floral piles and find shades that will go with your sign. You want to look for a variety of sizes and shapes so that your wreath will have different textures and lots of depth. If, like me, you have a hard time finding what you need in your craft stash we have a post with lots of organizational tips for you. Be sure to check them out!
Tips for adding florals to your wreaths
Y’all know that we love wreath recipes. They are easy to follow and simple to adapt for every season and occasion. When it comes to floral wreaths, however, the recipe gets a bit fuzzy. We can give you the overall guidelines but adding floral pieces to your wreaths is a pretty personal thing. But, that doesn’t mean you can’t learn to do it beautifully, it just takes practice! If you start with a greenery base, move to your largest flowers, then work your way down to your tiny filler flowers, you should be able to create a masterpiece! Just keep at it friends!

Fluffy bow
Instructions
- Take the 2.5" ribbon and measure at 20" tail. Then pinch and twist and make a 7" loop. Continue to pinch, twist, and loop until you have 3 loops on each side. Then measure another 20" tail and trim it from the spool. Place this layer of your bow in the EZ Bow Maker.
- Next use a 1.5" ribbon to make two 6" loops on each side, just like you did with the last layer. Then place it in the bow maker.
- Repeat with another 1.5" ribbon, making 2 5.5" loops on each side.
- Use another 1.5" ribbon to make a little loop for the center and one loop on each side.
- Take two pipe cleaners and twist the ends together to make one long pipe cleaner. Remove your bow from the bow maker and use the long pipe cleaner to secure the center of the bow twisting it off at the back.
Spring Floral Grapevine Wreath
Materials
- grapevine wreath 18" round
- sign/attachment
- pipe cleaners
- staple gun
- craft foam or cardboard
- scissors
- Bow
- hot glue
- ficus stems
- 4 floral stems peonies, small irises, tiny flowers (two kinds)
- Floral balls
- wire cutters or stem cutters
Instructions
- Start by cutting small pieces of craft foam or cardboard. Lay them on the back of the sign where you want them then place a pipe cleaner over it and staple them in place.
- Use the pipe cleaners to secure the sign to the bottom right or left of the grapevine base.
- Add your bow to the top of the wreath on the opposite side of your sign, diagonally from it.
- Trim the ficus stems and use hot glue to attach them to the wreath. These will be your greenery base.
- Trim your peonies into 5 separate pieces and use the hot glue to attach them to the frame evenly around the wreath.
- Next trim your small irises and use hot glue to attach them evenly around the wreath.
- Now trim your tiny flowers and repeat the same process of adding them in.
- Then trim your second type of tiny flowers and use those as filler, using hot glue to attach them to the frame.
- Next, dovetail the ends of your ribbon tails. Take the trimmed pieces and put three of them together and secure the together. Repeat with another 3 tails. Then add them into the wreath with hot glue.
- Trim down the floral balls and add them evenly through the wreath using hot glue.
Video
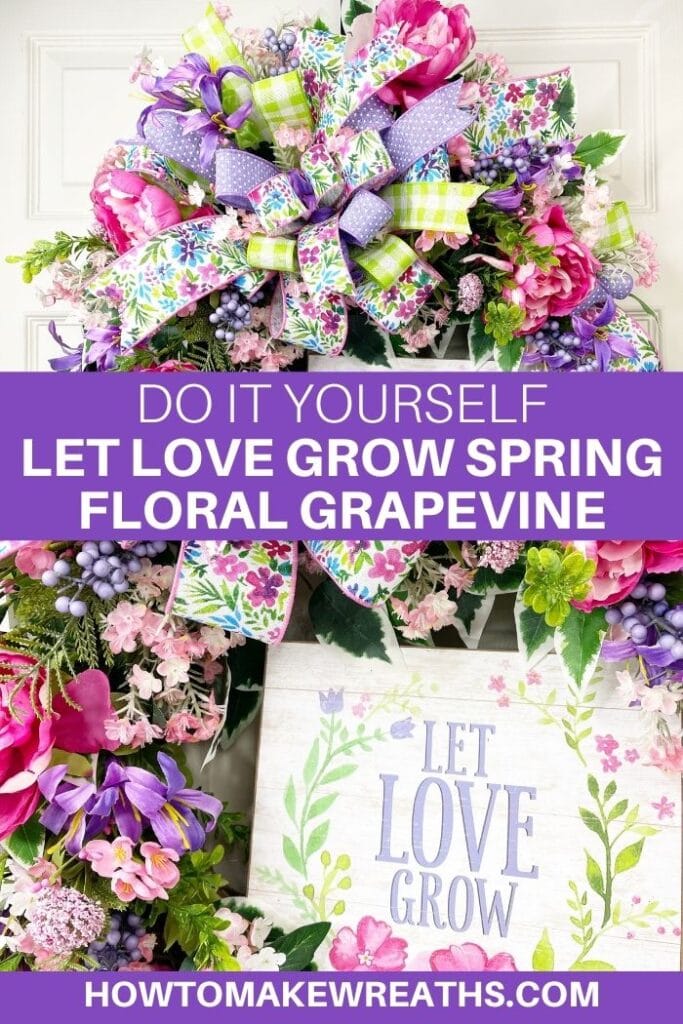
Y’all, this wreath has so much texture and dimension! It is absolutely beautiful. I really love the way Coach Mel worked her extra ribbon into the design. It adds so much to the overall look. I hope you love this project and, remember, don’t let the flowers intimidate you! You’ll be a pro in no time with a little practice!
Just pin this spring floral grapevine wreath tutorial below to find the instructions later!
CHECK OUT MORE GRAPEVINE WREATHS
If you need any help with centerpiece-making, bow-making, wreath-making, or crafting in general, be sure to check out more of our tutorials on How to Make Wreaths.
We would love to see your beautiful summer wreaths! Please share with us over at the How To Make Wreaths Facebook Group.


