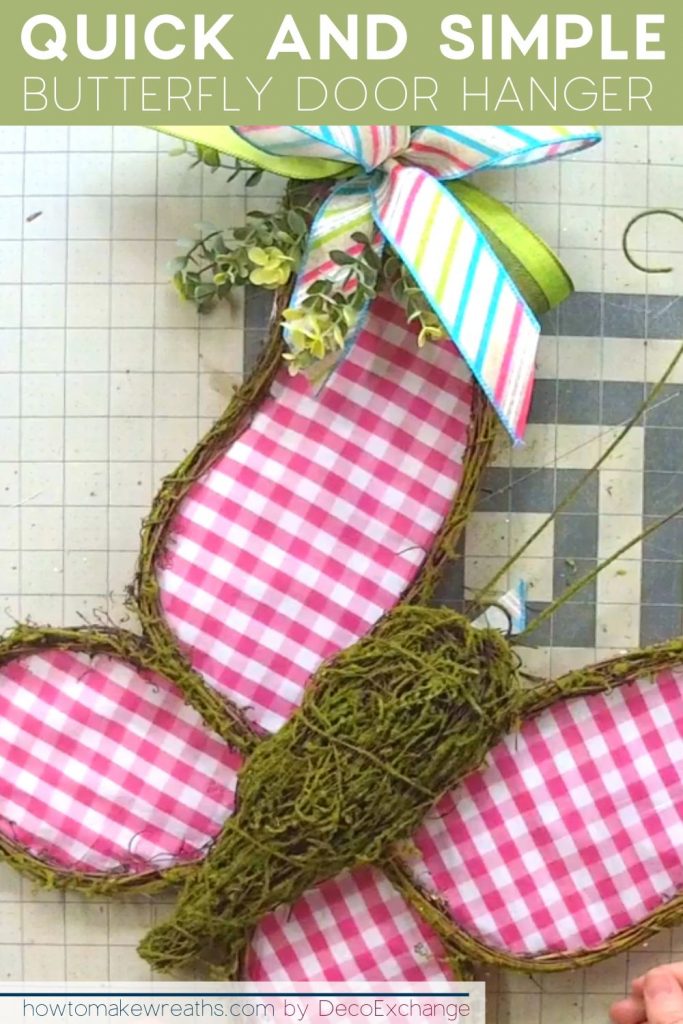
The birds are chirping and the flowers are blooming! If you are looking for a simple and adorable spring project I have just what you need to make this cute butterfly door hanger.
Y’all, this door hanger is so quick to do and it’s a great chance to get creative with greenery. I was still fighting off a cold when I did this video so you also get to see me roll with the punches and fix an “oops moment”. The result is really cute and just goes to show that hot glue and zip ties can fix just about anything!
How to Make a Butterfly Door Hanger
The video below will show you step by step how to make a beautiful butterfly door hanger to welcome spring. It will be sure to brighten up your front door or your business page! You can do it exactly like I did or improvise a little and add your own touches.
I use the EZ Bow Maker to make the perfect bows for this hanger and I give you the secret to keeping those pesky pegs in place (spoiler: it’s super low tech). If you are having difficulties with your bow maker, I did a whole post showing you how to assemble and troubleshoot this handy tool, you can check it out here.
But wait…that’s not all! I also show you how to make a festive St. Patrick’s Day project in this video. I use a grapevine shamrock, fun greenery, and re-purpose some sparkly green and gold Christmas ribbon to make a fabulous shamrock door hanger.
Butterfly Door Hanger Video Tutorial

How to Make a Butterfly Door Hanger
Materials
Instructions
- Get your greenery and your butterfly. Build out greenery at the top of your butterfly wing. Arrange, fluff out, and trim the stems.
- Turn on your glue gun.
- Build out the greenery on the bottom of your butterfly wing.
- Get out your EZ Bow Maker and ribbons.
- Take your 2.5" ribbon, measure 8-inch tail to the top right, 6" loop to the top left, 6" loop to the bottom right, and a tail on the bottom left.
- Take your 1.5" ribbon, measure 8-inch tail to the bottom right, (2) 5.5" loop to the left, and (1) 5.5" loop to the right. Cut the tail.
- With your 2.5" ribbon, cut a ribbon tail, scrunch in the middle, and add with the tail up on the top right.
- With your 1.5" ribbon, measure a 8-inch tail, make a single loop, and end with a tail.
- Take a pipe cleaner and wrap around the center. Tie nice and tight. Fluff out the bow and arrange how you want it to look.
- Take glue gun and hot glue the greenery you added so that it stays in place. Make sure its dry.
- Then get your pipe cleaner from the bow and wrap around the butterfly wing on top of the greenery. Tie nice and tight and trim excess pipe cleaner. Trim the tails of the bow at an angle.
- Add small extra pieces of greenery and hot glue it around the bow.
- Repeat steps 5-12 for the bottom wing of your butterfly door hanger. Only making a smaller version of the bow.
Y’all, this butterfly door hanger is perfect for your front door or to give as a gift! It is also simple enough to create multiples to offer for sale. If you would like some helpful advice about efficiently producing multiples, I put together a blog post about that too!

If you need any help with centerpiece-making, bow-making, wreath-making, or crafting in general, be sure to check out more of our tutorials on How to Make Wreaths.
We would love to see your beautiful spring wreaths! Please share with us over at the How To Make Wreaths Facebook Group.

We Think You’ll Enjoy These Related Posts: