
Christmas is nearing and it is time to get those wreaths made. This define naughty deco mesh wreath will be perfect for anyone who has a sense of humor or looking to give your guest a good laugh! Follow along in this tutorial as I show you exactly how to make one for yourself.
I know you. I know why you are here. You are looking for an adorable wreath that stands out from all the others you see in craft stores. You want something funny and special for the holiday season. Well, look no further. This Define Naughty Deco Mesh Wreath Kit is perfect for you. You may even want to check out the Meet Me Under The Mistletoe Wreath kit. It is a cute little wreath with a fabulous sign too.
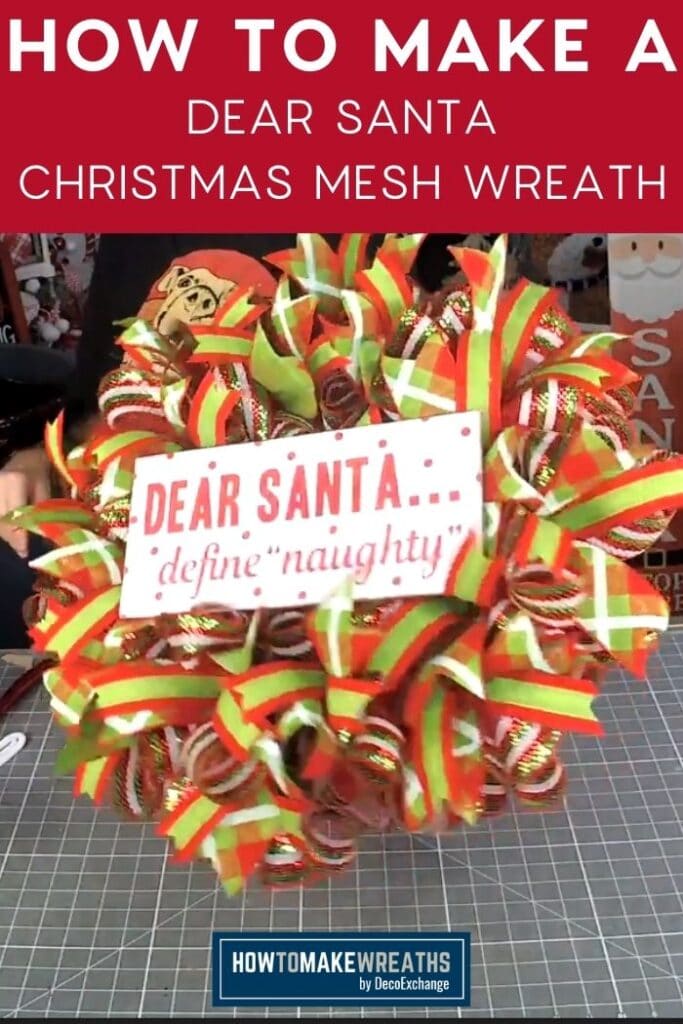
Christmas Deco Mesh Wreath with Funny Santa Sign
“Ho, Ho, Ho!” You know we all want to hear that happy little phrase this Christmas season. The phrase means Santa is pleased with our good behavior for the year. We would much rather hear that than the dreaded, “No, No, No!” That is why this sign is so much fun. Because naughty can be interpreted in so many ways. And fingers crossed, Santa is feeling generous when he stops by your home. At least if he sees this funny little sign, he may be willing to overlook any bad choices you have made!
In this step-by-step tutorial, I will walk you through how to create this one-of-a-kind wreath. You will learn how to work with mesh, a “Unique in the Creek” ring, and a ribbon board maker. I will even show you how to create a simple bow with an EZ Bow Maker. So stick around and let’s have some fun prepping for Santa’s big arrival!
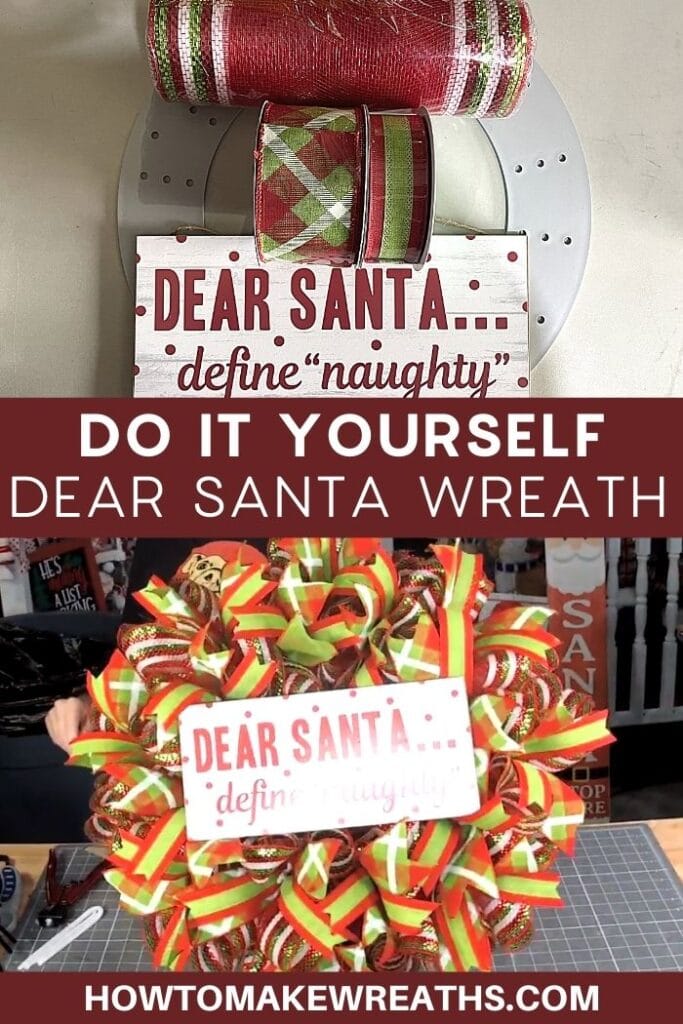
Supplies You Need for this Mesh Wreath
- UITC Ring Wreath Board
- 10″ deco mesh Christmas Themed check fabric
- 2.5″ wired ribbon Christmas themed Ribbon
- 1.5 wired ribbon Christmas themed Ribbon
- sign/attachment Dear Santa Define “Naughty”
- 1″ mounting square
- rotary cutter
- super glue
- cutting mat
- ribbon tail board
- pipe cleaners
- EZ Bow Maker
How to Make Your Own Christmas Deco Mesh Wreath
Step #1: Trim your string from the back of the sign. Grab your Rapid Fuse Super Glue and add 1 dot of superglue in each of the 4 corners of the sign. Add 4 of your 1×1 mounting squares on all 4 corners of your Define Naughty Christmas sign. Place a little dab at the bottom and top, because a little goes a long way. Adhere your mounting squares to the super glue. Set aside.
Step #2: Grab your UITC round board and determine the top – (Spot with 3 holes down the center and 2 on the sides). Place 1 pipe cleaner around to create a regular wreath base. Insert 1 pipe cleaner in top 2 spots in the first location (outside). Alternate to the bottom 2 spots as you move around your wreath base (inside). Alternate top 2 holes then bottom 2 holes as you work, outside and inside of the wreath. Be sure to twist your pipe cleaners 2 times to secure the base. When done, you should have 8 spots for ruffles on the inside and 8 outside for your board – 16 in all.
Step #3 Here is the math for this wreath: 30’/360” mesh roll, divided by 16 twist ties, tells us we can have 22.5” mesh pieces to completely cover our wreath. Sometimes the mesh is not always exactly 30”. It is wise for us to go a little shorter when we cut our pieces smaller than 22.5”
Step #4 With your Christmas Fabric Deco mesh, laying it out on your measuring mat. Cut 16 pieces at 20-21” with your rotary cutter. These will be our inside and outside ruffles.
Step #5: Once cut, grab one 20” mesh ruffle. Roll it up from both ends, scrunch together and add 1 of these all the way around your outer edge first. Use your twist tines to secure in place. There is no wrong way to add a ruffle.
Step #6: Repeat adding your ruffles into the inner circle. Fluff as you go. Set aside. It should be nice and full now.
Step #7: Grab your 13” and 14” ribbon board and the 2 different types of ribbons you will be working with. Wrap your ribbon around the 13” side of the board so that you can create 16 ribbon tails. Cut the ribbon on the sides to have your 16 tailpieces. Dovetail those ends in bulk to skip that step later on. Do this with both sets of ribbons.
Step #8: Place 1 2.5” ribbon on the bottom and 1 1.5” ribbon on top of each other in your hand. Fold in half. Get a nice crease on the edge and pinch. Add 1 of each of these ribbon bundles to every set of twist ties all the way around. Make your pipe cleaner nice and tight to secure. Remove excess pipe cleaner with wire cutters. Then spread out your ribbon tails, so they flare out from your mesh underneath. Remember to do the outside ring first. Set aside.
Step #9: Our Define Naughty sign with glue should be ready to continue. Grab your pipe cleaners, sliding 1 tip into the mounting square, and twist it off. Repeat for all 4 mounting squares on the back of your sign.
Step #10: First eyeball where you want to place your sign. Having a visual plan is always a good idea. I am adding my sign right in the center section of my wreath.
Step #11: Work your pipe cleaners down through the frame in the position you like. When tying down my pipe cleaners, I like to go corner to corner at an angle first, and then complete the other two. Be sure to tie them securely to your frame so they will stay in place. Do not smash your mesh. Set aside.
Step #12: Now for the bow! Trim off any weird ends you might have on your ribbon. Grab your EZ Bow Maker and your 2.5” Christmas ribbon. Measure out about 8” to create your first tail. Give it a pinch and twist before sliding into your EZ Bow Maker. Pull tail down. We’re going to measure our loop out to 6”. Bringing it back through, making another tail of 8”. Cut ribbon. Grab your 1.5” ribbon and repeat, with 2 8” tails and 1 6” inch loop. Your loop for this ribbon layer should be opposite your first layer.
Step #13: For the 3rd and 4th layers, repeat the same ribbon pattern creating smaller loops this time of 5.5”. You may have enough ribbon to create another set of layers or even a whole new bow. You decide what you think will look best.
Step #14: To finish the bow, get 1 pipe cleaner. Give it a good pinch in the center to fold in half. Wrap it around all the layers of ribbon with the center of the pipe cleaner at the top. Hold the layers tight. Holding each side of the pipe cleaner as close to the bow, twist nice and tight. You’ll see the loops and tail start to form the bow. Fluff and adjust.
Step #15: Determine where you want to add your bow. I chose the bottom for this wreath. Secure with a twist tie to your wreath base. Fluff and fancy your loops, reposition your tails if needed, remembering not to smash your beautiful mesh underneath. Dovetail those ends.
Step #16: Step back and take a look at your wreath. Make any adjustments as needed. Arrange the bow, so your sign is not covered. Be sure your loops and ribbon tails look fabulous!
Try Making your own Christmas Mesh Wreath with sign.
There you have it. An adorable Christmas mesh wreath, full, funny, and fancy from start to finish. And that sign… come on! So cute and comical. We all know Santa has a sense of humor right? You still believe in him, don’t you? I know I do! Wink! Wink!
If you need any help with centerpiece-making, bow-making, wreath-making, or crafting in general, be sure to check out more of our tutorials on How to Make Wreaths.
We would love to see your beautiful summer wreaths! Please share with us over at the How To Make Wreaths Facebook Group.

Define Naughty Deco Mesh Wreath Kit
Materials
- UITC Ring Wreath Board
- 10" deco mesh Christmas Themed check fabric
- 2.5" wired ribbon Christmas themed Ribbon
- 1.5 wired ribbon Christmas themed Ribbon
- sign/attachment Dear Santa Define "Naughty"
- 1″ mounting square
- rotary cutter
- super glue
- cutting mat
- ribbon tail board
- pipe cleaners
- EZ Bow Maker
Instructions
- Trim your string from the back of the sign. Grab your Rapid Fuse Super Glue and add 1 dot of super glue in each of the 4 corners of the sign. Add 4 of your 1×1 mounting squares on all 4 corners of your Define Naughty Christmas sign. Place a little dab at the bottom and top, because a little goes a long way. Adhere your mounting squares to the super glue. Set aside.
- Grab your UITC round board and determine the top – (Spot with 3 holes down the center and 2 on the sides). Place 1 pipe cleaner around to create a regular wreath base. Insert 1 pipe cleaner in top 2 spots in first location (outside). Alternate to the bottom 2 spots as you move around your wreath base (inside). Alternate top 2 holes then bottom 2 holes as you work, outside and inside of the wreath. Be sure to twist your pipe cleaners 2 times to secure the base. When done, you should have 8 spots for ruffles on the inside and 8 outside for your board – 16 in all.
- Here is the math for this wreath: 30’/360” mesh roll, divided by 16 twist ties, tells us we can have 22.5” mesh pieces to completely cover our wreath. Sometimes the mesh is not always exactly 30”. It is wise for us to go a little shorter, when we cut our pieces smaller than 22.5”
- With your Christmas Fabric Deco mesh, laying it out on your measuring mat. Cut 16 pieces at 20-21” with your rotary cutter. These will be our inside and outside ruffles.
- Once cut, grab one 20” mesh ruffle. Roll it up from both ends, scrunch together and add 1 of these all the way around your outer edge first. Use your twist tines to secure in place. There is no wrong way to add a ruffles.
- Repeat adding your ruffles into the inner circle. Fluff as you go. Set aside. It should be nice and full now.
- Grab your 13” and 14” ribbon board and your 2 different types of ribbons you will be working with. Wrap your ribbon around the 13” side of board so that you can create 16 ribbon tails. Cut ribbon on sides to have your 16 tail pieces. Dovetail those ends in bulk to skip that step later on. Do this with both sets of ribbon.
- Place 1 2.5” ribbon on bottom and 1 1.5” ribbon on top of each other in your hand. Fold in half. Get a nice crease on the edge and pinch. Add 1 of each of these ribbon bundles to every set of twist ties all the way around. Make your pipe cleaner nice and tight to secure. Remove excess pipe cleaner with wire cutters. Then spread out your ribbon tails, so they flare out from your mesh underneath. Remember to do the outside ring first. Set aside.
- Our Define Naughty sign with glue should be ready to continue. Grab your pipe cleaners, sliding 1 tip into the mounting square and twist it off. Repeat for all 4 mounting squares on the back of your sign.
- First eyeball where you want to place your sign. Having a visual plan is always a good idea. I am adding my sign right in the center section of my wreath.
- Work your pipe cleaners down through the frame in the position you like. When tying down my pipe cleaners, I like to go corner to corner at an angle first, and then complete the other two. Be sure to tie them securely to your frame so it will stay in place. Do not smash your mesh. Set aside.
- Now for the bow! Trim off any weird ends you might have on your ribbon. Grab your EZ Bow Maker and your 2.5” Chrismtas ribbon. Measure out about 8” to create your first tail. Give it a pinch and twist before sliding into your EZ Bow Maker. Pull tail down. We’re going to measure our loop out to 6”. Bringing it back through, making another tail of 8”. Cut ribbon. Grab your 1.5” ribbon and repeat, with 2 8” tails and 1 6” inch loop. Your loop for this ribbon layer should be opposite your first layer.
- For the 3rd and 4th layers, repeat the same ribbon pattern creating smaller loops this time of 5.5”. You may have enough ribbon to create another set of layers, or even a whole new bow. You decide what you think will look best.
- To finish the bow, get 1 pipe cleaner. Give it a good pinch in the center to fold in half. Wrap it around all the layers of ribbon with the center of the pipe cleaner at the top. Hold the layers tight. Holding each side of the pipe cleaner as close to the bow, twist nice and tight. You’ll see the loops and tail start to form the bow. Fluff and adjust.
- Determine where you want to add your bow. I chose the bottom for this wreath. Secure with a twist tie to your wreath base. Fluff and fancy your loops, reposition your tails if needed, remembering not to smash your beautiful mesh underneath. Dovetail those ends.
- Step back and take a look at your wreath. Make any adjustments as needed. Arrange the bow, so your sign is not covered. Be sure your loops and ribbon tails look fabulous!
Video
Just pin this Define Naughty Deco Mesh Wreath tutorial to save the instructions for later!
If you’re a dog lover or know someone who is, check out our Support Dog Rescue t-shirts and click on the picture below!


