
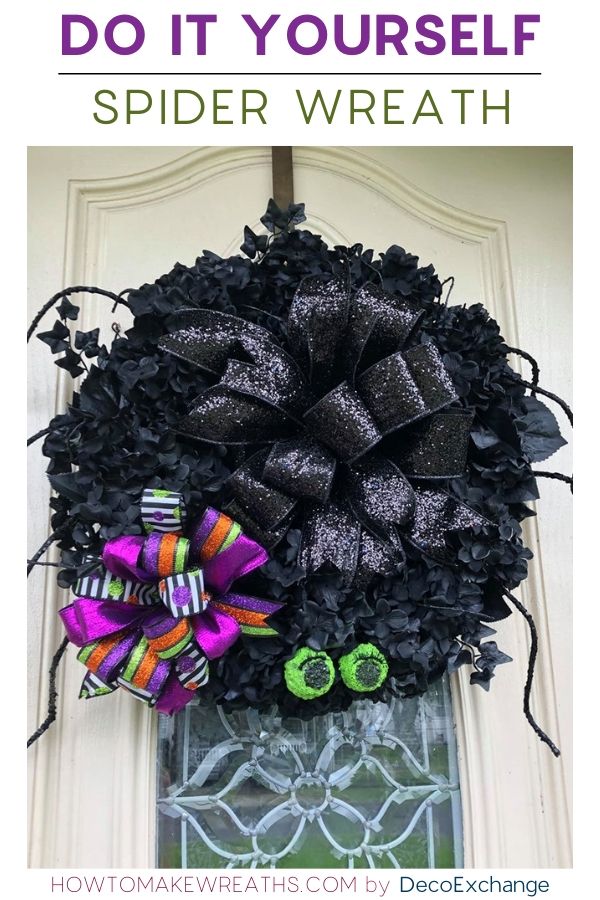
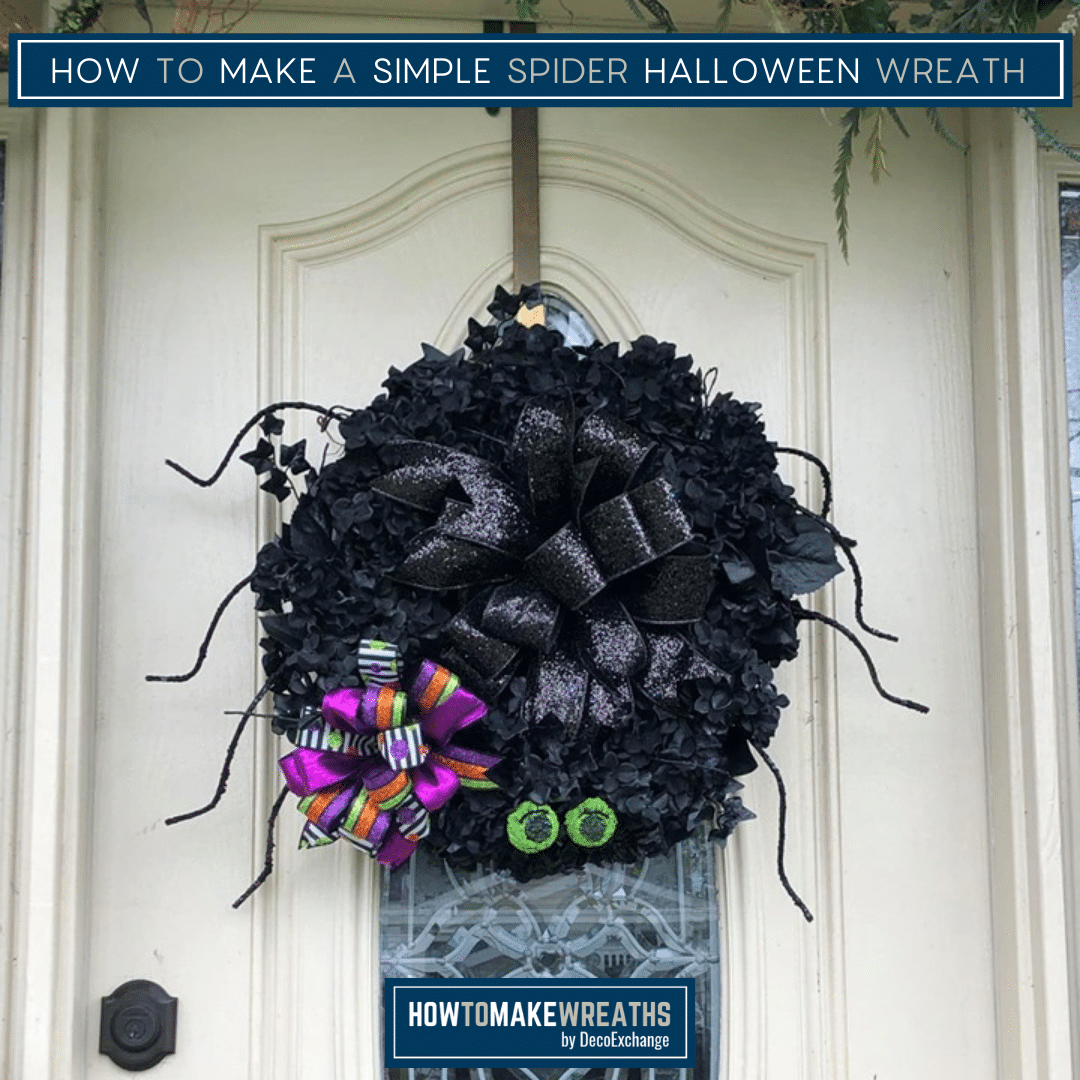
Spiders don’t have to be scary y’all!!! This cute little spider with her fancy hair bow and flirty lashes are proof of that. Silvia Boudreaux from Wreaths by Silvia will walk you through step-by-step in the video on how to complete this Simple Spider Wreath. Since some painting is involved, this project will take a little longer to allow for drying time. You can make this DIY Halloween wreath to sell, keep for yourself, or I’m certain someone would love to receive this as a gift.
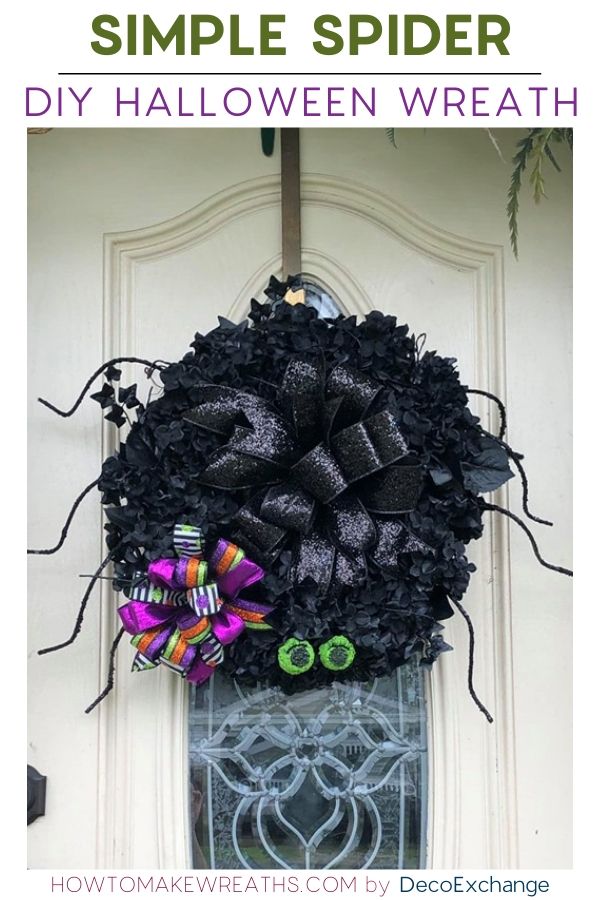
How To Make A Simple Spider DIY Halloween Wreath
This spider Halloween wreath is a prime example of taking what you have and with a few changes, turning it into something awesome! You can let the creativity flow and make something crafty, especially now that it’s almost time for Halloween.
Spider Halloween Wreath Tools and Supplies List
- 3 Hydrangea Wreath bases (“Wreaths of Shame”
 )
) - 18-inch grapevine wreath
- 3 cans Krylon Fusion All-in-One spray paint – 2 Black Satin; 1 Jungle Green Gloss
- (2) 2-inch Styrofoam balls used for the eyes
- Black paint pen for the eye centers
- One set of fake eyelashes – the longer, the better
- 2.5 inch black glittered ribbon for Butt Bow
- 3 varieties – 1.5 inch Halloween ribbon for hair bow
- Black pipe cleaners
- Pro Bow – The Hand Bow Maker and Fluff Box
- 4-6 12-inch black zip ties
- (8) 12-inch pieces of wired Glittered Glamour Rope
- 4-6 pieces of 10-inch black Deco Mesh
- Rubber gloves and mask
- Drop cloth to lay wreaths on during painting and an empty box to place any loose flower blossoms in to make it easier to paint them.
- 2 wooden skewers or leftover wire flower stems to hold the styrofoam eyeballs for painting
- Small square of scrap foam to place the skewers while the eyes dry.
- Wire needed for project:
- (4) 24-inch pieces of 26 gauge wire for the bows (2 for each bow).
- (3) 12-inch 18 gauge wire stems
- (4) 1-inch pieces of standard floral wire
- DAP brand glue
- Wire cutters and scissors.
- Hot glue gun or glue pot
- Pick machine
- Wooden floral picks with wires and floral tape
 )
) – 2
– 2  ; 1
; 1 
 used for the eyes
 for the eye centers
 – the longer, the better

 and
and 
 to lay wreaths on during painting and an empty box to place any loose flower blossoms in to make it easier to paint them.
 or leftover
 and
and  .
. or
or 
 and
and 
DIY Spider Halloween Wreath Instructions
Day One – Prep Work:
*Be sure to use spray paint in a well ventilated area. Wear rubber/plastic gloves and paint mask*
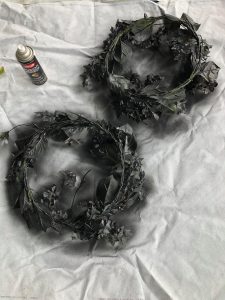
- Layout drop cloth and place hydrangea wreaths and grapevine wreath front side down. Using black spray paint, begin spraying wreaths applying a thorough and even coat of paint. Let dry.

- Place any loose hydrangea blossoms in an empty box and apply a coat of black paint. Shake box while spraying to get better coverage on all sides. Let dry.
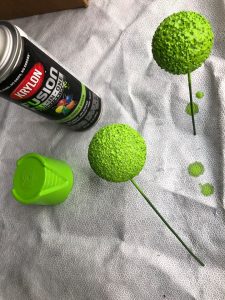
- For the eyes, stick the Styrofoam balls onto the wooden skewers or wire stems and spray with the Jungle Green paint. Stick skewers into foam block to dry.
- Take one set of eyelashes, leaving on the plastic base, and spray with a thin coat of black paint. Let dry and apply maybe one additional coat of paint. You want them to appear longer and thicker.
- While everything dries, let’s make the bows. You’ll need your ribbon selection – 2.5″ glittered black for the Butt Bow and 3 varieties 1.5″ ribbon for the hair bow. You’ll also need the Pro Bow Maker and the Fluff Box (when working with several ribbons and multiple layers, this tool makes the task so much easier to manage, and it’s also a lot easier on your hands). For detailed instructions, check out how to make a wreath bow using a Pro Bow.
- By this time, your painted items should be dry and ready for another coat.
- Flip the wreaths to the front side and spray with black paint making sure to get thorough coverage. Add another coat of black to the eyelashes and loose flowers in the box if needed. And another layer of green to the eyeballs if needed.

Day Two – Assembling the wreath:
- Take black paint pen and form a quarter size circle on each eyeball and fill in completely. Since the foam ball is porous, you may need to push tip of the pen into the divots for better coverage. Let dry.
- Next, you’ll need two 18 gauge wire stems to construct a brace in a cross shape in the center opening of the grapevine wreath. Insert the ends of one stem into the grapevine from left to right. Then insert the end of the second stem in the bottom of the wreath, wrap around horizontal wire once, and insert other end into top of wreath. Hot glue can be added to wire ends for added security.
- Now you’ll begin building the wreath base. Take two hydrangea wreaths, one on top of the other, and start joining them together by staggering and weaving the blooms together to form one wreath. Repeat this step with the third hydrangea wreath until you have one big wreath.
- Use two zip ties to secure them together, clipping the zip tie tails as you go.
- Attach the hydrangea wreath to the grapevine wreath with four zip ties – one each on top, bottom, left, and right.
- Weave the zip ties “through” the grapevine and around the hydrangea wreath. Clip zip tie tails as you go, since everything is black they can be harder to find.
- Then you’ll be building the support for the Butt Bow. You will need the 30 inch pieces of black deco mesh. Take one piece with one end in each hand and curl or roll the ends inward a couple of times. Then gather the remaining mesh bringing the curls together to form a ruffle. Secure in the middle of the ruffle with a pipe cleaner. Repeat this step with remaining pieces of mesh.
- Attach the ruffles to the wire cross brace in the grapevine center. Use 4-6 ruffles depending on how full you want the center to be.
- Next, attach the bows. Add the Butt Bow to the wreath by weaving the pipe cleaners through the mesh and twisting them snugly around the wire cross brace. Pick a bare spot in the flowers to place the hair bow and twist pipe cleaners around wreath.
- To finish the eyeballs, you’ll need to add some DAP Glue to the eyelashes and place on the foam balls to achieve the look you want. Although it may be easier to add glue to the foam ball and use a toothpick to position the eyelashes.
- Next, cut 4-1″ pieces of floral wire and form a U shape. Using two per eye, push U pins over the ends of the eyelash for added security.
- To attach the eyeballs to the wreath, take an 18 gauge wire stem and fold in half. Using the pick machine, add a pick to the bent end of the wire (A wooden floral pick will also work if you don’t have a pick machine).
- Add a dab of hot glue to the ends of the wire and insert one end into the back of each eyeball. Add hot glue to the pick and insert into the wreath near the hair bow.
- Fill in any gaps or thin areas with the loose hydrangea blossoms. Group two or three blossoms together, add a pick and hot glue, then add to the wreath. A few smaller floral pieces can be saved to cover the picks used in the next and final step.
- Finally…your spider needs some legs. You will need the 8-12 inch pieces of black wired Glittered Glamour Rope. Add picks to one end of each leg, then bend legs in the middle to form a soft U shape. “Before” gluing, push the picks into the grapevine wreath to get the desired placement for the legs. Then one at a time remove each leg, add glue, and place back in original position. To form a little foot, bend a soft “L” shape about 1.5 inches from the end of each leg.
And that’s it ya’ll! You have made a cute and simple Spider Halloween Wreath!!! It does take a little more time to complete than most wreaths, but would make a nice weekend project. And a great way to re-purpose those “Wreaths of Shame.”
Share some of your Halloween-themed wreaths with us over at the How To Make Wreaths Facebook Group. We’d love to see all your creations! If you are interested in more info on learning how to make wreaths, where to buy supplies, and being in a community of like-minded crafters, check out our Creative Coaching Subscription Group.
PS – Shop DecoExchange today and use this link and it’ll automatically take 10% off of $100 for you! Happy Shopping!


Absolutely had a blast making this…. thanks DecoExchange for the challenge.
This wreath is so cute, just love it ??
I love the spider. Awesome job
Love it
Silvia is a great designer. If I did Halloween I’d want this and I hate spiders! Love these blogs
so cute