
If you’re new to bow-making, the process may seem intimidating. Learn how to make a wreath bow using the Pro Bow to help save time and eliminate stress as you grow your wreath-making skills.
Hey, y’all! Bows are one of the most important parts of a homemade wreath. And, they work double duty because not only do they cover up unsightly areas such as places where you insert greenery or picks, but they add great visual appeal and tie all the elements of your design together.
Unfortunately, learning how to make bows can be a stumbling block for many new wreath makers. I have great news, though – they aren’t as intimidating as you might think!
Different Tools To Use To Make Wreath Bows
I’ve been working hard to change that misconception by sharing some helpful tutorials on different ways to make bows. While you can make a bow by hand, there are terrific tools you can use as you work to get more comfortable with the process such as the EZ Bow Maker and The Pro Bow Maker.
Did you already catch our video tutorial on the EZ Bow Maker? If not, make sure to watch that next.
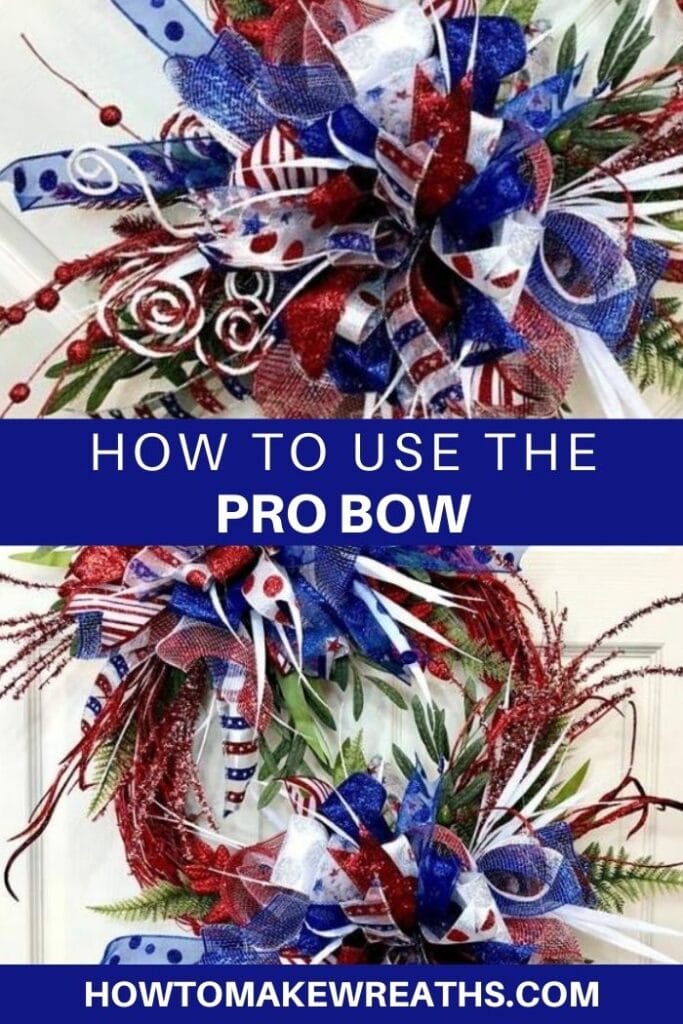
In today’s post, we are focusing on how to make a wreath bow using the Pro Bow.
Tip: If you have to craft multiple bows, both tools will help you save time and eliminate frustration. Check out our Top 3 Bow Making Tools to help get you started on your journey toward bow-making success.
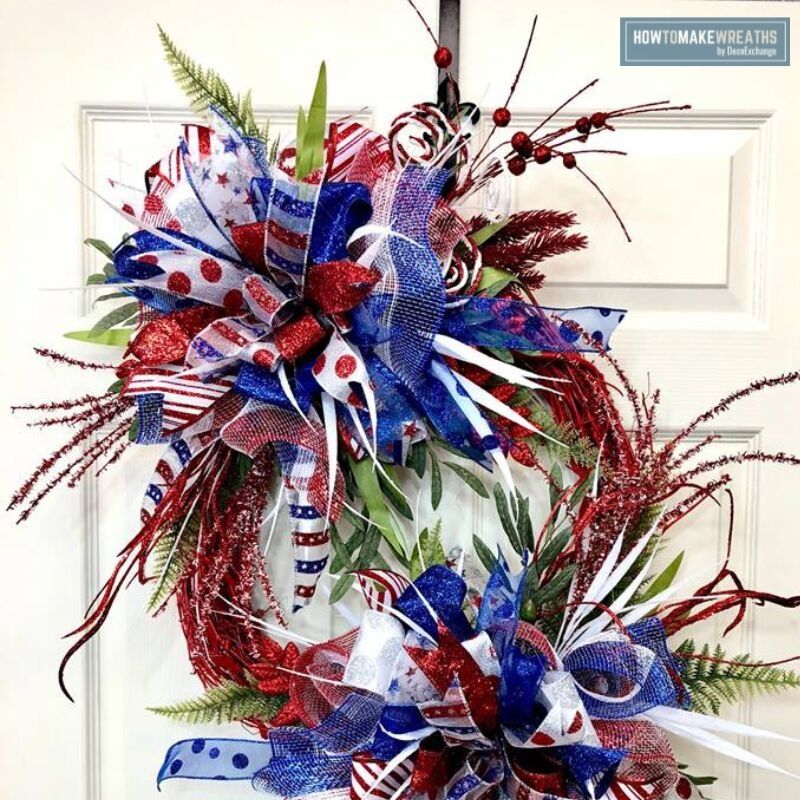
FYI, most of the time these days you’ll see me using the EZ Bow Maker, but there was a time that I would pull out the Pro Bow for projects like the one pictured below. Everyone has their own preferences, so I like to show both ways!
Ok, let’s dive in and see how to make a wreath bow with the Pro Bow.

How To Make A Wreath Bow Using The Pro Bow
Remember you can use this tutorial for any type of wreath. We went with a patriotic theme for this one. But, if you want to make a wreath bow for different seasons or holidays, all you need to do is switch out your ribbons to fit the season or occasion.
Take a look at some of our Creative Coaching members’ wreaths at the end of the post. They are GORGEOUS!
Supplies Needed
Here’s what you’ll need to make a wreath bow. I’ve included handy links to help make finding what you need faster and easier.


Video Tutorial
These steps may seem tedious at first, but they’re simple and easy to follow. Once you start and practice a little, you’ll be able to make professional wreath bows in your sleep!
Instructions
In case you’re better at following written instructions than a video, here they are!
Step 1
Start by measuring out a piece of 24-inch wire. You’re going to need to cut and have 2 of these per bow.
Step 2
Next, take your first ribbon of choice and set it aside. Grab one of the wires that you just cut and fold it in half. Measure the ribbon out about 6 inches, give it a pinch, and tie it off with the wire.
Step 3
Take that ribbon and wrap it around your center peg. Give it a little pinch on the bottom then tie it with the wire and wrap the wire around the bottom peg. Tie it off on the top. Doing this gives you a center loop.
Step 4
Now it’s time to add your second wire. Take the second piece of cut wire and fold it in half. Work it through the bottom of the ribbon that is the newly created center ribbon and twist it off using the wire.
Step 5
Take your ribbon and loop up and around the center ribbon and around the next pegs on the left and right of the center ribbon. Then, tie it off at the bottom.
Step 6
At this point, you’ll do the same with your third ribbon as well. Follow the same steps of grabbing your third wire, folding it in half, circling around the bottom center loop and around the next two pegs on the left and right that are currently empty.
Step 7
For the final step of using up the four cut wires, repeat the same process with the fourth ribbon and fourth wire.
Step 8
Do these steps over and over again until you’ve come to the end of the pegs. On the final peg, I like to use two ribbons at a time (instead of just one) and loop around the bottom and tie it off just to give it a bit of extra pizzazz.
Step 9
Once tied, pull off the pegs and you’ve created your very own wreath bow!
See how simple and easy it can be to learn how to create a wreath bow?
Would you like to learn how to make the entire wreath pictured above? Check out our free patriotic wreath tutorial by clicking here.
More On How To Create A Wreath Bow: See Some Members’ Creations!
We love highlighting our members’ creativity through their beautiful products. Here are a few recent examples we received.


FAQs
Here are a few answers to questions I frequently see readers ask to help you out even more!
Is the Pro Bow easier than the EZ Bow Maker?
The answer regarding which one is easier or better is really a matter of opinion. Both of these bow makers (and all the bow-making tools) are terrific tools for wreath makers, and can help make the process of creating bows easier.
The best one for YOU will be the one that you’re most comfortable using!
Can I use different sizes of ribbon with the Pro Bow?
Yes, definitely. I’ve used ribbons in every size up to 4 inches in the Pro Bow without any problem at all.
Here’s More Wreath-Making Inspiration
If you love making wreaths, check out these other popular design tutorials.
- How To Make Bows: 6 Bow-Making Tutorials You Need
- How To Make A 3-2-1 Layered Bow
- Handmade Bow Tutorial: The Damon Bow
- How To Make A Bow For A Wreath
- How To Make A Simple Bow: A Tutorial By Parker
If you haven’t joined our Facebook group How To Make Wreaths Facebook Group, make sure you head on over there. Share your latest design!
If you need any help with centerpiece-making, bow-making, wreath-making, or crafting in general, be sure to check out more of our tutorials on How to Make Wreaths.
Finally, if you’re interested in more info on learning how to make wreaths, where to buy supplies, and being in a community of like-minded crafters, check out our Creative Coaching Subscription Group.


How To Make A Wreath Bow With The Pro Bow
Instructions
- Start by measuring and cutting 2 pieces of 24-inch wire for each bow you want to make.
- Take your first ribbon and fold one of the wires that you just cut in half. Measure 6 inches of ribbon, pinch it in the middle, and tie it off with the wire.
- Next, wrap that ribbon around your center peg. Give it a little pinch at the bottom and tie it with the wire. Then wrap the wire around the bottom peg and tie it off on the top. This will be your center loop.
- Now take the second piece of cut wire and fold it in half. Work it through the bottom of the newly created center ribbon and twist it off using the wire.
- Loop your ribbon up and around the center ribbon and around the next pegs on the left and right of the center ribbon. Tie it off at the bottom.
- Repeat the same process with your third ribbon. Grab your third wire, fold it in half, circle it around the bottom center loop and around the next two empty pegs on the left and right.
- Repeat the same process one more with the fourth ribbon and fourth wire. Do these steps over and over again until you’ve come to the end of the pegs.
- I like to use two ribbons at a time on the final peg to give the bow a bit of extra pizzazz. Tie it off.
- Once tied, pull off the pegs and you have a wreath bow!
Just pin this wreath bow on the Pro Bow tutorial below to find the instructions later!
If you’re a dog lover or know someone who is, check out our Support Dog Rescue t-shirts and click on the picture below!


I still have my Pro Bow but I purchased the EZ Bow Maker last year I think but haven’t used it yet. I haven’t made a wreath in months. When I need to make another bow I will try the EZ Bow Maker. I’m glad that y’all are giving everyone options to choose what works for them
These videos are so nice! Thank you guys so much and thank you Parker for all your hard work on the blog! I started by using the EZ bow maker and really liked it. I purchased a Pro Bow because I had a hard time making a certain kind of bow. I am still practicing and Damon’s videos are really helpful. In the end I can’t tell the difference between an EZ bow maker bow, a Pro Bow bow or a hand bow bow or whatever other kind of bow maker there is out there. Its all about Patience, Practice… Read more »
glad you enjoy this! feel free to share! much love.
Never had one but looks pretty complicated and time consuming and frustrating, I use the ez bow maker
we love our EZ bow too – theres a tool for everyone out there… Thanks for reading!
It’s great I enjoyed it!
thanks for reading – feel free to share!
Love my Probow and y Easy Bowmake! Wonderful video and instructions.
glad you liked it feel free to share.
Love the ProBow, and the EZ Bow maker, it depends on what type of look I want for that particular wreath or centerpiece I am working on, love the video, it’s different on how I use my ProBow so it was educational thanks!
thanks for watching! appreciate you taking the time to comment.
All posted videos are very helpful. Thank you for your generosity and kindness in sharing!!
Thank you for taking the time to provide excellent step by step instructions! While not my personal choice for a bow maker, I definitely appreciate y’all taking the time to show other options!
Love how you make it look so easy.
Damon and Parker I really like your new website
I check every day to see what I can learm..
I prefer the Pro Bow to the EZ Bow Maker. Your ribbon length is more consistent and the bow seems tighter. The bows are neater looking. I have a Pro Bow and LOVE it. No EZ Bow maker for me.
Glad you found something that works for you