This simple sunflower grapevine wreath is a beautiful reminder that fall is just around the corner. Follow my steps below for an easy project with great results each time!
It’s FALL y’all! And to say I am excited would be a total understatement! That is why I am sharing with you today how to make a simple sunflower grapevine wreath. All the yellows, the oranges, browns, and those deep reds, I just love them! Combined together in a fall grapevine wreath they are just perfection. I also love that during this season, nature teaches us a simple truth. With little or drastic change, everything and anything can be beautiful! Good reminder for us who might be dealing with some hard things in our life. I know I will think about that reminder every time I walk by this beautiful wreath. Change is beautiful!

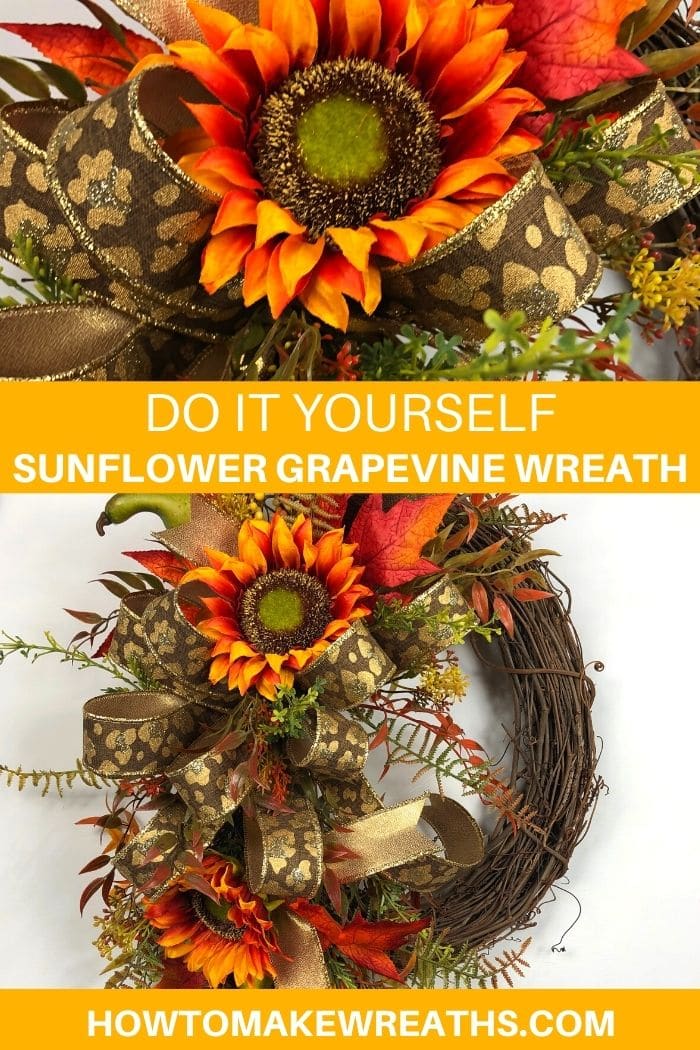
Create your own Simple Sunflower Grapevine Wreath
With this project, I will show you step by step how to work with each material provided in this kit, create a hand bow, and use every piece with no waste. Did I mention that we can create this magnificent wreath in under 30 minutes? Do you believe me? Go get your stopwatch ready. Let’s get started!
Supplies for Simple Sunflower Grapevine Wreath
Here are the supplies you will need for creating this wreath:
- grapevine wreath 18″ Oval
- floral picks sunflower
- 2.5″ wired ribbon Leopard and gold
- greenery sprays fall colored bush
- scissors
- cutting mat
- zip ties
- pipe cleaners
- wire cutters
- hot glue gun
How to Make a Simple Simple Sunflower Grapevine Wreath
Step #1: Let’s begin with our bow. This will be made by hand, so don’t stress. I will teach you! When creating a bow follow the motto, “Pinch it, twist it, and loop it.” Grab your leopard and gold ribbon. Measure out 15” inches to form your first tail. Pinch it, twist it, and make your first loop measuring about 11”.
Twist and repeat to make your next 11” loop. You can measure or just eyeball it. Twist your ribbon and begin your next layers of loops repeating the steps to form 3 more loops, at 13” this time. Repeat with the pinch, twist, loop to create another 2 loops, measuring about 15” this time. You should have 8 total loops for this bow. With your remaining ribbon, cut off any excess from your 2nd tail that should measure 15”. Set excess ribbon aside, we will use it later. Fluff, manipulate your loops and tails before you officially tie them down. Grab your zip tie and secure your bow in the center. Trim excess zip tie.
Step #2: Secure your bow to the grapevine with a pipe cleaner on the left side. Work your pipe cleaner down through the guts of the grapevine. Secure over the top center of the bow where you just zip-tied. Then, pull the pipe cleaner down through the grapevine again. Flip grapevine over and twist pipe cleaner tightly.
Step #3 You add your bow first so we don’t have to hide a lot of stems or trim them either from your picks. Grab your 1st sunflower pick and slide the stem back behind the top of your bow. Weave down through your grapevine. Place the second sunflower pick the same way, just on the opposite side of your bow. Hot glue your picks in places to secure.
Step #4: Next, trim your tails on your ribbons, with a dovetail effect.
Step #5: Now it is time to grab your fall-colored bush, and trim the 9 sections all the way down to the base with wire cutters. Gives you several bundles to work with. Pull your greenery to the top of stems to make them nice and full.
Step #6: Add hot glue to your stems, work your greenery around the top of the grapevine behind the bow and sunflower pick. Use a triangular motion as you add your 3 picks, building depth, dimension, and fullness. Repeat underneath your bow as well. So simple and so beautiful. You should only use 6 total bundles for this part.
Step #7: With the excess ribbon we have leftover, measure out 2 15” pieces. There should be another excess section of ribbon Set aside.
We will create 2 tails. Grab a pipe cleaner and cut it in half. Determine where you want to add your 2 tails. I placed 1 pipe cleaner behind the sunflower pick to start. With the gold side facing out since our bow was the leopard side showing.
Step #8: We will create 2 tails. Grab a pipe cleaner and cut it in half. Determine where you want to add your 2 tails. I placed 1 pipe cleaner behind the sunflower pick to start.
Step #9: We will use the gold side facing out for these tails since our bow was the leopard side showing. Find the center of the ribbon and pinch as you secure with a pipe cleaner to your grapevine. Dovetail your ribbon tail ends.
Step #10: Grab the second ribbon tail and the excess part of the ribbon so there is no waste for this project. Fold ribbon tail in half with gold showing and the leopard part showing for that third tail look. Pinch in place and secure to the grapevine with a pipe cleaner on the opposite side of the bow. The length of your third tail adds a nice touch. Dovetail those ends.
Now how long did that take us? Not long at all, right? Now you have a beautiful, simple sunflower grapevine wreath to hang on your front door this fall!
Make Simple Wreaths Like These!
The best part about these tutorials is that they can be repeated with different florals and ribbons. Once you learn the techniques and where to place your items into a grapevine you can keep making wreaths for different seasons, and holidays. If you are new to wreath making then this is a simple one to start with if you are looking to have some quick wins to sell in your pop-up shop.
If you need any help with centerpiece-making, bow-making, wreath-making, or crafting in general, be sure to check out more of our tutorials on How to Make Wreaths.

Learn how to start, operate, and scale your creative business!
Get more info about business and creative coaching at The Makers University.

Simple Sunflower Grapevine Wreath
Materials
- grapevine wreath 18" Oval
- floral picks sunflower
- 2.5" wired ribbon Leopard and gold
- greenery sprays fall colored bush
- scissors
- cutting mat
- zip ties
- pipe cleaners
- wire cutters
- hot glue gun
Instructions
- Let’s begin with our bow. This will be made by hand, so don’t stress. I will teach you! When creating a bow follow the motto, “Pinch it, twist it, and loop it.” Grab your leopard and gold ribbon. Measure out 15” inches to form your first tail. Pinch it, twist it, and make your first loop measuring about 11”. Twist and repeat to make your next 11” loop. You can measure or just eyeball it. Twist your ribbon and begin your next layers of loops repeating the steps to form 3 more loops, at 13” this time. Repeat with the pinch, twist, loop to create another 2 loops, measuring about 15” this time. You should have 8 total loops for this bow. With your remaining ribbon, cut off any excess from your 2nd tail that should measure 15”. Set excess ribbon aside, we will use it later. Fluff, manipulate your loops and tails before you officially tie them down. Grab your zip tie and secure your bow in the center. Trim excess zip tie.
- Secure your bow to the grapevine with a pipe cleaner on the left side. Work your pipe cleaner down through the guts of grapevine. Secure over the top center of the bow where you just zip tied. Then, pull the pipe cleaner down through the grapevine again. Flip grapevine over and twist pipe cleaner tightly.
- You add your bow first so we don’t have to hide a lot of stems or trim them either from your picks. Grab your 1st sunflower pick and slide the stem back behind the top of your bow. Weave down through your grapevine. Place the second sunflower pick the same way, just on the opposite side of your bow. Hot glue your picks in places to secure.
- Trim your tails on your ribbons, with a dovetail effect.
- Grab your fall colored bush, and trim the 9 sections all the way down to the base with wire cutters. Gives you several bundles to work with. Pull your greenery to the top of stems to make them nice and full.
- Add hot glue to your stems, work your greenery around the top of the grapevine behind the bow and sunflower pick. Use a triangular motion as you add your 3 picks, building depth, dimension and fullness. Repeat underneath your bow as well. So simple and so beautiful. You should only use 6 total bundles for this part.
- With the excess ribbon we have leftover, measure out 2 15” pieces. There should be another excess section of ribbon Set aside. We will create 2 tails. Grab a pipe cleaner and cut it in half. Determine where you want to add your 2 tails. I placed 1 pipe cleaner behind the sunflower pick to start. With the gold side facing out since our bow was the leopard side showing.
- We will create 2 tails. Grab a pipe cleaner and cut in half. Determine where you want to add your 2 tails. I placed 1 pipe cleaner behind the sunflower pick to start.
- We will use the gold side facing out for these tails, since our bow was the leopard side showing. Find the center of the ribbon and pinch as you secure with pipe cleaner to your grapevine. Dovetail your ribbon tail ends.
- Grab the second ribbon tail and the excess part of the ribbon so there is no waste for this project. Fold ribbon tail in half with gold showing and the leopard part showing for that third tail look. Pinch in place and secure to the grapevine with a pipe cleaner on the opposite side of the bow. The length of your third tail adds a nice touch. Dovetail those ends.
Video
Just pin this Simple Sunflower Grapevine Wreath tutorial to save the instructions for later!