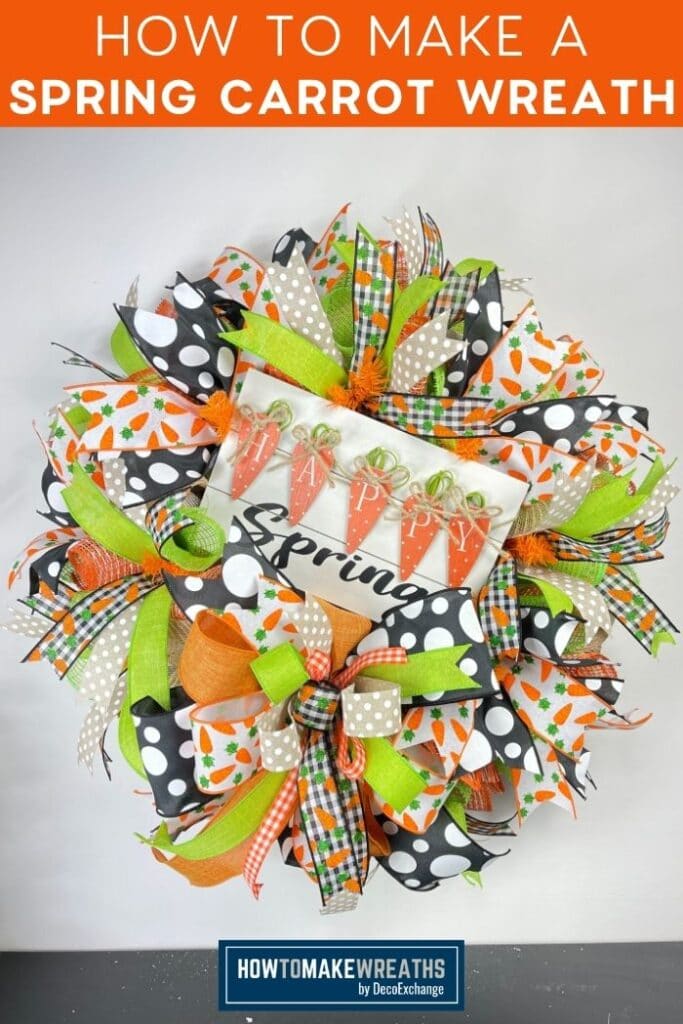
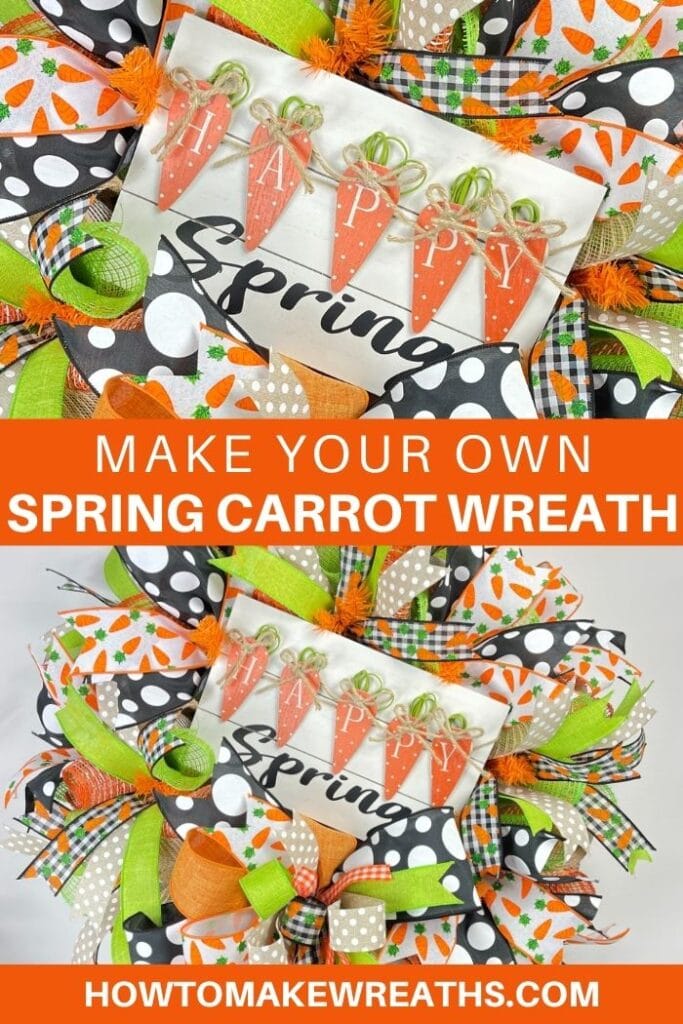
Is your front door looking a little bare? Not to worry, we’ve got the perfect solution! Today we’ll be showing you how to make a spring carrot wreath. This is a great project for any crafters out there, and it’s really easy to do. So let’s get started!
Who’s ready for Spring? I can’t wait! The flowers are just so lovely. All the new blooms make my heart happy when they all are bloomed in their beautiful colors. It just makes me feel excited to see them again after all this crazy winter weather we have all endured.
I can’t wait to see the bright colors that come my way when Spring rolls around. It just makes me so happy. That could explain why I love this Spring Wreath! It makes SOOO cheerful, too. Do you agree with me? Are you more Team Winter or Team Spring? I’ll give you one guess on which team I am on!

Spring Carrot Wreath
This wreath has so much about it that I love. Mostly the fullness of the mesh but really all the bright spring colors that pop! Such a big, full, beautiful base all from mesh! Which is why I just LOVE it! If you have been here a while, you know my usual style is BOW fabulous, from start to finish. But not this wreath. No need for all those bows. Of course, I had to have some ribbon tails to accent my 1 big bow in the center though.
I am so excited to teach you how to create this beautiful spring carrot wreath. I will be sharing with you exactly how to make it along with all my tips and tricks to wreath making. You will learn all about the perfect poof with mesh, ribbons, and tails. As well as how to properly attach a sign, and so much more. I promise you will leave feeling bright and full of spring spirit. For a more neutral spring wreath check out my Spring Grapevine Wreath!
Supplies
- 21″ deco mesh
- 2- 10″ deco mesh
- wreath form
- sign/attachment
- 3- 1.5 wired ribbon
- 2- 2.5″ wired ribbon
- 1- 4″ wired ribbon
- 1- .5″ orange and white check wired ribbon
- staple gun
- rotary cutter
- rapid fuse glue
- cutting mat
- ribbon tail board
- pipe cleaners
- EZ Bow Maker
How to Make A Spring Carrot Wreath
Step 1: Trim your string from the back of the sign or staple in the center so the string does not get stuck. Grab some orange pipe cleaners and staple one into all 4 corners. Reinforce with some gel super glue to soak into holes of the staple. This board is made of particle board so be extra careful
Step 2: To begin, grab your Burlap Deco Mesh and drop it to the floor. Fold-down over the edge, holding in place. Then fold in both ends where your hands are, and scrunch it. Walking your hands together to prevent any fraying. Keep that gripped in your hand as we secure it to the top of your work form wreath with orange twist ties. Twist in nice and tight to secure in place.
Step 3 To create 10” poofs, pull your mesh completely over the very next twist tie, which is about 5” away. Pull it to the next location to create a 10” section of mesh. Then bring it back to the twist tie you just skipped over and secure it in by twisting it twice. This will give you 10” poofs all around. Fluff as you go. Go completely around your inner ring first with your burlap poofs.
Step 4 Repeat, bringing the mesh down to the outer edge of your wreath. Pull your mesh as tight as you can as you go straight down to the next twist. Then repeat making 10” poofs all the way around. Do not stress if they are not all the exact same. It will be just fine! I promise. When you come to the end of your wreath, just cut the mesh off. Set aside.
Step 5: Open up both rolls of deco mesh and lay them on top of each other. With your rotary cutter and work mat, cut 18 pieces of each at 10” to create your inside and outside ruffle sections. Set aside your leftovers for another project later on.
Step 6: Bring your wreath back over. Take your 2 rolls, 1 of each color making sure they are a loose roll. Try to keep the edges of the mesh down so they do not fray. Make an X with them and add them to your wreath, twist tying in place, not opening the twist ties. Just twist once more to secure in place. Begin on the outer edge first. Work your way around.
Step 7: Repeat adding on the inner ring on top of the wreath, using your twist ties again. Fluff as you go. Keep it nice and full. Set aside.
Step 8: Bring your Happy Spring sign back over and make sure the pipe cleaners are dry. Twist them on ends by wood to add security. Eyeball where you want to place the sign. Once decided, work your 1 pipe cleaner down through your mesh base and twist one pipe cleaner to your workform wreath wire base. Work in diagonal corners as you tie in place. Be sure to secure all 4 corners of the sign down. Careful not to smash the mesh down completely. Set aside.
Step 9: Now for the bow! Trim off any weird ends you might have on your ribbons. Grab your EZ Bow Maker and your 4” Black and White Polka Dot ribbon. Measure out about 12” to create your first tail. Give it a pinch and twist before sliding into your EZ Bow Maker. Pull tail down. We’re going to measure our first loop out to 7”. Create 2 loops. Bring it back through, making another tail of 12”. Cut ribbon.
Step 10: Grab your 3” Solid Orange ribbon and repeat, with 2 11” tails and 2 6.5” inch loops for your 2nd layer of the bow. Every layer of the ribbon gets slightly smaller as you create your loops and tails.
Step 11: For the 3rd layer of your bow, use your 3” White with Orange Carrots Ribbon. 4th Layer of ribbon will be created following the same steps, using the 2” line green ribbon. 5th Layer of the bow, use your Burlap with White Polka dot ribbon. 6th Layer will be created with the ⅝” Orange and White checkered ribbon. All layers of the bow repeat the same pattern – 2 loops and 2 tails.
Step 12: To create the center loop for our bow, grab the Black and White Carrot ribbon. Make a single loop for this layer, with 2 tails. This will bring the black and white look from the back up and tie it into the front, giving it a cohesive look. It will also help the colors from your sign really pop.
Step 13: Next, take 2 pipe cleaners, connect the ends together to form 1 large pipe cleaner. Pull it off and make sure it is nice and tight. Remove from bow maker and wrap a pipe cleaner around it. Give it a good twist.
Step 14: Add your giant bow down in the center, off at a bit of an angle to the right. Run pipe cleaners around the frame and get it tied off. Nice and tight to secure. Fluff and fancy your tails to your liking.
Step 15: Dovetail ribbon ends, trimming off pieces at all different sizes for the length you like. On the ⅝” ribbon, just cut at an angle. This adds a bit of character.
Step 16: Now we will add some ribbon tails around our wreath with our ribbons, mixing it all up. Grab your Ribbon Tail Board, using the 14” side. Wrap around your 4” Black and White Ribbon on the board 8 times to give you 16 total pieces. Dovetail the ends.
Step 17: Repeat with your 3” White with Orange Carrots Ribbon, your 1.5” Black and White Checkered Ribbon, and your 1.5” Burlap with white polka dots ribbon. Set in a pile so they are easy to access as you add to your wreath.
Step 18: Take your B & W polka dot with Orange Carrots Ribbons, forming a pair of ribbons to add, then fold in half. Get a good pinch to form a crease. Then pinch it from the center sides to create a bowtie look, and add it to a twist around the bottom ring of your wreath. Play with placement as you mix and match your ribbon tails.
Step 19: Next determine the order of ribbon you want to use with your 3 different 1.5” ribbon tails. Repeating the steps of “Stack, Fold, Pinch and Add Method”, begin placing them alternating throughout your bottom ring of the wreath.
Step 20: You will have an open section above the top of your sign on the inner/top ring of your work form wreath. Alternate your ribbon tail pairings like you did before and you secure them with the twist ties. Fluff as you go!
Step 21: Make any adjustments you see fit by shifting ribbons loops here or tails there. Just make sure you love it!
FAQs
How To Mount A Sign Without A Staple Gun
If you do not have a staple gun, you can use the 4 mountain squares option as well with your Rapid Fuse Super Glue and add 1 dot of superglue in each of the 4 corners of the sign. Add 4 of your 1×1 mounting squares on all 4 corners of your Happy Spring sign. Place a little dab at the bottom and top, because a little goes a long way. Adhere your mounting squares to the super glue.
Conclusion
If you need any help with centerpiece-making, bow-making, wreath-making, or crafting in general, be sure to check out more of our tutorials on How to Make Wreaths.
We would love to see your beautiful summer wreaths! Please share with us over at the How To Make Wreaths Facebook Group.
Spring Carrot Wreath
Materials
- 21" deco mesh burlap
- 2 10" deco mesh Orange, lime
- wreath form
- sign/attachment Happy Spring carrot sign
- 3 1.5 wired ribbon carrot with black and white check ribbon, tan with white dots, lime green
- 2 2.5" wired ribbon orange, carrots with white background
- 1 4" wired ribbon Black with white dots
- 1 .5" orange and white check wired ribbon Orange and White Checkered Ribbon
- staple gun
- rotary cutter
- rapid fuse glue
- cutting mat
- ribbon tail board
- pipe cleaners
- EZ Bow Maker
Instructions
- Trim your string from the back of the sign or staple in the center so the string does not get stuck. Grab some orange pipe cleaners and staple one into all 4 corners. Reinforce with some gel super glue to soak into holes of staple. This board is made of particle board so be extra careful
- To begin, grab your Burlap Deco Mesh and drop to the floor. Fold down over the edge, holding in place. Then fold in both ends where your hands are, and scrunch it. Walking your hands together to prevent any fraying. Keep that gripped in your hand as we secure it to the top of your work form wreath with orange twist ties. Twist in nice and tight to secure in place.
- To create 10” poofs, pull your mesh completely over the very next twist tie, which is about 5” away. Pull it to the next location to create a 10” section of mesh. Then bring it back to the twist tie you just skipped over and secure it in by twisting it twice. This will give you 10” poofs all around. Fluff as you go. Go completely around your inner ring first with your burlap poofs.
- Repeat, bringing the mesh down to the outer edge of your wreath. Pull your mesh as tight as you can as you go straight down to the next twist. Then repeat making 10” poofs all the way around. Do not stress if they are not all the exact same. It will be just fine! I promise. When you come to the end of your wreath, the just cut the mesh off. Set aside.
- Open up both rolls of deco mesh and lay on top of each other. With your rotary cutter and work mat, cut 18 pieces of each at 10” to create your inside and outside ruffle sections. Set aside your leftovers for another project later on.
- Bring your wreath back over. Take your 2 rolls, 1 of each color making sure they are a loose roll. Try to keep the edges of mesh down so they do not fray. Make an X with them and add them to your wreath, twist tying in place, not opening the twist ties. Just twist once more to secure in place. Begin on the outer edge first. Work your way around.
- Repeat adding on the inner ring on top of the wreath, using your twist ties again. Fluff as you go. Keep it nice and full. Set aside.
- Bring your Happy Spring sign back over and make sure the pipe cleaners are dry. Twist them on ends by wood to add security. Eyeball where you want to place the sign. Once decided, work your 1 pipe cleaner down through your mesh base and twist one pipe cleaner to your workform wreath wire base. Work in diagonal corners as you tie in place. Be sure to secure all 4 corners of the sign down. Careful not to smash the mesh down completely. Set aside.
- Now for the bow! Trim off any weird ends you might have on your ribbons. Grab your EZ Bow Maker and your 4” Black and White Polka Dot ribbon. Measure out about 12” to create your first tail. Give it a pinch and twist before sliding into your EZ Bow Maker. Pull tail down. We’re going to measure our first loop out to 7”. Create 2 loops. Bringing it back through, making another tail of 12”. Cut ribbon.
- Grab your 3” Solid Orange ribbon and repeat, with 2 11” tails and 2 6.5” inch loops for your 2nd layer of the bow. Every layer of the ribbon gets slightly smaller as you create your loops and tails.
- or the 3rd layer of your bow, use your 3” White with Orange Carrots Ribbon. 4th Layer of ribbon will be created following the same steps, using the 2” line green ribbon. 5th Layer of the bow, use your Burlap with White Polka dot ribbon. 6th Layer will be created with the ⅝” Orange and White checkered ribbon. All layers of the bow repeat the same pattern – 2 loops and 2 tails.
- To create the center loop for our bow, grab the Black and White Carrot ribbon. Make a single loop for this layer, with 2 tails. This will bring the black and white look from the back up and tie it into the front, giving it a cohesive look. It will also help the colors from your sign really pop.
- With 2 pipe cleaners, connect the ends together to form 1 large pipe cleaner. Pull it off and make sure it nice and tight. Remove from bow maker and wrap pipe cleaner around it. Give it a good twist.
- Add your giant bow down in the center, off at a bit of an angle to the right. Run pipe cleaners around the frame and get it tied off. Nice and tight to secure. Fluff and fancy your tails to your liking.
- Dovetail ribbon ends, trimming off pieces at all different sizes for the length you like. On the ⅝” ribbon, just cut at an angle. This adds a bit of character.
- Now we will add some ribbon tails around our wreath with our ribbons, mixing it all up. Grab your Ribbon Tail Board, using the 14” side. Wrap around your 4” Black and White Ribbon on the board 8 times to give you 16 total pieces. Dovetail the ends.
- Repeat with your 3” White with Orange Carrots Ribbon, your 1.5” Black and White Checkered Ribbon, and your 1.5” Burlap with white polka dots ribbon. Set in a pile so they are easy to access as you add to your wreath.
- Take your B & W polka dot with Orange Carrots Ribbons, forming a pair of ribbons to add, then fold in half. Get a good pinch to form a crease. Then pinch it from center sides to create a bowtie look, and add it to a twist around the bottom ring of your wreath. Play with placement as you mix and match your ribbon tails.
- Next determine the order of ribbon you want to use with your 3 different 1.5” ribbon tails. Repeating the steps of “Stack, Fold, Pinch and Add Method”, begin placing them alternating throughout your bottom ring of the wreath.
- You will have an open section above the top of your sign on the inner/top ring of your work form wreath. Alternate your ribbon tail pairings like you did before and you secure them with the twist ties. Fluff as you go!
Video
Just pin this Spring Carrot Wreath tutorial to save the instructions for later!


