
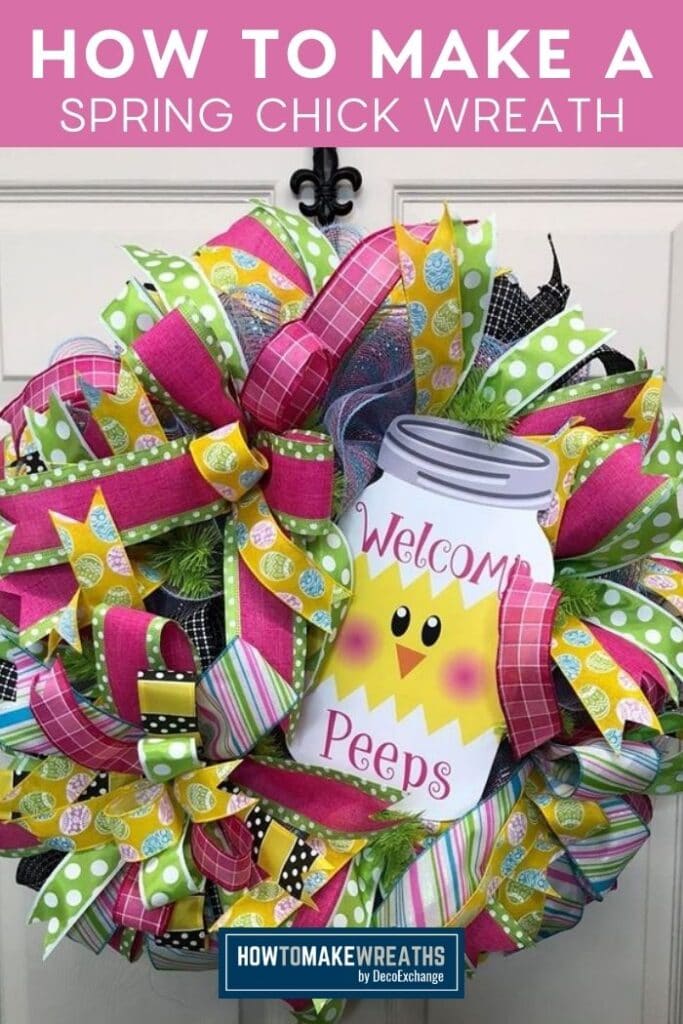
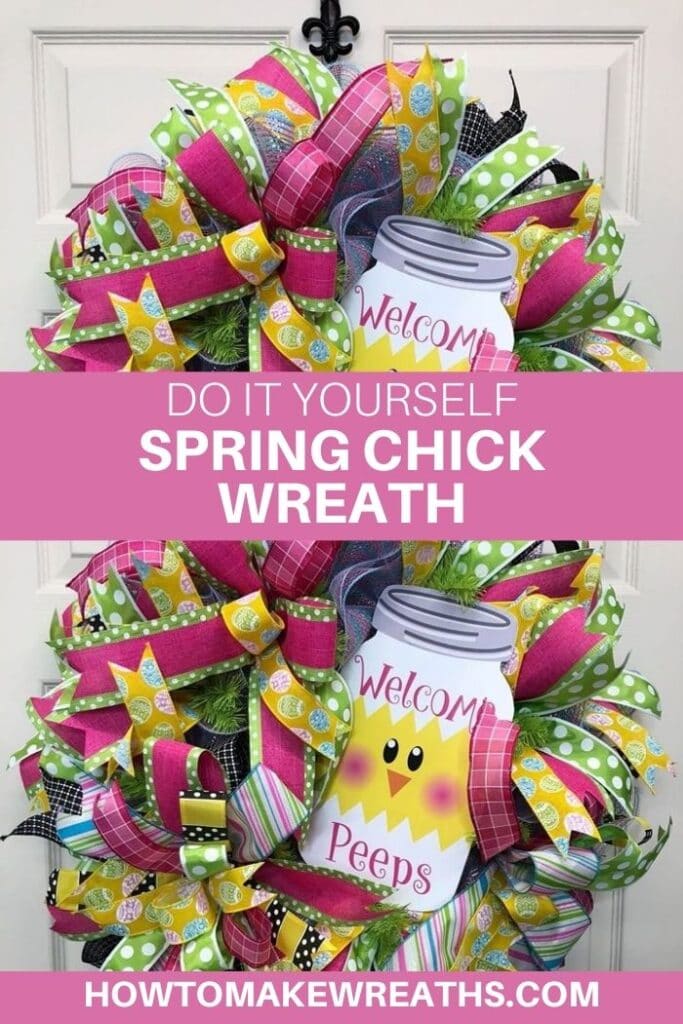
If you’re looking for a cheerful, fun project to make, look no further than this spring wreath with a chick! Pastel ribbons and a fun sign make this the perfect statement piece for your front door to welcome guests.
Okay, y’all. I’m not always a pastel fan, but when it’s springtime, I cling to my motto — go big or go home. Whether you love pastels or not, you have to admit there’s something very spring-like about them.
As you can see, I didn’t hold back on pastels for this chick wreath. It makes the entire piece perfect for this season!
Spring Wreath Supplies Needed
Here’s what you’ll need in order to make this wreath.
- Pro Bow the Hand
- Floral Wire 26″ gauge
- 3 2.5″ wired ribbon
- 4 1.5″ wired ribbon
- Wire cutters
- 1 15″ wreath form
- 18 pieces 10″ deco mesh 30″ long
- Mesh cutter
- 2 2.5″ wired ribbon
- 2 1.5 wired ribbon
- 1 sign/attachment
- Staple gun
- Craft foam
- Pipe cleaners
- Scissors
- Ribbon tailboard
How To Make A Spring Chick Wreath
This wreath is made on my standard 15-inch wreath form, and the base layer is 30″ mesh added on top.
Then, I’ll show you how to layer not one, not two, not three… but seven different ribbons on top! Lastly, we’ll add this adorable mason jar chick.
Spring Wreath Video Tutorial: Follow Along!
We have a video tutorial that you can follow along as I go. The video can be found together with the recipe card, so that it’s all in one place!
Make A Bow With The Pro Bow Directions
In case you prefer to follow written instructions, here they are for the bow.
Step 1
Measure out and cut 4 pieces of floral wire to 24-inches each with your wire cutters.
Step 2
Take your first ribbon and measure out 7-inches for the tail. Take a wire and fold it in half, give it a pinch around the ribbon, then tie it off.
Wrap the ribbon around your center peg. Pinch on the bottom peg, twist, and tie it off on the top.
Step 3
Now that you have your center loop, add your second wire. Fold the wire in half and work it through.
Step 4
Take your 2.5″ ribbon, and measure out 7-inches for the tail. Take a wire and fold it in half, give it a pinch around the ribbon, and tie it off.
Wrap the ribbon around the next peg. Pinch on the bottom peg, twist, and loop on the other side. Tie off the wire and dovetail the ends.
Step 5
Repeat the step above until all the pegs are used working your way outwards from the center peg.
Once you’re done, tie it off, unwrap the first wire from the top and bottom from when you first started. Take off your bow off of the Pro Bow.
Step 6
Take your fluff box, place the bow in the center and wrap the wires on the side hooks to keep it in place.
Fluff out your bow, start with the outside and work your way to the center.
Step 7
Repeat the full process to make 2 more bows. You’ll use all three in your wreath.

How to Make a Bow using the Pro Bow
Materials
Instructions
- Sort out what ribbons you will be using. Measure out 4 pieces of floral wire about 24-inches each. Cut the floral wire with your wire cutters.
- Let's start with our first ribbon. Measure out about 7-inches for the tail. Take a wire and fold it in half, give it a pinch around the ribbon, and we're going to tie it off. Wrap the ribbon around your center peg. Pinch on the bottom peg, twist, and tie it off on the top.
- Now that you have your center loop, you'll need to add your second wire. Fold the wire in half and work it through.
- Take your 2.5" ribbon, trim into a dovetail, Measure out about 7-inches for the tail. Take a wire and fold it in half, give it a pinch around the ribbon, and we're going to tie if off. Wrap the ribbon around the next peg. Pinch on the bottom peg, twist, and loop on the other side. Cut the dovetail. Tie off with the wire.
- Repeat the step above until all the pegs are used working your way outwards from the center peg. Once you're done, tie off, unwrap the first wire from the top and bottom from when you first started. Take off your bow from the Pro Bow.
- Take your fluff box, place the bow in the center and wrap the wires on the side hooks to keep it in place. Fluff out your bow, start with the outside and work your way to the center.
- Repeat the full process to make 2 more bows.
DIY Spring Wreath Instructions
Now that you have your bows made, it’s time to put your wreath together. Follow these instructions if you don’t want to follow along with the video.
Step 1
Fluff out the wreath form.
Step 2
Take your 10″ mesh and cut (18) 30″ pieces.
Step 3
Take each of the cut pieces of mesh, scrunch in the center and add one to each wreath tie. (Note: This is the ruffle method.)
Start at the bottom of the wreath frame and work your way to the top to avoid getting tangled up.
Step 4
Get your wreath sign, craft foam, pipe cleaners, and staple gun. Add craft foam to each corner of the sign. Staple a pipe cleaner to each craft foam piece on the back of the sign.
Step 5
Attach sign to wreath frame with pipe cleaners.
Step 6
Add all three bows to your wreath and secure them tightly.
Step 7
Take your 2.5″ ribbon, measure 24-inches, fold it in half, twice. Add it to the wreath ties around your wreath.
Take a 1.5″ ribbon, and measure 24-inches, fold it in half, and again. Add to wreath ties around your wreath.
Step 8
Get out your ribbon tail board, 2.5″ ribbon, and 1.5″ ribbon.
Step 9
Wrap 2.5″ ribbon around the ribbon tail board and cut it into (10) 14″ strips.
Step 10
Dovetail the ends.
Step 11
Wrap your other 1.5″ ribbon around the ribbon tail board and cut it into (10) 14″ strips.
Step 12
Dovetail the ends.
Step 13
Wrap 1.5″ ribbon around the ribbon tail board and cut into (10) 14″ strips.
Step 14
Layer (2) 1.5″ ribbon strips on top of (1) 2.5″ ribbon strip. Fold each stack in half, scrunch the middle, and add one to each of the open wreath ties.
Step 15
Fan out the ribbon tails to make the wreath look as big and full as possible.
DIY Spring Chick Wreath
Materials
Instructions
- Fluff out wreath form
- Take your 10" mesh and cut (18) 30" pieces.
- Take each of the 18 pieces of mesh, scrunch down the center, and add to every wreath tie. This is the ruffle method. Do start at the bottom of the wreath frame and work your way to the top to avoid getting tangled up.
- Get your wreath sign, craft foam, pipe cleaners, and staple gun. Add craft foam to each corner of the sign. Staple a pipe cleaner to each craft foam piece on the back of the sign.
- Attach sign to wreath frame with pipe cleaners.
- Add bows that you made to your wreath. Tie nice and tight.
- Take 2.5" ribbon, measure 24-inches, fold it in half, told in half again. Add to wreath ties around your wreath. Take a 1.5" ribbon, and measure 24-inches, fold it in half, told in half again. Add to wreath ties around your wreath.
- Get out your ribbon tail board, 2.5" ribbon, and 1.5" ribbon.
- Wrap 2.5" ribbon around the ribbon tail board and cut into (10) 14" strips.
- Cut ends into dovetails.
- Wrap your other 1.5" ribbon around the ribbon tail board and cut into (10) 14" strips.
- Cut ends into dovetails.
- Wrap 1.5" ribbon around the ribbon tail board and cut into (10) 14" strips.
- Layer (2) 1.5" ribbon strips on top of (1) 2.5" ribbon strip, fold in half, scrunch in middle, and add to the open wreath ties.
- Fan out the ribbon tails. and Make sure it all points out to make the wreath look bigger.
Video
Isn’t this chick wreath adorable? Make a few—one to keep for yourself and another few to gift or sell. Spread the joy around, y’all!
If you love this spring wreath, be sure to check out these too:
- DIY Spring Themed Bike Wheel Wreath
- Quick and Easy Spring Door Hangers
- 32 Homemade Spring Decorating Ideas
Just pin this spring chick wreath tutorial below to find the instructions later!
If you need any help with centerpiece-making, bow-making, wreath-making, or crafting in general, be sure to check out more of our tutorials on How to Make Wreaths.
We would love to see your beautiful summer wreaths! Please share with us over at the How To Make Wreaths Facebook Group.


