
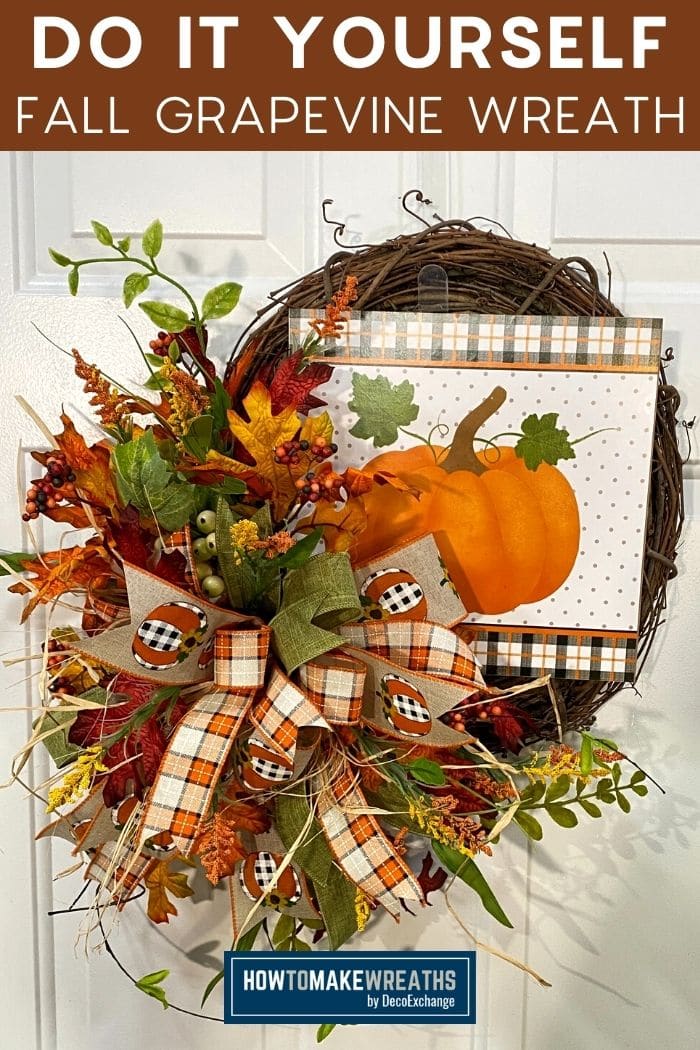
Fall is coming on fast, y’all, and your shop should be full of fall designs. Today I’m showing you how to make a beautiful fall grapevine wreath that is a perfect addition to your shop!
Since fall is so full of natural beauty I wanted to make a wreath that mirrors that natural splendor. To make this fall grapevine wreath meet that standard, I add some fall leaves, grasses, greenery, and raffia. Those elements, along with an adorable pumpkin sign, make for a fabulously elegant fall wreath! In the video below I show y’all how to assemble this grapevine wreath. This is a fairly simple design and won’t take you too long to master. So, grab your supplies and let’s get crafting!
Fall Grapevine Wreath
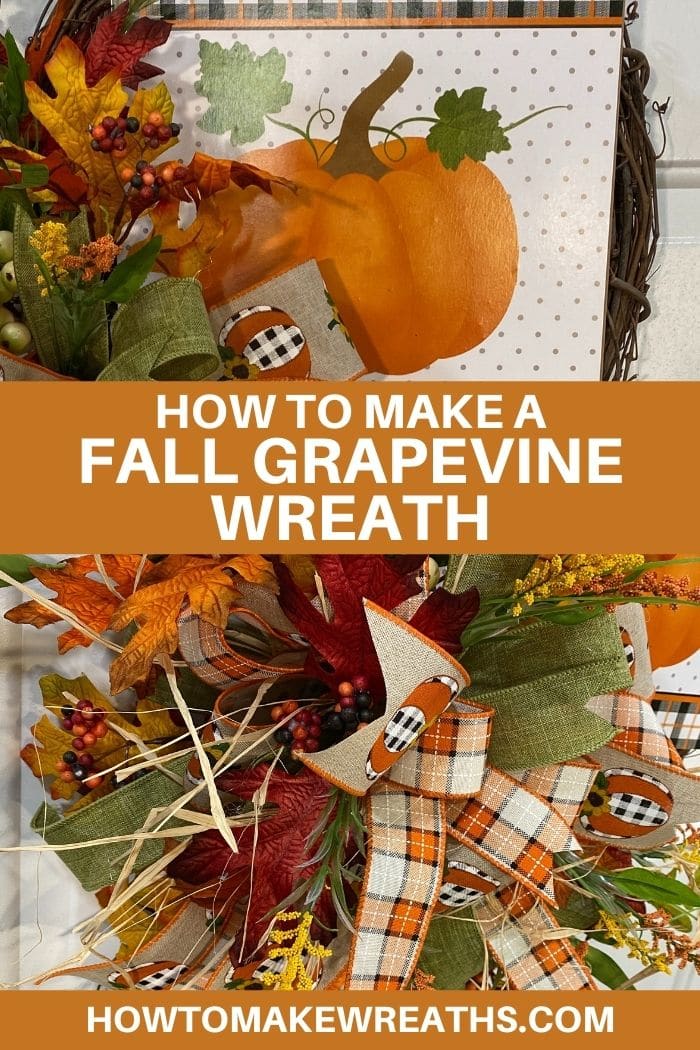
Like I said, y’all, I wanted this to be a natural wreath. But, I also wanted to incorporate lots of colors and textures. Using the fall leaf stems and greenery added some gorgeous colors. The grapevine itself lends lots of texture but I wanted something a little extra. Y’all know I’m a little extra! I love raffia for this reason, it doesn’t work for every season but it works great for fall!
When you are selecting your raffia, keep in mind how you will be using it in your project. I like to use a thinner raffia for my bows because I think it adds more texture than a thicker version. Those extra strings just give the bow a bit more dimension. If that stringy look isn’t what your going for though, make sure to grab a thicker raffia.
Y’all, another thing that I want to mention is ribbon selection. People often say that the thing they struggle with the most is picking out their ribbons. I want to remind you to keep it simple. Look at your sign and notice what colors and patterns are there. Then find ribbon that matches one or both of those things. Don’t over think it y’all! If you want more advice, I have a whole post on selecting ribbon colors and patterns that you can check out.

Raffia Bow
Instructions
- Take your first 2.5" ribbon, measure an 8" tail then make a 5.5" loop, inserting it into the EZ Bow Maker. Measure a 12" tail and cut from the ribbon roll.
- Repeat using the 4" ribbon, making your loop on the other side.
- Repeat using the second 2.5" ribbon.
- Take a small bunch of raffia and add it to the EZ Bow Maker.
- Next, make a second layer of tails and loops just like you did the first one but make this layer a bit smaller.
- Add another small bunch of raffia.
- Make another layer of loops and tails, smaller again than the last.
- Take a small bunch of raffia, make a small loop and knot it. Add this to the center of your bow.
- Take two pipe cleaners and attach them end to end to make one long one. Remove your bow from the bow maker and use the pipe cleaner to tie it off.
Fall Grapevine Wreath
Materials
Instructions
- Take the craft foam and cut 4 small squares.
- Place one square at each corner of your sign. Using a staple gun, staple a pipe cleaner to each square at the center of the pipe cleaner.
- Use the pipe cleaners to attach the sign to the center of your grapevine wreath base. Be sure to attach the sign as far from the left of the wreath base as possible to allow yourself room to fill in that space using your bow and foliage.
- Turn the wreath over and trim the ends of the pipe cleaners. Tuck the remaining ends back into the grapevine.
- Attach your raffia bow to the bottom left corner of your sign. Fluff the bow and trim the tail ends at differing lengths.
- Take your fall leaf stems and trim them into smaller pieces using wire cutters.
- Pick two points on your wreath that will be the end points for you foliage. These will be your markers and you won't put anything past these points. Use hot glue to attach your fall leaves to each point. Then, use your remaining leaves to fill in between those two spots (including the bow area). Don't forget to leave a little space for the greenery.
- Take your greenery and use wire cutters to trim them into smaller pieces. Separate and fluff them out to make them more 3 dimensional. Use hot glue to attach them to your wreath.
- Finally, use your fall grass to fill in a few spots including the bow area.
Video
Y’all, I love the way this fall grapevine wreath turned out! It is beautiful and gives off all those warm and cozy feelings of fall. If you are loving the look of this wreath and want to learn more about how to decorate grapevines, I have a post for that too. The awesome thing about grapevines is that they work for absolutely every season!
CHECK OUT MORE GRAPEVINE WREATHS
If you need any help with centerpiece-making, bow-making, wreath-making, or crafting in general, be sure to check out more of our tutorials on How to Make Wreaths.
We would love to see your beautiful summer wreaths! Please share with us over at the How To Make Wreaths Facebook Group.


I’m going to take apart a wreath I was building and follow your design! I love it!