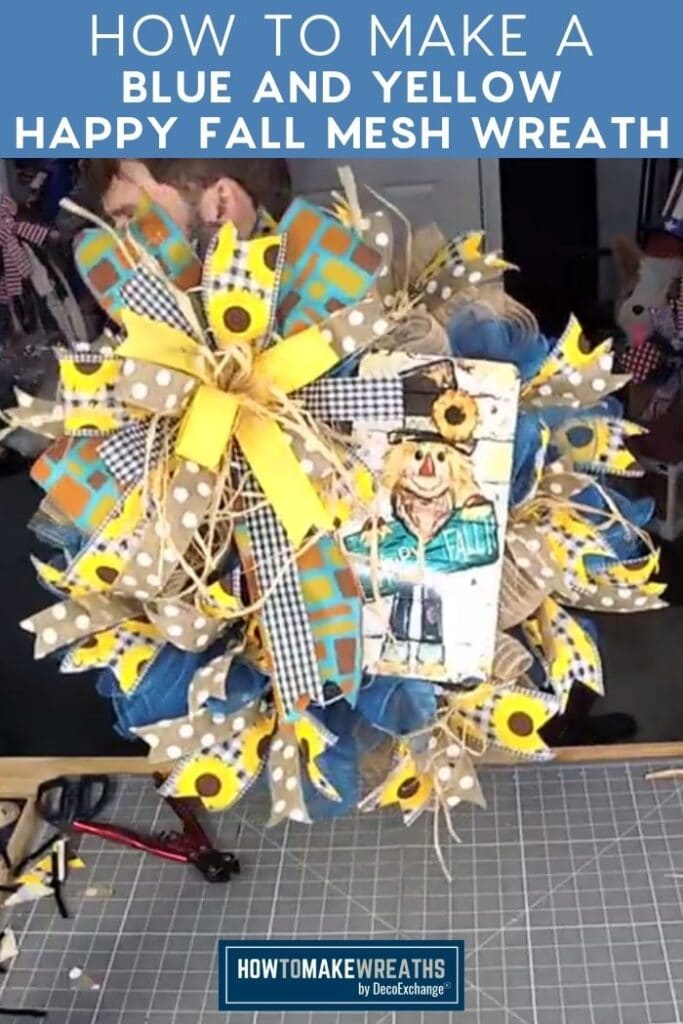
Fall is right around the corner! This deco mesh ‘Happy Fall’ wreath is adorable and the perfect item for anyone who loves anything harvest or fall-related.
Hey, y’all! Once the days start to get a little shorter (but before the heat breaks), my shop begins selling fall wreaths like hotcakes. So many people get tired of the heat of summer and long for that beautiful transitional season we call fall.
I love fall. The crisp colors, vibrant aromas, and pumpkin everything draw me in and keep me there. Every season is full of inspiration, but fall is one of my favorite seasons for crafting because it offers SO many crafting possibilities that it never gets boring.
This fall wreath design is a playful twist on my previous Hello Fall Mesh Wreath and “Hello Fall” Wreath designs that continue to be very popular.
If you want even more fall wreath inspiration, check out some of our other popular designs such as our How To Make A Fall Deco Mesh Wreath and Fall Harvest Wreath designs!
Ok, it’s time to learn how to make this fun fall wreath!
How To Make A Happy Fall Wreath With Deco Mesh
This design is so eye-catching and fun that it’s perfect for anyone’s front door. It’s also an ideal piece to add to your online shop because it will literally fly off your shelves and sell out (maybe) faster than you can make them!
Supplies Needed To Make Fall Mesh Wreath
- Circle UITC board frame
- (3) 20” strips of 10” burlap deco mesh
- (3) 30” strips of 10” burlap deco mesh
- (5) 20” strips of 10” blue deco mesh
- (5) 30” strips of 10” blue deco mesh
- Happy Fall Scarecrow Sign
- (1) 4” ribbon
- (2) 2.5” ribbons
- (3) 1.5” ribbons
- (1) raffia ribbon
- 1” mounting squares (rated for outdoors)
- E6000 permanent glue
- Pipe cleaners
- Rotary cutter
- Scissors
- EZ Bow Maker
- Ribbon tail board
Deco Mesh Fall Wreath Instructions
Follow along as I guide you through the process step-by-step of making this adorable fall deco mesh wreath.
Step 1
Prepare your UITC board by adding pipe cleaners into the holes around the outside edge. Alternate the exact position by putting the first pipe cleaner into the outermost two holes and then the next pipe cleaner goes into the inner two holes.
Continue alternating all the way around the holes along the outside edge.
Step 2
Take your 10” deco mesh and begin making poufs in the inner pipe cleaners you just inserted. Tie the end of your mesh into the first inner pipe cleaner and create 8” poufs.
Step 3
Take your 30” strips of mesh, curl both ends and scrunch them into the middle to create a ruffle.
Tie the ruffle into your first outer pipe cleaner.
Repeat this step for all of your 30” strips of deco mesh, attaching each one to your wreath with a new pipe cleaner as you make your way around the outside of the frame.
Create a pattern of two blues and a burlap.
Step 3
Repeat the same process with the 20” strips of mesh and attach them with the pipe cleaners around the inside of your frame, also alternating the colors of the mesh ruffles.
Step 4
Now it’s time to prepare the Happy Fall sign. Peel off the back of 2 mounting squares, add a dab of super glue and press each square onto the back of the metal sign (one near the top and one near the bottom).
Insert a pipe cleaner into each mounting square. Then use those pipe cleaners to attach the sign to the wreath.
Step 5
Now it’s time to make the unique bow for our fall wreath.
Take your 4” ribbon and make 8” tails with (2) 7” loops. Your tails and loops for this bow will be in an x-shape.
Grab your 2.5” ribbon and make 8” tails with 6.5” loops in an x-shape that’s offset from the layer below.
Repeat the same tail and loop process with your first 1.5” ribbon, making the loops about 6”. Make sure to offset this layer from the previous one.
Follow this same pattern again with the second 1.5” ribbon, making the loops slightly smaller at about 5.5”.
Repeat the process one more time with the 3rd 1.5” ribbon, this time making loops a little smaller at about 5”.
Finally, take the raffia and repeat the same basic process one final time. Make the loops about 4.5” to add some texture and tie the wreath design together with the scarecrow sign. This unusual element is what makes this bow so much fun.
Carefully remove your bow from the EZ Bow Maker and wrap a pipe cleaner around the middle. Twist tightly to secure the bow.
Step 6
Use the pipe cleaner to attach the bow to the wreath next to the bunny sign.
Step 8
Now we’re going to make some ribbon tails for the wreath. Measure and cut (10) 13-inch ribbon tails from two of your ribbons. Dovetail all the ends.
Pair up the ribbon tails. Take a pair and fold it in the middle so that one side meets up with one side from the other end. You want to be able to see the pretty side of all the ribbons from the same side.
Insert the folded end into one of the pipe cleaners holding a ruffle on the outside of the wreath and twist the pipe cleaner around the ribbon tail pair to secure it in place. Repeat the process by adding ribbon tails all around the outside of the wreath.
Step 9
Ok, let’s add a little bit of raffia to the rest of the wreath to tie everything together. Just cut off lengths of raffia about 8 inches long and tie them into the pipe cleaners around the outside of the wreath.
Fluff everything out and your wreath is complete!
I hope you love this design and try making it yourself! I think the raffia really makes it stand out from other similar designs and catches people’s eyes.
Try This Wreath Design Yourself!
It’s a cute fall wreath design that just makes people smile when they see it – and when something makes people smile, they tend to buy it (hint, hint 😉)!
If you love this fall wreath design, be sure to check out these designs too:
- How To Make A Simple Fall Grapevine Wreath
- Designer Fall Grapevine Wreath With A Pumpkin Sign
- Make a Designer DIY Fall Wreath in Under 6 Minutes
- DIY Fall Grapevine Blue Truck Wreath
If you need any help with centerpiece-making, bow-making, wreath-making, or crafting in general, be sure to check out more of our tutorials on How to Make Wreaths.
We would love to see your beautiful wreaths! Please share with us over at the How To Make Wreaths Facebook Group.
If you’re interested in more info on learning how to make wreaths or being in a community of like-minded crafters, check out our Creative Coaching Subscription Group.


Deco Mesh Happy Fall Wreath With Raffia
Materials
- Circle UITC board frame
- 3 20” strips of 10” burlap deco mesh
- 3 30" strips of 10” burlap deco mesh
- 5 20" strips of 10” burlap deco mesh
- 5 30" strips of 10” burlap deco mesh
- Happy Fall Scarecrow Sign
- 1 4” ribbon
- 2 2.5” ribbons
- 3 1.5” ribbons
- Raffia
- 1″ mounting squares
- E6000 permanent glue
- Pipe cleaners
- Rotary cutter
- Scissors
- EZ Bow Maker
- ribbon tail board
Instructions
- Prepare the UITC board by adding pipe cleaners into the sets of three holes that run along the outside edge. Insert the first pipe cleaner into the outermost two holes, then insert the next pipe cleaner into the inner two holes. Continue this pattern all the way around the holes along the outside edge.
- Attach your mesh to a pipe cleaner along the inner portion of the outside of the frame and make 8" poufs as you work your way around the inner pipe cleaners.
- Take your 30” strips of mesh, curl both ends and scrunch them into the middle to create a ruffle. Then tie it into one of the outer pipe cleaners.Repeat this step for all of your 30” strips of deco mesh, inserting them into the pipe cleaners around the outside of your frame. Alternate colors of mesh as you work.
- Repeat the same process with the 20” strips of mesh and attach them with the pipe cleaners around the inside of your frame. Make sure to alternate the colors of mesh as you work.
- Prepare the Happy Fall sign. Peel off the back of 2 mounting squares, add a dab of super glue and press a square onto the back of the metal sign at the top and one at the bottom. Once the glue dries, attach a pipe cleaner into each mounting square. Then use those pipe cleaners to attach the sign to the wreath.
- Let's make our fun bow.Take your 4” ribbon and make 8” tails with (2) 7” loops. Your tails and loops for this bow will be in an x-shape.Grab your 2.5” ribbon and make 8” tails with 6.5” loops in an x-shape that’s offset from the layer below.Repeat the same tail and loop process with your first 1.5” ribbon, making the loops about 6”. Make sure to offset this layer from the previous one.Follow this same pattern again with the second 1.5” ribbon, making the loops slightly smaller at about 5.5”.Repeat the process one more time with the 3rd 1.5” ribbon, this time making loops a little smaller at about 5”.Finally, take the raffia and repeat the same basic process one final time. Make the loops about 4.5” to add some texture and tie the wreath design together with the scarecrow sign. This unusual element is what makes this bow so much fun.Carefully remove your bow from the EZ Bow Maker and wrap a pipe cleaner around the middle. Twist tightly to secure the bow.
- Use the pipe cleaner to attach the bow to the wreath next to the sign.
- Let's make some ribbon tails. Measure and cut (10) 13-inch ribbon tails from two ribbons. Cut the ends in a dovetail shape.Pair up the ribbon tails. Take a pair and fold it in the middle so that one side meets up with one side from the other end. You want to be able to see the pretty side of all the ribbons from the same side. Insert the folded end into one of the pipe cleaners holding a ruffle on the outside of the wreath and twist the pipe cleaner around the ribbon tail pair to secure it in place. Repeat the process by adding ribbon tails all around the outside of the wreath.
- Add a little bit of raffia to the ruffles in the wreath to tie everything together. Just cut off 8" lengths of raffia and attach them using the pipe cleaners around the outside of the wreath.
Video
Just pin this deco mesh happy fall wreath tutorial to save the instructions for later!