
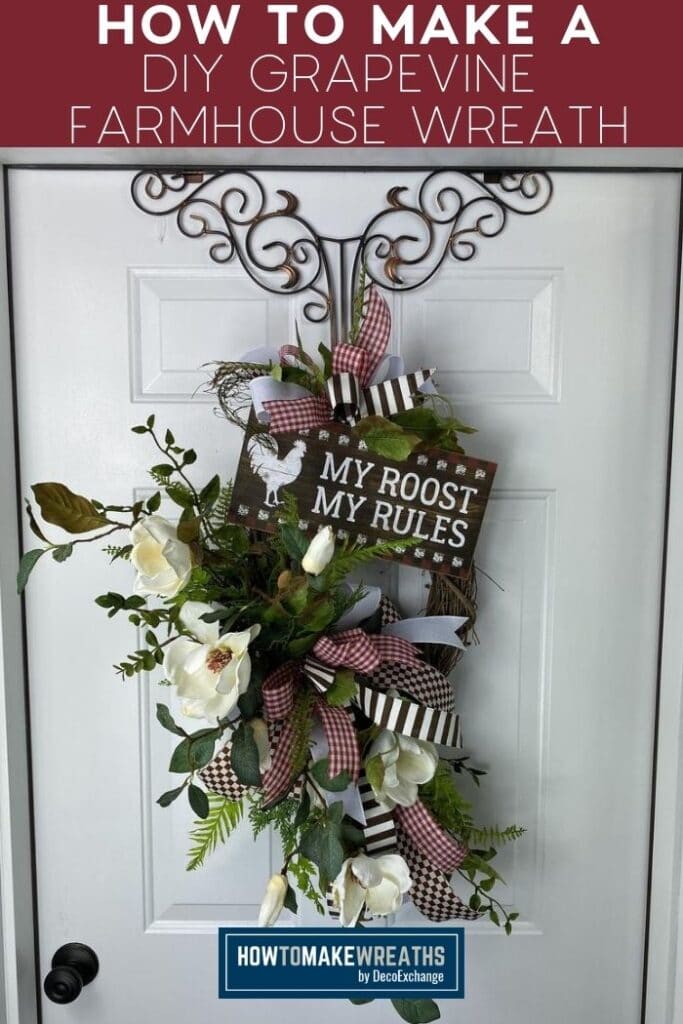
This farmhouse wreath has a basic grapevine base that’s all jazzed up with plenty of personality! Make this DIY farmhouse wreath project for yourself or to sell at a craft show—it’ll fly off the shelves!
In case you haven’t noticed (and if you haven’t, you’ve been living under a rock)…the farmhouse trend is HOT, y’all.
If there’s one thing that’s practically guaranteed to sell out at a craft fair, it’s a farmhouse wreath.
Farmhouse decor doesn’t always equate to the same thing as country-style, although that’s the way I decided to take this farmhouse wreath.
Farmhouse style can mean different things to different people….do a quick google search and you’ll see what I mean.
The fun thing about this style of decor is you can give it flair!
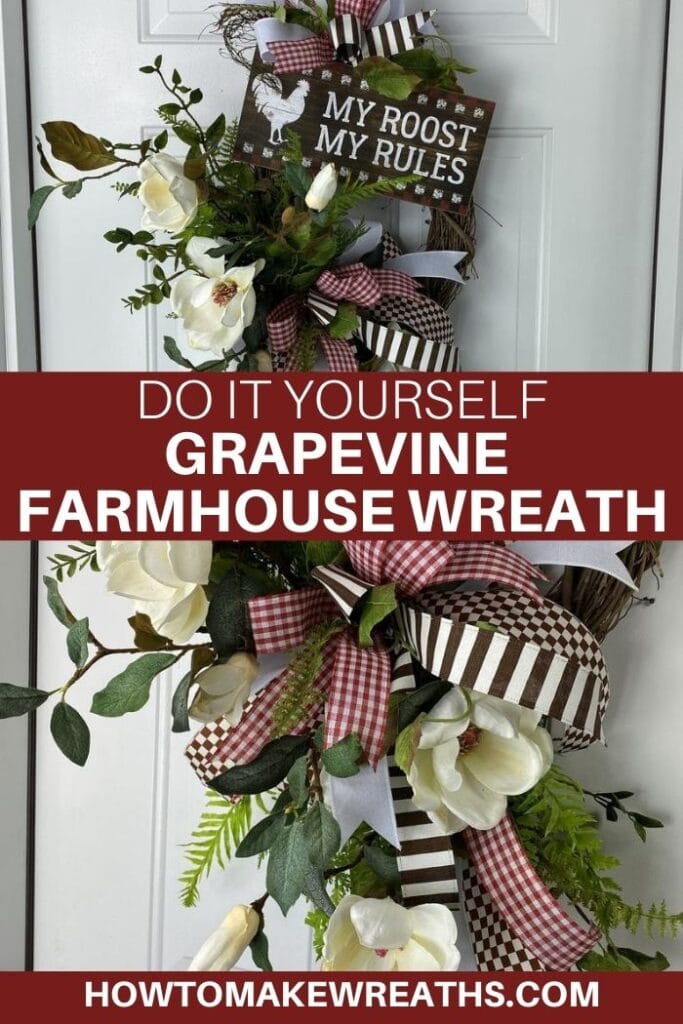
You start with a basic grapevine wreath, then layer on greenery and florals. Of course, I had to include magnolias since they’re the most farmhouse-friendly flower I could think of!
Then, kick it up another notch by adding a cheeky sign and several coordinating bows and ribbons.
More Farmhouse Wreath Inspiration:
- DIY Farmhouse Decor: Designer Swag in Under 6 Minutes
- How To Make A Burlap Wreath: Ruffled Burlap Wreath
DIY Farmhouse Grapevine Wreath Video Tutorial
This video will walk you through exactly how I put together a farmhouse wreath. As always, feel free to change it up and make it your own! Check out the video at the end of this post.
Supplies Needed to Make This Farmhouse Wreath
In order to make this wreath, you’re going to need a few supplies 😉 Check out this list so you can gather what you need.
- 1 grapevine wreath
- 1 wreath sign
- scissors
- pipe cleaners
- glue sticks
- hot glue gun
- 1 2.5″ wired ribbon
- 3 1.5 wired ribbon
- EZ Bow Maker
- greenery sprays
- floral picks
- stem cutter
- Steelpix professional stemming machine
How To Make this Grapevine Farmhouse Wreath
Simply follow these step-by-step instructions to make this jazzed up, beautiful DIY farmhouse wreath.
When you first see how many steps there are, you might be tempted to think that this wreath is hard to make.
It’s NOT!
Just follow each step and you’ll have a gorgeous wreath in no time!
Step 1
Prepare your wreath sign by stapling the string of the sign to the back, so it’s out of your way. Remove any stickers from the back of the sign since it’s going to be on a grapevine base (and easy to see).
Step 2
Staple a pipe cleaner to both sides of the wreath sign then take a hot glue gun and cover both the pipe cleaner and staple to secure them.
Step 3
Put the pipe cleaners through the top of the grapevine base then twist and tie off on the back.
Step 4
Grab your greenery. Since we don’t want it to be too full, if it’s big and full, cut it in half. Then, fluff it out and trim the stem.
You want to position the greenery so that it comes all the way up to the top, but doesn’t quite cover the sign.
Step 5
Take your other half of the greenery (or another spray if you couldn’t cut the first one in half) and use it as the bottom piece. Make it go down further to make the wreath look big and full.
Use dabs from the glue gun to keep both greenery pieces in place.
Step 6
Take your 2.5″ ribbon and EZ Bow Maker and make an extra long tail as well as a 6-inch loop on each side.
Step 7
Next comes the 1.5″ ribbon. Make a tail and a loop (on each side) slightly smaller than your previous ribbon.
Step 8
Then, take another 1.5″ ribbon and use it to make a tail. The loop (on each side) will be slightly smaller than the last ribbon.
Step 9
Now, take the same ribbon and add the extra tail to give it a little extra flair (I love that!).
Step 10
Next, comes the last 1.5″ ribbon. Make a single loop for the center then take your pipe cleaner and use it to twist and tie off. Fluff your bow.
Step 11
Add your bow in the middle of the greenery pieces. Tie off the pipe cleaners after inserting through the grapevine base.
Step 12
Now you can add additional greenery to the top or bottom of the bow if you want to. Keep adding until the wreath looks as full as you want it to look.
Step 13
If you want to take it up another notch, you can add floral sprays/picks to the top and bottom of your bow.
Step 14
Now trim and make all your tails into dovetails.
Step 15
Make a second bow. Either by hand or with the EZ Bow Maker, start with just a tail with a 2.5″ ribbon. Next, use a 1.5″ ribbon and make a loop on each side. Take another 1.5″ ribbon and make a loop on each side slightly smaller than the previous ribbon.
Finally, take the last 1.5″ ribbon and make a single loop in the center. Use a pipe cleaner to tie off the bow then fluff it out.
Step 16
Attach that bow at the top of the wreath sign with a pipe cleaner through the grapevine base. Trim and cut all the ends of the bow into dovetails.
Step 17
Take extra greenery and add it around the top bow to make one cohesive-looking design.
Step 18
For the bottom bow, take a strip of each of the ribbons and make tails-only ribbon. Crunch it into the middle.
Use the stem pick machine to pinch it off and a steel pick to keep the ribbon in place. Add the tails to the bottom of the wreath and trim ends into dovetails.
DIY Farmhouse Wreath Final Thoughts
There you have it – you know how to make a beautiful, trendy, sure-to-sell DIY farmhouse wreath. Don’t forget to make it your own—I can’t wait to see what you come up with! 🙂
Grab your craft supplies and let’s start creating!
No matter what kind of decor you make, we want to see your creations over at the How To Make Wreaths Facebook Group.
If you are interested in more info on learning how to make wreaths, where to buy supplies, and being in a community of like-minded crafters, check out our Creative Coaching Subscription Group.

Farmhouse Grapevine Wreath
Materials
Instructions
- Prep your wreath sign. Staple the string of the sign to the back, so it's out of the way. Make sure the back of the sign is free of any stickers since it's going to be on a grapevine base.
- Add a pipe cleaner to both sides of the wreath sign and staple it. Take a hot glue gun and cover the pipe cleaner and staple.
- Take the pipe cleaners and put it through the top of the grapevine base. Twist and tied off on the back.
- Take greenery and if it's big and full, cut half. Fluff it out and trim the stem. You want the greenery to come all the way up to the top, but not quite cover the sign.
- Take the other half of the greenery and make the bottom piece go down further to make the wreath look bigger and fuller. Use the glue gun to keep both greenery in place.
- Take your EZ Bow Maker and 2.5" ribbon, make an extra long tail and make a 6-inch loop on each side.
- Next is the 1.5" ribbon, make a tail and a loop (on each side) slightly smaller than your previous ribbon.
- Then get another 1.5" ribbon, make a tail and the loop (on each side) will be slightly smaller than the last ribbon.
- Take the same ribbon and add the extra tail to give it a little extra flair.
- Next is the last 1.5" ribbon. Make a single loop for the center. Take the pipe cleaner, twist and tie off. Fluff your bow.
- Add your bow in the middle of the greenery pieces. Tie off the pipe cleaners after inserting through the grapevine base.
- Now you can add more greenery to the top and bottom of the bow. Keep adding until the wreath looks nice and full.
- Next you can add floral sprays/picks to the top and bottom of your bow.
- Now trim and make all your tails in to dovetails.
- Make another bow. You can do it by hand or use an EZ Bow Maker. Start with just a tail with a 2.5" ribbon. Next, use a 1.5" ribbon and make a loop on each side. Take another 1.5" ribbon and make a loop on each side slightly smaller than the previous ribbon. Take the last 1.5" ribbon and make a single center loop. Use a pipe cleaner to tie off the bow nice and tight. Fluff out the bow.
- Attach bow at the top of the wreath sign with the pipe cleaner through the grapevine base. Trim and cut ends of the bow into dovetails.
- Take extra greenery and add around the top bow to make the look cohesive.
- For the bottom bow, take a strip of each of the ribbons and make tails only ribbon. Crunch it up in the middle. Take the stem pick machine, pinch it off, and add steel pick to keep the ribbon in place. Add the tails to the bottom of the wreath, trim ends into dovetails.
Video
Additional Tutorials You’ll Love


