
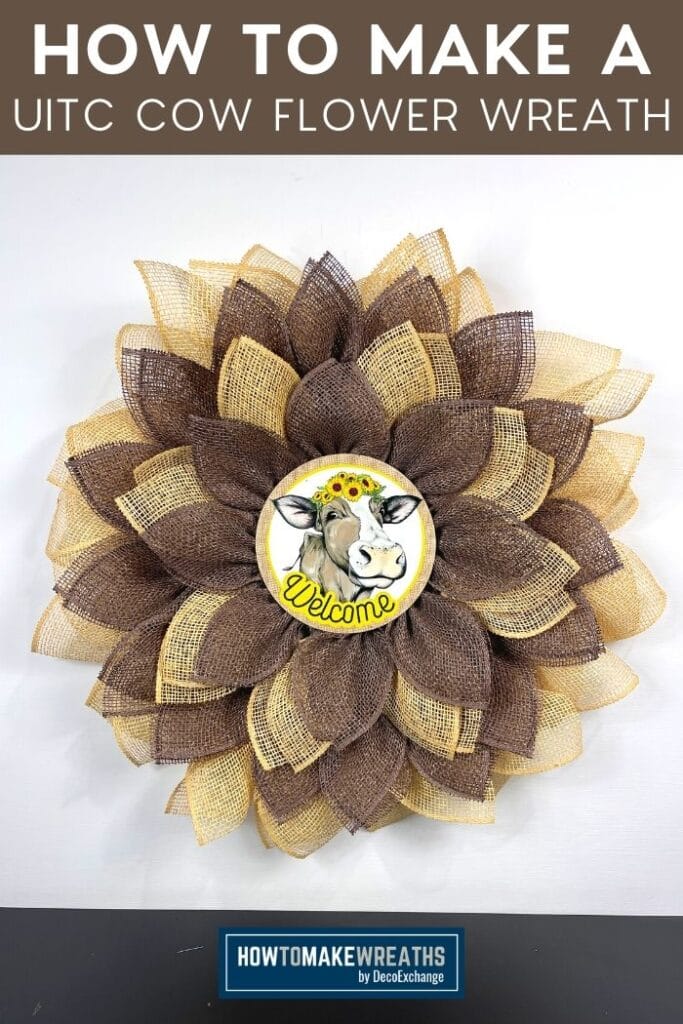
I have been having so much fun with the UITC boards lately, y’all! Today I’m showing you how to make a UITC cow flower wreath using burlap mesh and an adorable cow sign.
It is always great to get into new wreath designs. It’s not a bad thing to stick with your signature designs but, adding in some new wreath making skills is a fantastic way to keep you sharp. And, adding to the variety of your products is a great way to keep things fresh for you customers!
This UITC cow flower wreath is so pretty when it’s assembled. And it offers you a different way to make your much loved deco mesh wreaths. What could be better than a design that keeps your wreath making sharp, fresh, and beautiful?!
DIY UITC Cow Flower Wreath
Ok so I finally gave in to y’all and am trying a new way of cutting my burlap mesh. I’ve always just used my rotary cutter, but between Coach Mel and all of you, I’ve been convinced to give the wood burner method a try. And, I will admit that there was less fraying with the wood burner!
If you’re not sure what I’m talking about, here’s the gist…When you cut burlap (or polyburlap) mesh, there tends to be a lot of fraying at the edges. It’s just the nature of the material. But, if you use a wood burning tool to make your cuts, the heat from the tool helps to seal your edges. That means way less of a mess from your mesh!
You absolutely must use a piece of tempered glass as your cutting surface though. Tempered glass can handle the heat from the tool so you won’t have to worry about burning or melting your work area. The other reason you want the glass is that you can place it over your measuring mat and still see through it to measure. And please remember that these tools are super hot. It is easy to burn yourself if you aren’t focused on what you’re doing. Best to leave the scary movies until after you’ve cut your mesh!
Design Variations
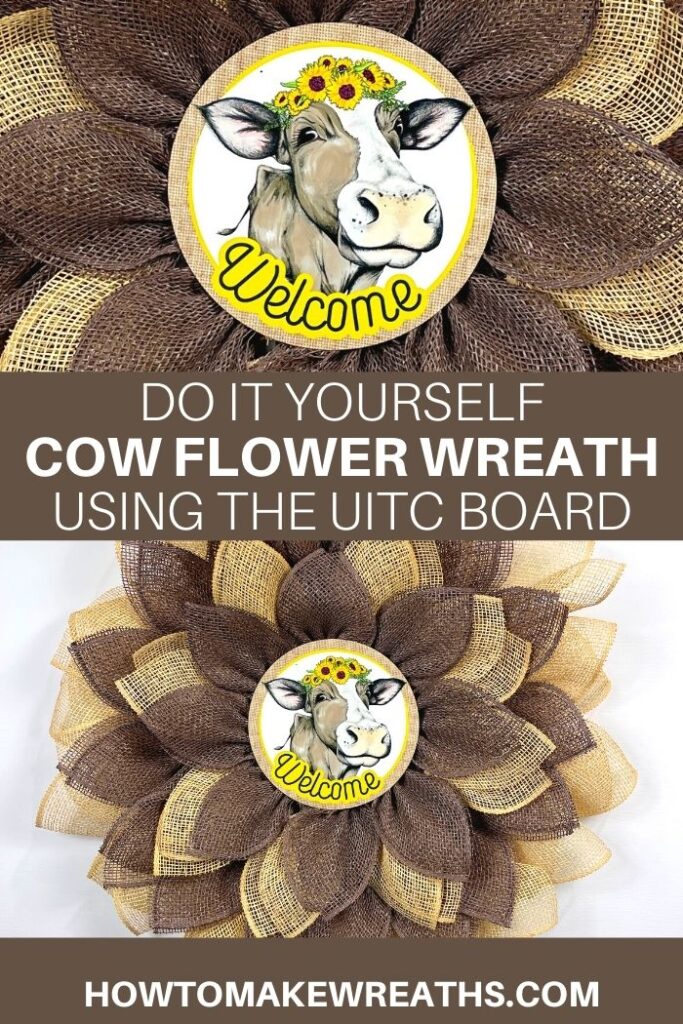
We sold this fabulous wreath as a kit and, sadly, the kits are sold out. But, you can probably still find the supplies for it on decoexchange.com. Even if you can’t snag the exact supplies that I used you can still learn to use the UITC flower board to make a fabulous wreath! I love the little cow sign that I used but if you find another circular sign you like better, go for it!
You can also just skip the sign and use a flower center or something else as your middle piece. It’s totally up to you. If you want to see a different version of the flower wreath you can watch Coach Mel in action making the Pink and White Flower Wreath. She also goes into great detail in that post about how to use the wood burning tool to cut your mesh!

UITC Cow Flower Wreath
Materials
- UITC Flower Board
- zip ties
- 2 10" burlap deco mesh One regular burlap and one chocolate colored
- sign/attachment
- 1″ mounting square
- pipe cleaners
- super glue
- Wood burner and tempered glass cutting board optional
- Rotary cutter
- wire cutters
Instructions
- Start by cutting 10" squares of your burlap meshes. If you have a wood burner and tempered glass cutting board use those to make your cuts. If not, you can use scissors.
- Next, load your zip ties into the first four outside rows of the UITC flower board, skipping the outside row. Close the zip ties but don't pull them completely closed. Then load the outside row, one zip tie per hole, and don't close them.
- Now use the super glue to attach a cable tie mount to the back of your sign. Set it aside to dry.
- Next, take a piece of your burlap and scrunch it corner to corner to make a ruffle. Fold the ruffle in half and then add it to a tie on the outside rung of the flower board. You want about an inch and a half of the fold to go through the zip tie. Pull the tie snug and then use the wire cutters to trim the ends. Continue this around the entire outside ring of the board.
- For the next ring in, use the chocolate mesh. For the rest of the rings you will make your petals like this: fold one corner to the opposite corner to make a triangle. Make a slight fold at the center. Then loosely scrunch up a few inches on each side to make a petal. Attach them to all the zip ties on the second ring in just like you did your other petals.
- Move to the next ring in and add burlap petals to each zip tie. For this layer, spread the two parts of the petal apart to open them up a bit.
- Next, use the chocolate mesh to add petals to each tie on the next ring in.
- Now push a pipe cleaner through the opening on your mounting square. Then, use the pipe cleaner to attach the sign to the center of the flower.
Video
I love how the two burlap meshes in this wreath work together. They blend well and give a soft look to the whole wreath. This is also one of the few wreath designs that I make that would fit perfectly between a storm door and front door. It’s only about 2-3 inches thick. Perfect for any northern living wreath lovers!
If you are looking for wreath designs that work well with storm doors, check out How to Make a Christmas Pancake Wreath. It’s just like a traditional deco mesh wreath but at a fraction of the thickness. I hope you give this UITC cow flower wreath a try and have a lot of fun doing it!
Just pin this UITC cow flower wreath tutorial below to find the instructions later!
If you need any help with centerpiece-making, bow-making, wreath-making, or crafting in general, be sure to check out more of our tutorials on How to Make Wreaths.
We would love to see your beautiful summer wreaths! Please share with us over at the How To Make Wreaths Facebook Group.

If you’re a dog lover or know someone who is, check out our Support Dog Rescue t-shirts and click on the picture below!


I love this. My maiden name is Borden, as in Elsie the cow. The colors are striking, like chocolate milk. I’m gonna have to check it out.