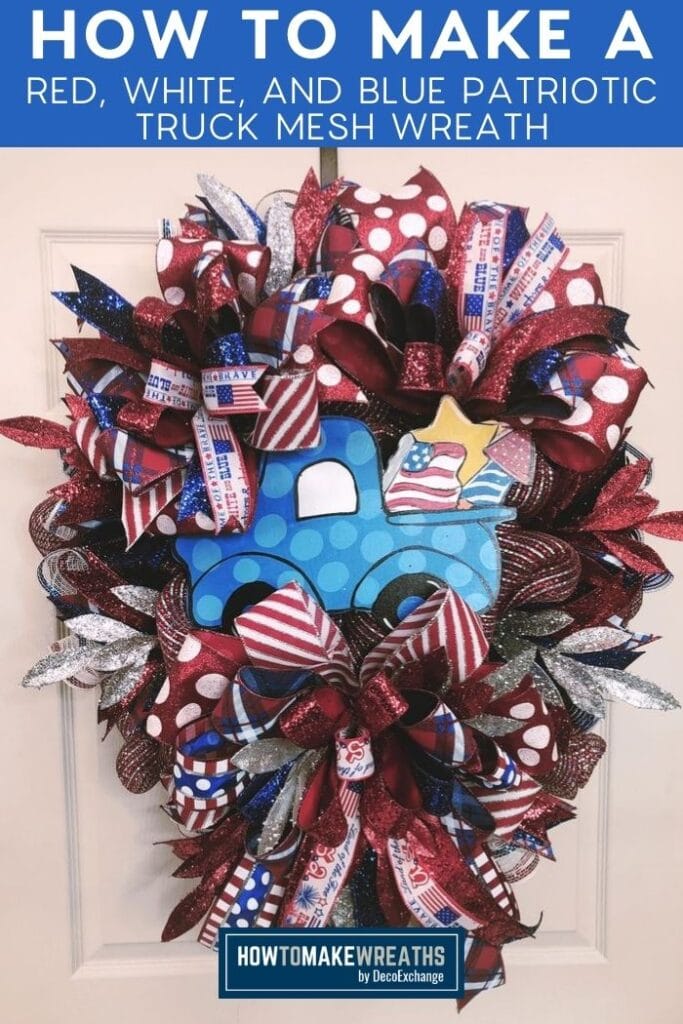
Learn how to make a patriotic red, white, and blue wreath with a cute truck on it. This wreath proudly and beautifully boasts our nation’s colors and is perfect for displaying all summer long.
Hey, y’all! It’s time to get patriotic with some red, white, and blue!
Today, I’m showing you how to make a deco mesh red, white, and blue patriotic wreath. It has bows, poufs, and ribbon tails and cheers up any door with its fun, patriotic colors.
Patriotic Truck Wreath Supplies Needed
Here’s everything you need to make this fun red,white, and blue wreath with a truck!
- 24” Evergreen wreath base
- Wide truck sign
- 3 Colors of deco mesh
- Craft foam
- Hot glue gun and glue sticks
- Heavy-duty stapler
- 4” ribbon
- 3 – 2.5” ribbon
- 3 – 1.5” ribbon
- Pipe cleaners
- Ribbon tail boards
- Glitter leaf sprays
- EZ Bow Maker
TIP: If you can avoid buying the more expensive oval wreath frames by purchasing a circle frame which costs about half as much, you can save a good chunk of money and all you need to do is simply bend the wreath frame into the oval shape.
How To Make Your Patriotic Bows
Use these step-by-step instructions to put your bows together. The first bow will be the biggest. The second bow will follow the process of the first bow but have smaller measurements.
Step 1
Take your EZ Bow Maker and your 4” red and white ribbon and make a 8” loop with 16” tails.
Step 2
Grab your 2.5” ribbon and make two 8” loops with 16” tails.
Step 3
Using the second 2.5” ribbon, make a slightly smaller loop and 16” tails.
Step 4
With the third 2.5” ribbon, make two slightly smaller loops and 16” tails.
Step 5
Grab the 1.5” ribbon and make a slightly smaller loop and 16” tails.
Step 6
With the second 1.5” ribbon, make two slightly smaller loops and 16” tails.
Step 7
Use the 1.5” ribbon to make a slightly smaller center loop with 16” tails.
Step 8
Attach 2 pipe cleaners together because your bow is thick! Carefully pull your bow off the EZ Bow Maker and use a pipe cleaner to secure your bow.
Bow #2
For the second bow, start with using your 4” ribbon to make 6” loop and 8” tails. Take your next ribbon and follow the same process.
Keep doing through the order of the ribbons making X’s with your loops and tails. With your final ribbon, make a center loop with 2 tails.
Attach 2 pipe cleaners together to make them longer. Carefully pull the bow off your EZ Bow Maker and secure it with your pipe cleaners. Dovetail the ends of your tails.
Bow #3
Your third bow will use the fewest ribbons.
Make a 7” loop with 12” tails using your 4” ribbon. Then, take a 2.5” bow and make 2 slightly smaller loops and 12” tails.
Use the next 2.5” ribbon to make a slightly smaller loop with same size tails.
Grab a 1.5” ribbon and make two slightly smaller loops with same size tails. Use your 1.5” ribbon to make a center loop with tails, then pull your bow off and secure it with pipe cleaners.

Patriotic Red White and Blue Bows
Instructions
- Take your EZ Bow Maker and your 4” red and white ribbon and make a 8” loop with 16” tails.
- Grab your 2.5” ribbon and make two 8” loops with 16” tails.
- Using the second 2.5” ribbon, make a slightly smaller loop and 16” tails.
- With the third 2.5” ribbon, make two slightly smaller loops and 16” tails.
- Grab the 1.5” ribbon and make a slightly smaller loop and 16” tails.
- With the second 1.5” ribbon, make two slightly smaller loops and 16” tails.
- Use the 1.5” ribbon to make a slightly smaller center loop with 16” tails.
- Attach 2 pipe cleaners together because your bow is thick! Carefully pull your bow off the EZ Bow Maker and use a pipe cleaner to secure your bow.
Notes
Bow #2
For the second bow, start with using your 4” ribbon to make 6” loop and 8” tails. Take your next ribbon and follow the same process. Keep doing through the order of the ribbons making X’s with your loops and tails. With your final ribbon, make a center loop with 2 tails. Attach 2 pipe cleaners together to make them longer. Carefully pull the bow off your EZ Bow Maker and secure it with your pipe cleaners. Dovetail the ends of your tails.Bow #3
Your third bow will use the fewest ribbons. Make a 7” loop with 12” tails using your 4” ribbon. Then take a 2.5” bow and make 2 slightly smaller loops and 12” tails. Use the next 2.5” ribbon to make a slightly smaller loop with same size tails. Grab a 1.5” ribbon and make two slightly smaller loops with same size tails. Use your 1.5” ribbon to make a center loop with tails, then pull your bow off and secure it with pipe cleaners.How To Make This Patriotic Red, White, and Blue Wreath
Follow these steps to make your own patriotic wreath to hang on your door or sell!
Step 1
Take your wreath base and push down on it to turn it more into an oval shape than a circle shape. This will give us room for more bows!
Step 2
Take the red and silver mesh and make 8 poufs going around the outside of the frame. Make sure your poof heights are about the same all the way around.
Step 3
Continue making poufs as you go around the wreath base again, this time on the inside to cover up the inner part of the wreath. Cut the mesh.
Step 4
Take the blue mesh and the red, white, and blue striped mesh and cut them in 25” strips. Scrunch them up side by side as a double ruffle and attach them around the outside of the wreath where your poufs are attached.
Step 5
Prepare to attach your truck sign by taking a pipe cleaner and hot gluing it to the back of the sign.
Cut out a small square of craft foam and put it on top of the pipe cleaner. Then, take your stapler and staple the craft foam and pipe cleaner to the sign.
Do this 4 times total (2 across the top and 2 across the bottom of the sign).
Step 6
After the glue dies on your truck sign, attach your truck sign to your wreath with the pipe cleaners you just added to the back of the sign.
Step 7
Attach your bow to the bottom of your wreath, under the sign, using the pipe cleaner you used to secure your bow.
Step 8
Attach bow #2 to the top of the wreath, above the truck sign.
Step 9
Using your ribbon tail boards, measure out tails with three different 2.5” ribbon. Cut the tails and dovetail the ends, then stack them, pinch them in the middle and attach them to your wreath next to the smaller bow at the top.
Repeat several more times around the outside of your wreath.
Step 10
Attach your third bow to the top right side of the wreath. Trim the tails down and dovetail the ends.
Step 11
Take your glitter leaf sprays and cut them to separate them. Add a dab of hot glue to the tips and add them in a triangle pattern around your wreath.
Step 12
Fluff out and arrange your ribbons and trim up any tails that you want.
Patriotic Truck Wreath – Final Thoughts
And, that’s it! Isn’t it fun?
This wreath is much bigger than most of my designs, but doesn’t it look amazing when it’s done? This wreath isn’t any harder to make than my other wreaths; it just takes a little longer to complete the additional steps.
If you love this patriotic truck wreath, check out our other red, white, and blue designs:
- How to Make a Patriotic Red Bike Wheel
- DIY Patriotic Deco Mesh Grapevine Wreath
- God Bless America Patriotic Wreath
- DIY Patriotic Centerpiece with a Top Hat
If you need any help with centerpiece-making, bow-making, wreath-making, or crafting in general, be sure to check out more of our tutorials on How to Make Wreaths.
We would love to see your beautiful wreaths! Please share with us over at the How To Make Wreaths Facebook Group.
If you’re interested in more info on learning how to make wreaths or being in a community of like-minded crafters, check out our Creative Coaching Subscription Group.

Patriotic Truck Red White and Blue Wreath
Materials
- evergreen wreath base
- truck sign
- deco mesh 3 different colors
- craft foam
- pipe cleaners
- ribbon tail board
- leaf sprays
- hot glue gun
- glue sticks
- staple gun
Instructions
- Push down on the side of your wreath base to turn it into an oval shape rather than a circle shape.
- Take the red and silver mesh and make 8 poufs going around the outside of the frame. Make sure your pouf heights are uniform all the way around.
- Continue making poufs as you go around the wreath base again, this time on the inside to cover up the inner part of the wreath. Cut the mesh.
- Take the blue mesh and the red, white, and blue striped mesh and cut them in 25” strips. Scrunch them up side by side as a double ruffle and attach them around the outside of the wreath where your poufs are attached.
- Prepare to attach your truck sign by taking a pipe cleaner and hot gluing it to the back of the sign. Cut out a small square of craft foam and put it on top of the pipe cleaner. Then take your stapler and staple the craft foam and pipe cleaner to the sign. Do this 4 times total (2 across the top and 2 across the bottom of the sign).
- After the glue dies on your truck sign, attach your truck sign to your wreath.
- Attach your bow to the bottom of your wreath, under the sign, using the pipe cleaner you used to secure your bow.
- Attach bow #2 to the top left section of the wreath, above the truck sign.
- Using your ribbon tail boards, measure out tails with three different 2.5” ribbons. Cut the tails and dovetail the ends, then stack them, pinch them in the middle and attach them to your wreath next to the smaller bow at the top. Repeat several more times around the outside of your wreath.
- Attach your third bow to the top right side of the wreath. Trim the tails down and dovetail the ends.
- Take your glitter leaf sprays and cut them to separate them. Add a dab of hot glue to the tips and add them in a triangle pattern around your wreath.
- Fluff out and arrange your ribbons and trim up any tails that you want.
Video
Just pin this patriotic truck wreath tutorial below to find the instructions later!