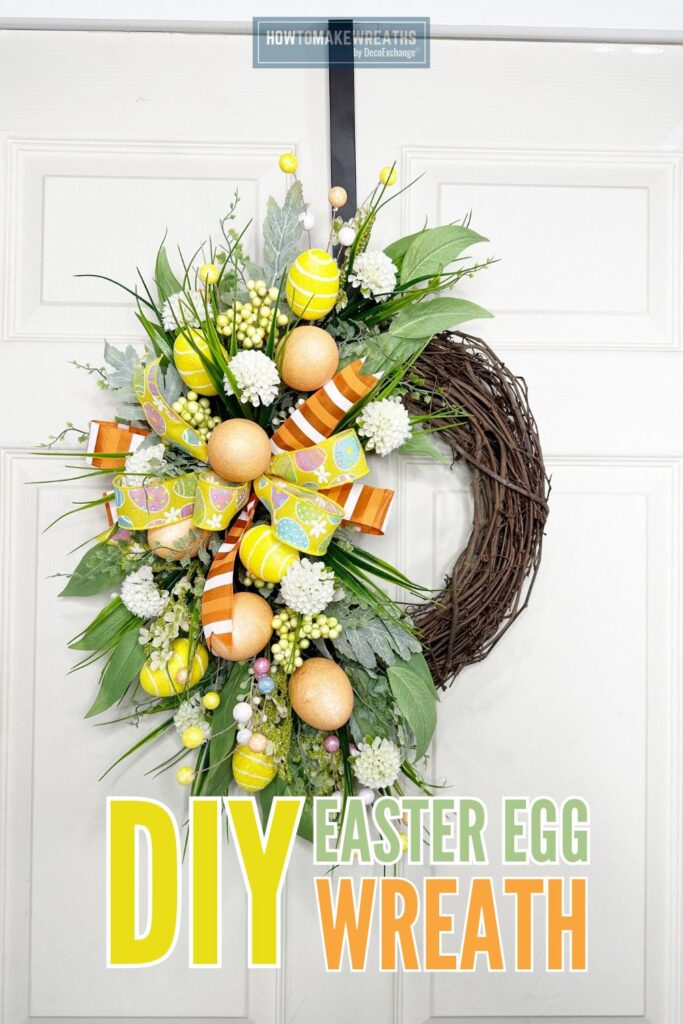
Looking for a last minute DIY to decorate your front door for Easter? It’s the perfect time to add a pop of color and a dash of joy to your home with a DIY Easter Egg Wreath.
This delightful project is not only fun to make but also a charming addition to your seasonal decorations. The best part? It’s easier than you think! Let’s hop into this tutorial.
Supplies Needed

- 14″ Oval grapevine wreath base
- Easter egg picks
- Greenery filler
- Pom pom florals stems
- 1.5″ Easter egg ribbon
- 1.5″ Orange and white stripe ribbon
- Hot Glue
Instructions
Prep your base
- Start with a 14” round grapevine wreath base.
- Add in 5 easter egg picks to the left half of the wreath using glue.
- Take a few greenery fillers and add picks to them using a pick machine. Put them off to the side.
Make and add your bow
- Take a 1.5” orange and white stripe ribbon and make a bow with 3 loops.
- Take a 1.5” egg ribbon and make a bow with 4 loops.
- Layer your bows.
- Secure your bow with a zip tie.
- Add a green zip tie.
- Dovetail the ends of the bow.
- Add your bow to the left side of the wreath in between the easter egg picks.
- Fluff out your bow.
Add in your greenery and florals
- Add the greenery fillers in between the easter egg picks using the picks and glue.
- Add in a few pom-pom florals in between the easter egg picks using glue.


Easter Egg Wreath on a Grapevine Base
Equipment
- Hot Glue Gun and Glue Sticks
- Pick Machine (Optional for adding picks to greenery)
- Zip ties
- Scissors for Dovetailing Ribbon
Materials
- 14- inch Grapevine Wreath
- 5 Easter Egg Picks
- Greenery Filler
- Pom Pom Florals
- 1.5" Egg Ribbon
- 1.5" Orange and White Stripe Ribbon
Instructions
Prep Your Base:
- Begin with a sturdy 14-inch round grapevine wreath base from DecoExchange as your canvas.
- Using a hot glue gun, attach five whimsical Easter egg picks to the left side of the wreath, ensuring they're evenly spaced and securely affixed.
Craft and Affix Your Bow:
- Create a springtime bow with the 1.5-inch orange and white stripe ribbon, fashioning three loops for a full and fluffy appearance.
- Next, take the 1.5-inch egg ribbon and make a slightly larger bow with four loops to layer on top of the first bow.
- Place the egg ribbon bow atop the striped ribbon bow, and fasten them together with a zip tie for extra security. Choose a green zip tie to blend seamlessly with your design.
- Cut the tails of your ribbons at an angle or in a dovetail shape for a polished look.
- Nestle your festive bow amongst the Easter egg picks on the left side of your wreath and fluff it to perfection.
Intersperse Greenery and Florals:
- Add depth and texture by dispersing greenery fillers throughout the left side of the wreath, using the picks you’ve prepared to insert them easily. The fillers should peek through the egg picks, creating a lush, natural backdrop.
- For that final touch of whimsy, tuck a few pom-pom florals among the picks, securing them with dabs of hot glue. These charming blooms will provide a delightful contrast and an extra burst of spring energy.
Video
Your very own, handcrafted Easter egg wreath is ready for your door! Let it welcome guests with the spirit of the season. This eye-catching decoration not only celebrates the festive cheer but also showcases your creative flair.
Remember, the beauty of DIY is in the uniqueness of each creation. Don’t hesitate to add personal touches or play with different color schemes. Share your finished wreath with us in the comments or tag us on social media – we can’t wait to see the joy you bring to life!
Happy crafting, and may your Easter be filled with as much delight as your new wreath brings!