
Hey y’all if you’ve been following along with our design planner you know your Valentine’s Day production runs from November thru January. So bookmark this deco mesh wreath for Valentine’s Day tutorial just in case.
You can still grab your 2020 Craftpreneur Design Planner, it’s not too late! Find out more on how to plan your production.
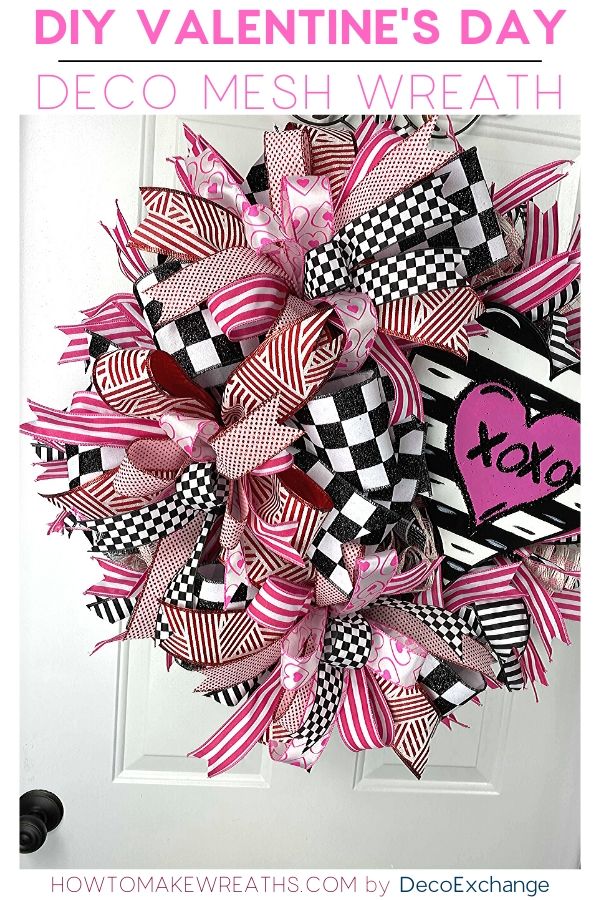
This easy-to-follow video tutorial will help you take this…

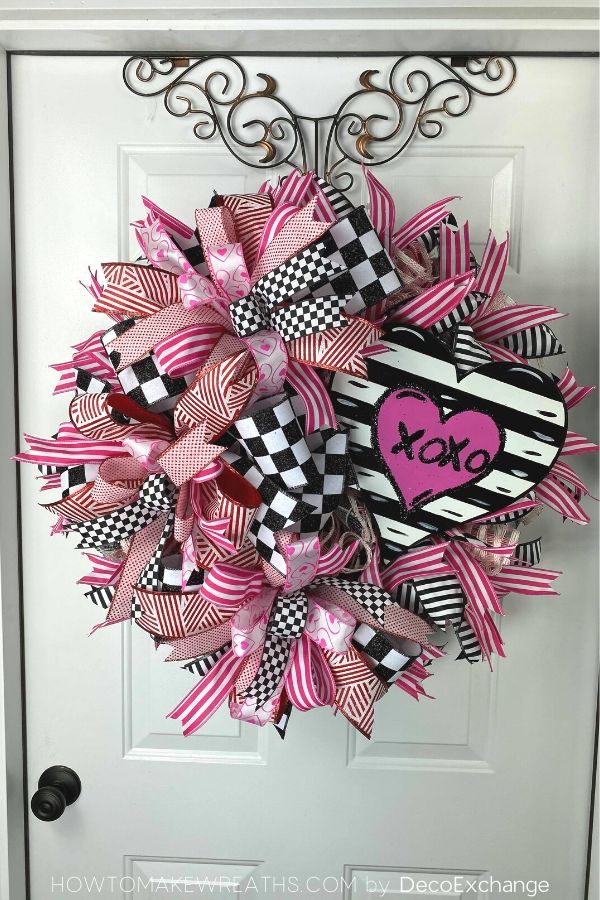
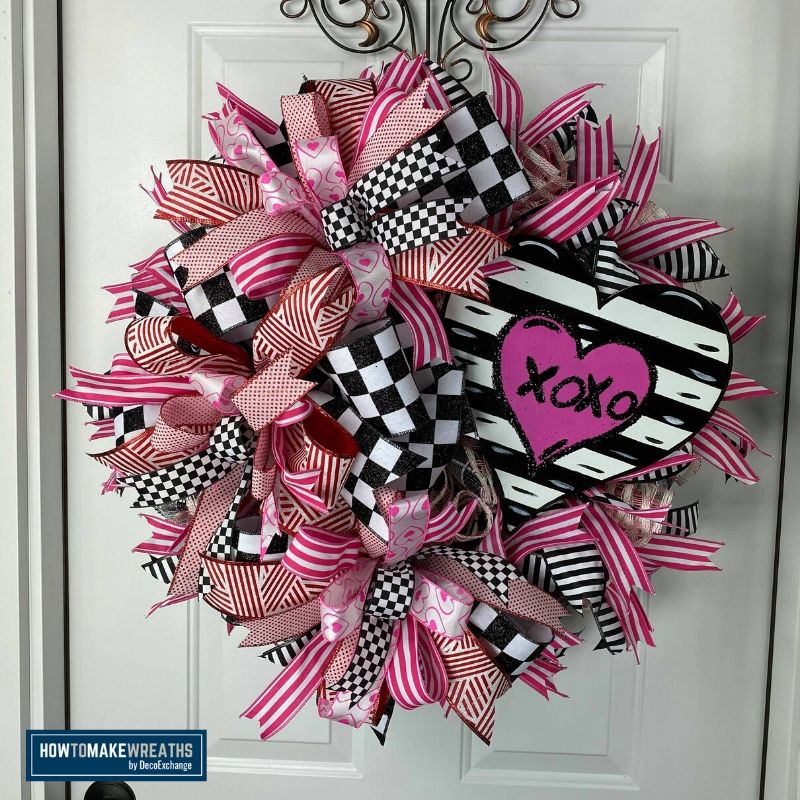
to this beautiful black, white, and pink Valentine’s Day deco mesh wreath!
Supplies
- 15″-20″ Wreath frame
- 21″ Roll deco mesh
- 10″ Roll of deco mesh
- (1) 4″ Ribbon
- (2) 2.5″ Ribbon
- (3) 1.5” Ribbon
- Sign attachment
- Pipe cleaners
Tools
Watch the video tutorial below
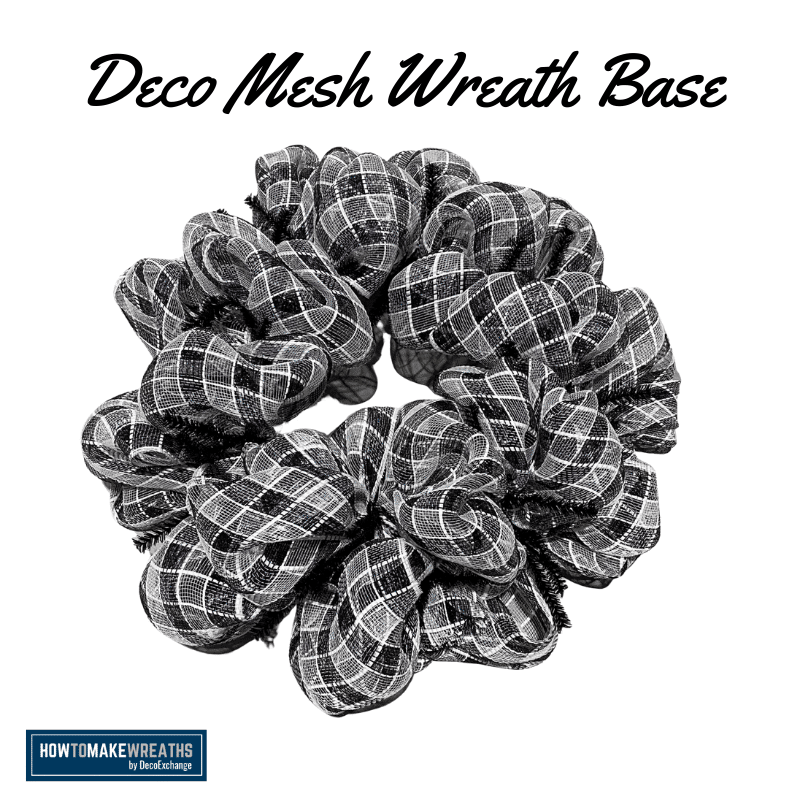
How to Make a Basic Deco Mesh Base:
- Push all the twist ties on the wreath form upward so they are ready for you to add the deco mesh.
- Lay your 21″ deco mesh on the floor below your workspace so you can unravel easily as you measure and create poofs throughout the wreath. (Check out the 1:56 mark on the video)
- Make sure to fluff as you go.
- Once the you’re done with this top layer, find the nearest twist and tie off the deco mesh
- You can keep going around on creating poofs on the bottom row of twist ties.
- Open up the first one twist tie and secure the end of your deco mesh. Get it nice and tight.
- Now, you can cut the tail.
Alright, so we’re gonna take our deco mesh base one step further by cutting 20″ ruffles with 10″ deco mesh and adding these ruffles to our whole wreath.
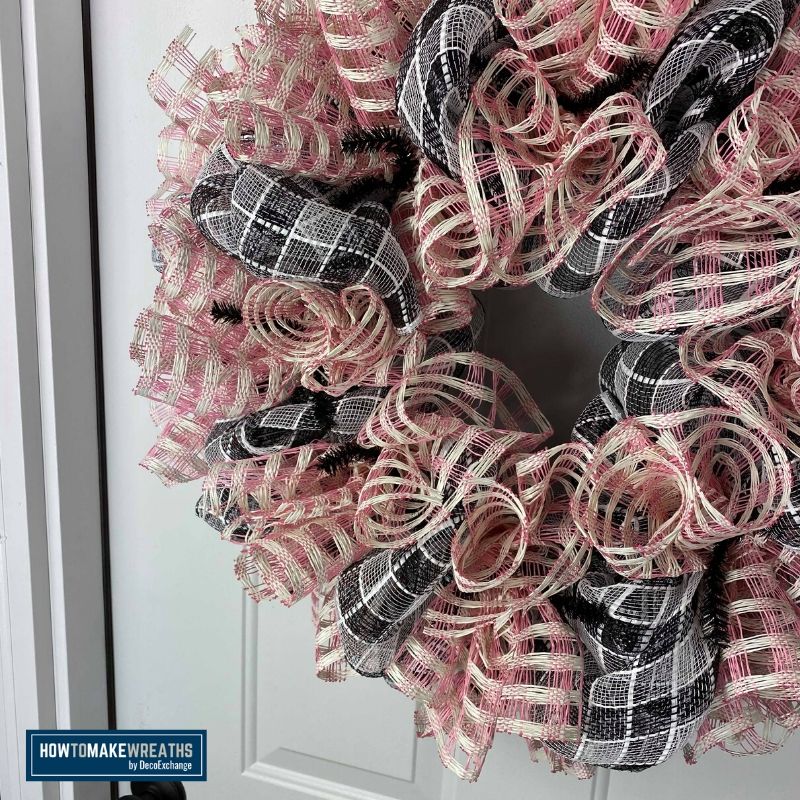
How to Add Ruffles to a Deco Mesh Base
- Take your 20″ cut deco mesh pieces and curl each piece inward at each end. Then crunch them towards the middle. (Check out 7:04 mark of the video) *Pro-tip: this keeps the cut edges hidden as they tend to fray.
- Now add these ruffles all around the base.
Adding Ribbon Tails to a Wreath
My rule of thumb is a poof size plus four inches. Since I always do 10″ poofs, I add 14″ ribbon tails.
- Using the ribbon tail board, wrap the 2.5″ inch ribbon around the 14″ section 5 times.
- Pull the wrap off of the board and cut each end. This should give you 10 ribbon tails once it’s cut. (Check out the 9:14 mark of the video to see how quickly you can create all 10!)
- Keep each side together (5 per side) and fold in half length-wise to cut diagonally from non-wired side to wired. Repeat with the other set of 5.
- Repeat step 1-3 with 1.5″ ribbon, except in this wreath we wrapped it 18 times to create 36 dove tails.
- Layer (2) 1.5″ ribbon tails over (1) 2.5″ ribbon tail and fold them in half to crease.
- Crunch the ribbon together at that crease and add to twist ties on base.
We could call it good, but I personally don’t think it looks complete. So let’s add the finishing touch, a cute wreath sign secured to the wreath form with pipe cleaners. We grabbed the Valentine’s Day sign pictured above from Hot Mesh Mom.
It’s bow making time!
Time to bust out your EZ Bow Maker and let’s get to bow making. We’re going to make 3 Terri Bows to go on our wreath.
- Using your 4″ ribbon, measure out 8″. Pinch it in the center. We’re going to give it a twist, slide it in. We want our pretty side up.
- For this process we’re going to have two loops and two tails.
- Using 2.5″ ribbon repeat step #1 with a 1/2″ inch shorter loop, but leave your tail the same length as the previous layer.
- Repeat with this layering process with the smaller size ribbon on each layer.
- Remove the bow from the EZ Bow Maker and secure with a pipe cleaner.
- Repeat 2 more times so you have 3 bows in total.
- Add the bow to wreath with the pipe cleaners that holding the bows together. (Top, bottom, and side)
Hope you guys learned a trick or two. Hope you guys are gonna make us some wreaths to check out on our How to Make Wreaths group.
If you are interested in more info on learning how to make wreaths, where to buy supplies, and being in a community of like-minded crafters, check out our Creative Coaching Subscription Group.
We think you’ll love these other posts too!


Wreath is amazing
You make it seem so easy, I enjoyed your tutorial and the wreath is beautiful.
I don’t understand why the deco mesh is used at all as you can’t even see it. All I see are ribbons. Why put the mesh on? I’m trying to learn and understand.
Helen, think of deco mesh as foundation to lay the ribbons on. It makes the ribbons stand out and also gives your wreath a fuller look and adds dimension.
WOW! Gorgeous…learned so much by watching your tutorial. Thank you for sharing.