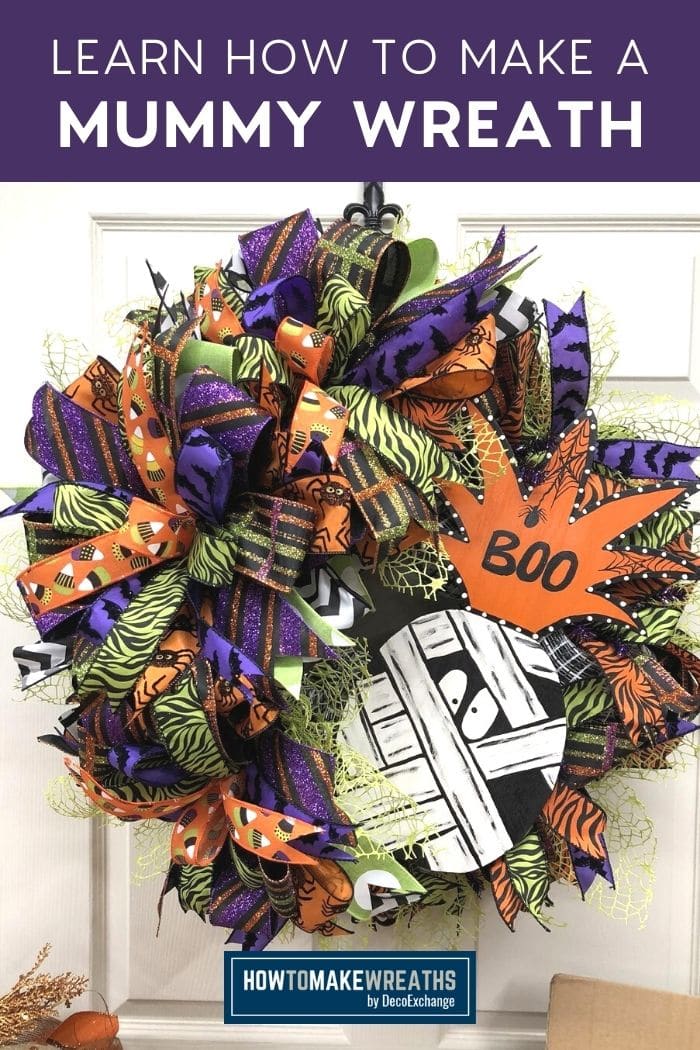
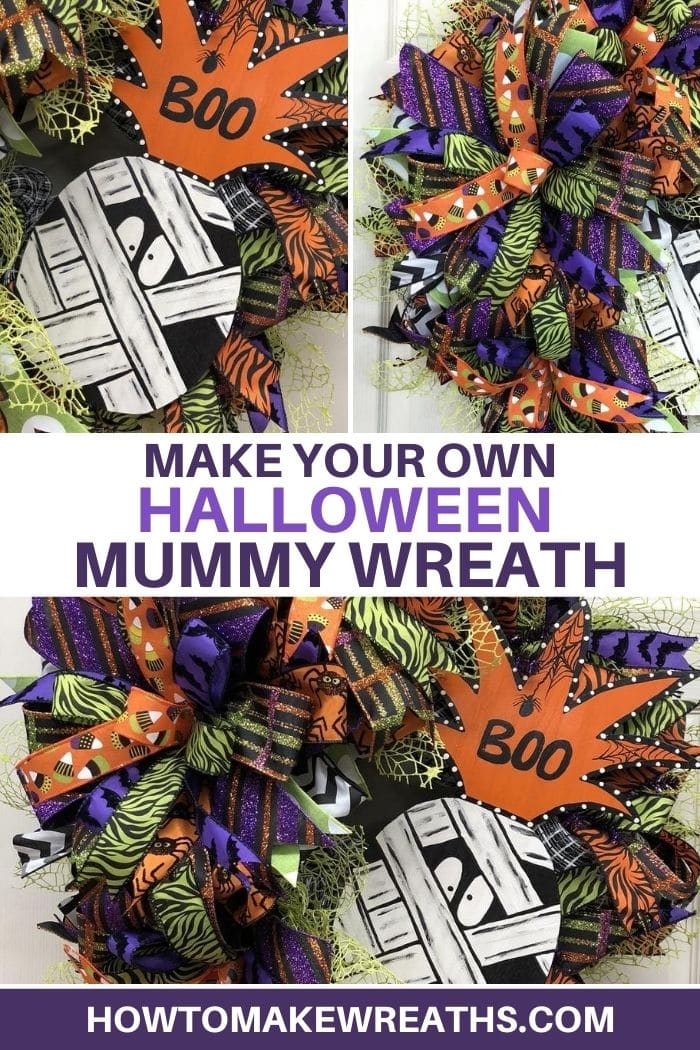
If y’all are looking for a fun Halloween wreath to make, I definitely have you covered. Today, I’m showing you how to make a DIY mummy wreath that is both festive and adorable!
In the video below I show you how to make a Halloween wreath with deco mesh. Two of my absolute favorite things y’all! I use some funky ribbons and a sweet pineapple mummy sign to create this wreath. The result is a unique and spooky piece of door decor!
How to Make a Mummy Wreath
Y’all know that I love Halloween. One of the things I love most is the variety of amazing wreath signs and ribbons you can find. The sign I used for this one is a super cute pineapple mummy. Not something you see every day right? I got this one from Hidden Angel Boutique and it’s so fun. If you want to know more about where to buy affordable wreath signs, we have a whole post to help.
When it comes to adding a sign to your wreath, make sure that it is thick enough to hold staples before you attach pipe cleaners to the back. If it isn’t thick enough your staples will come through the front and ruin your sign. You can avoid this problem by adding something to the back to make it thicker. I like to use Styrofoam sheets that are backed with adhesive. All you have to do is cut 4 squares and stick them to the back of your sign where you want to add your pipe cleaners. Problem solved! For more tips, check out my post on how to attach wreath signs.
I solve another problem while making this wreath too. Because I got to chatting with y’all, I accidentally added my wreath sign before the ribbon tails. If you’ve been with me for awhile you know that my number one rule is that we don’t rework! It takes too much time which adds to frustration and takes away from your profit. So, instead of removing the sign and starting over, I roll with the punches and make it work. When you make a mistake you just need to get creative with it. Sometimes the result may be better than your intended design. Don’t sweat the small stuff y’all.
Making a Terri Bow
Instructions
- Start by measuring out a piece of 24-inch wire. You’re going to need to cut and have 2 of these per bow.
- Next, take your first ribbon of choice (start with your 1.5" ribbons then move to your 4" ribbons after that) and set it aside. Grab one of the wires that you just cut and fold it in half. Measure the ribbon out about 6 inches, give it a pinch, and tie it off with the wire.
- Take that ribbon and wrap it around your center peg. Give it a little pinch on the bottom then tie it with the wire and wrap the wire around the bottom peg. Tie if off on the top. Doing this gives you a center loop.
- Now it’s time to add your second wire. Take the second piece of cut wire and fold it in half. Work it through the bottom of the ribbon that is the newly created center ribbon and twist it off using the wire.
- Take your ribbon and loop up and around the center ribbon and around the next pegs on the left and right of the center ribbon. Then, tie it off at the bottom.
- At this point, you’ll do the same with your remaining ribbons as well. Follow the same steps of grabbing your third wire, folding in half, circling around the bottom center loop and around the next two pegs on the left and right that are currently empty.
- For the final step of using up the four cut wires, do this exact same process again with the fourth ribbon and fourth wire.
- Do these steps over and over again until you’ve come to the end of the pegs. On the second to last peg use 2 4" ribbons together. Use one 4" ribbon at the last peg. The reason for this is that we are using 8 different ribbons but the Pro Bow only has 7 pegs.
- Once tied, pull off the pegs, fluff your ribbon, and you’ve created your very own wreath bow!
DIY Mummy Wreath
Materials
- wreath form 15"
- 21" deco mesh I used black and white window pane
- 10" deco mesh I used green spider web
- wreath sign mummy sign
- 2 1.5" wired ribbon
- 1 2.5" wired ribbon
- pipe cleaners
- ribbon tail board
- scissors
- rotary cutter
- Pro Bow the Hand
- staple gun
- craft foam
- 3 Terri Bows See above recipe
Instructions
- Attach your 21" deco mesh to wreath form. Start with an 8" poof at the top then work your way around the wreath form attaching a 8" poof at each anchoring spot. Start with the top ring of the form. Continue along the bottom ring of the form making your poofs slightly larger than the ones on top. Add a middle row to cover the wreath frame. This row should be down under your poofs. Skip every other twist tie. Cut end when done.
- Take your sign and attach one pipe cleaner diagonally at each corner with a staple gun. Make sure that your staples are not thicker than your sign, you don't want them to pop through the front. If you need to, cut 4 squares of craft foam and attach to the sign where you want to attack the pipe cleaners. Use hot glue gun on each corner to make sure your staple and pipe cleaner are secure.
- Attach the wreath sign using the secured pipe cleaners. You want it tight enough so that it doesn't move but not so tight that you squish your mesh.
- Use a ribbon board to cut 18- 2.5" ribbon tails 14" long; dove tail the ends. Next, repeat with each of your 1.5" ribbons.
- Place one of each 1.5" ribbon tail on top of the 2.5" ribbon. Fold them in half and pinch at the center point. Attach at each twist tie on the wreath form. Repeat at all twist ties of the wreath form.
- Attach your three bows. One at the top, bottom, and left side of the wreath.
- Use rotary cutter to cut 9 strips of the spiderweb mesh. Turn it so it's in a diamond shape then gather at the center. Attach to each twist tie on the bottom rung of the wreath frame.
This Halloween wreath is one of my favorites so far. I got to use so many awesome ribbons and I love the way the whole project turned out. If you are in the market for Halloween wreath ideas that you can DIY I hope this gives you some inspiration. May your treats be many and your tricks be few!
If you need any help with centerpiece-making, bow-making, wreath-making, or crafting in general, be sure to check out more of our tutorials on How to Make Wreaths.
We would love to see your beautiful summer wreaths! Please share with us over at the How To Make Wreaths Facebook Group.
We Think You’ll Enjoy These Related Posts:


