
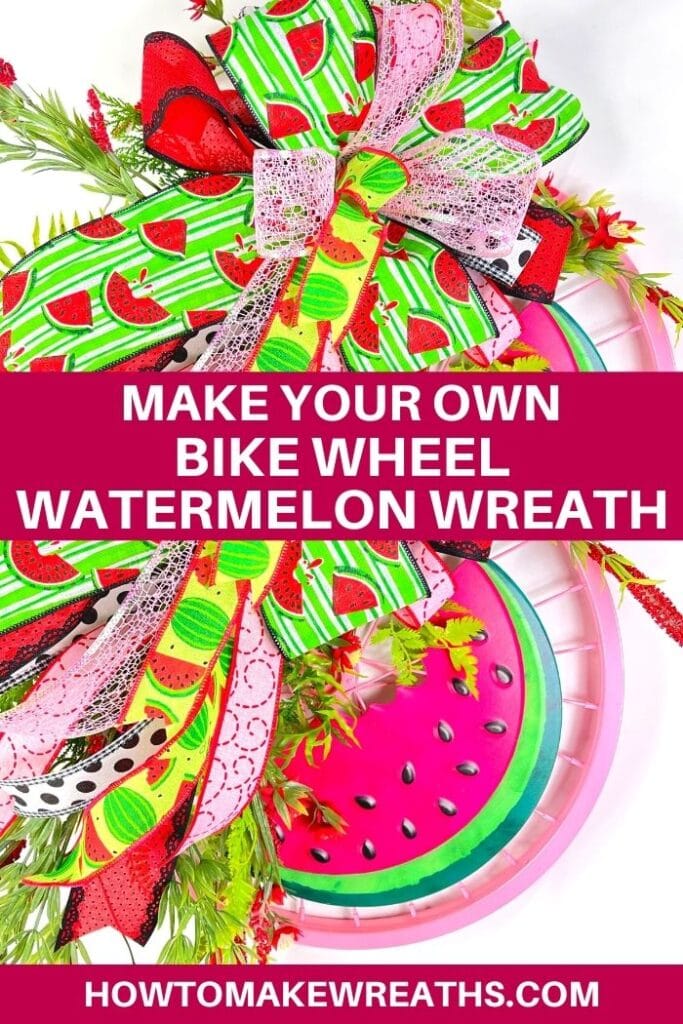
We have another awesome summer wreath design for you today! I’m showing you how to make a summer watermelon bike wheel wreath that gives you all the warm weather feels!
There are so many ways that you can go with your summer wreath designs. Bright colors and fun themes are always welcome during the warm months. In the video, below I show you how to create a summer watermelon bike wheel wreath that combines some of the best things about summer!
Eating watermelon while pedaling a bike may get a little tricky and sticky But, enjoyed separately, they are still some of the best activities. So I thought, why not incorporate them together into the same summer wreath? I love the results!

Make Your Own Bike Wheel Watermelon Wreath
Summer time is all about those fun outdoor activities and tasty seasonal treats. If you live in the south like we do, you probably find yourself hiding in the air conditioning more often than not. But, every chance we get, we are outside enjoying the sunshine.
If you are indoors, that just means you have more time to craft! And who doesn’t love that? This adorable summer bike wheel wreath is the perfect design to work on while you’re waiting for the temperatures to drop. Then, when you’re done, you can relax with a tasty slice of cold watermelon. It doesn’t get much better than that!
If you haven’t tried using a bike wheel as a wreath base yet, now is the time to try it! Bike wheels are perfect for your spring and summer designs. They also make an awesome alternative to grapevines for your floral wreaths. Another bonus is that you don’t need to use as many supplies for these wreaths.
You don’t want to cover up your adorable bike wheel since it is a focal point in your design. That means fewer supplies needed! This would be a great opportunity to dig into that bin of leftover supplies and use some of them up. Looking for more tips on how to use all your extra wreath making supplies? We have a post for that!
Using your 4″ Ribbon
Alright, I know that some of you are nervous about using 4″ ribbon but there is no need to be! Treat it just like you do a 2.5″ ribbon that got a little more fertilizer. A lot of the time I tell you to use the 4″ as the base of your bow. It makes a great support for your other ribbons and adds a lot of depth and size to your bow.
There are exceptions to this advice though. The 4″ ribbon that I use in this project is gorgeous and it was expensive. I don’t want to hide it in the back, y’all! If you have a ribbon like this, don’t be afraid to use it front and center. You don’t want to hide that ribbon that you spent a lot of money on. If you want more tips on how to use your 4″ ribbon, we have a post for that too!

Summer Watermelon Bike Wheel Wreath
Materials
- sign/attachment watermelon
- 16" Bike wheel
- 3 1″ mounting square
- zip ties
- wire cutters
- super glue
- EZ Bow Maker
- 3 1.5 wired ribbon
- 2.5" wired ribbon
- 2.5" wired ribbon window pain or mesh
- 4" wired ribbon
- pipe cleaners
- greenery stems fern
- floral stems red
Instructions
- Start by using super glue to attach 3 mounting squares to the back of your watermelon sign.
- While your glue is drying make your bow. Grab your EZ Bow Maker and one of the 2.5" ribbons. Make an 8" tail, twist the ribbon and add it to your bow maker. Then make a 6" loop, twist the ribbon and add that to your bow maker. Repeat with another loop on the other side. Then cut a shorter tail and pull your long tail towards the bottom and your short tail towards the top.
- Repeat this same process with a 1.5" ribbon just make the loops a little smaller this time. Repeat again with the next 1.5" ribbon.
- Now use the 4" ribbon to make two more tails and two more loops. Then use the window pane or mesh 2.5" ribbon and repeat for your last main layer.
- Next use your last 1.5" ribbon to make a small loop and 2 tails, this will be the center of your ribbon.
- Finally, take two pipe cleaners and twist the ends together to make one long pipe cleaner. Remove your bow from the bow maker and use the long pipe cleaner to secure the center of the bow twisting it off at the back.
- Next, use zip ties to attach your sign to your bike wheel. Use wire cutters to trim off the ends of the zip ties.
- Now take your greenery stem and full it out, use zip ties to attach it to the bike wheel. Then do the same thing with your red flowers.
- Attach your bow, using it's pipe cleaners, right on top of the greenery and flowers.
- Next, cut about a 14"" ribbon tail of each of the ribbons you used in your bow. Use a zip tie to secure one end of the tails together and then add that in right under your bow using another zip tie. Dovetail the ends of your bow and your ribbon tails.
Video
And that’s the summer watermelon bike wheel wreath! It may be a mouthful to say but it is super simple to make. The most time consuming part is making your fabulous bow. Other than that, it’s only a matter of minutes! And that means you’ll have more time for all those fun summer things. So grab your bike wheels and a cool tasty beverage and let’s get crafting!
Just pin this DIY summer bike wheel watermelon wreath tutorial below to find the instructions later!
CHECK OUT MORE GRAPEVINE WREATHS
If you need any help with centerpiece-making, bow-making, wreath-making, or crafting in general, be sure to check out more of our tutorials on How to Make Wreaths.
We would love to see your beautiful summer wreaths! Please share with us over at the How To Make Wreaths Facebook Group.

Join our creative coaching program
The Makers University creative coaching program is lead by our team of designers! They all bring different design styles so you can create like a boss!


That was very pretty! Do you give classes?
Thank you! There is Creative Coaching subscription group you can join if you’re interested in additional classes. We also have our How to Make Wreaths page where Damon and his coaches go live creating more wreaths.