With just ribbon, your hands, and a pipe cleaner you can make some pretty amazing bows. Watch and learn as I teach you how to make an everyday bow in this DIY everyday bow tutorial.
Y’all this bow tutorial is all by hand. No need for the EZ Bow Maker this time. And I bet if you are limited on space for storage of all your crafting gear, the EZ Bow Maker isn’t even something you own. I am here to let you know, that is just fine. Just you, your ribbons, and your cute little hands are all you need to make this beauty.
To make this bow more festive, mix and match those ribbons. Then, you are all set to celebrate whatever holiday is coming up! So, how many bows are you planning on creating? One for Valentine’s Day, Spring, 4th of July, Halloween, Fall, and Christmas. You might even have so much fun that you consider doing one for Groundhogs Day, and even National Donut Day. How fun does those sound?!

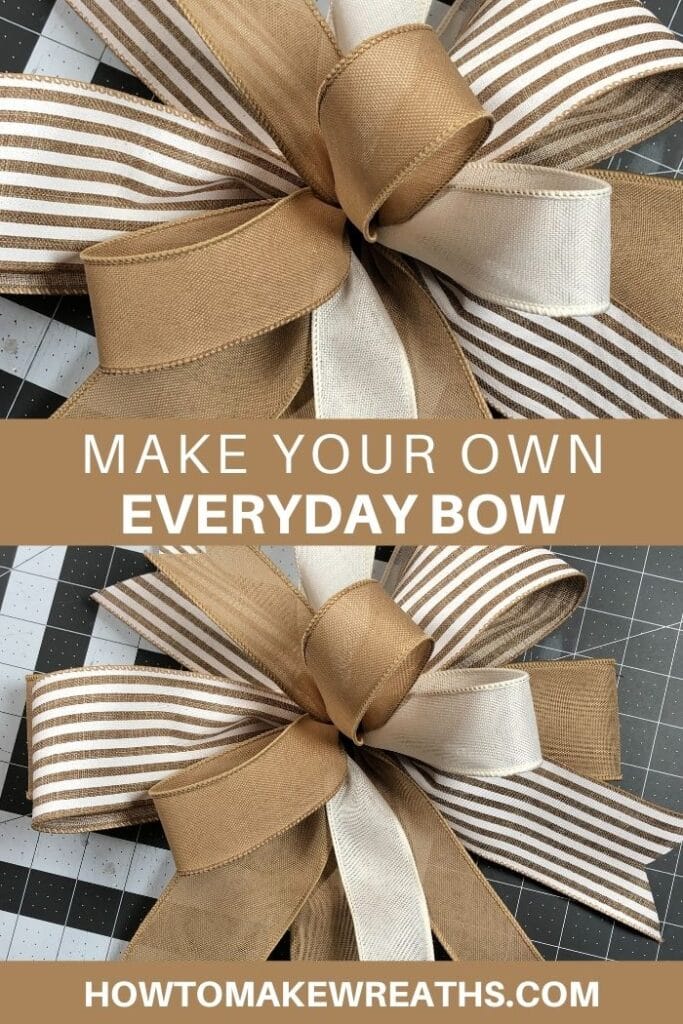
Make Your Own Everyday Bow
Want to add a little bit of personality to your wreaths and swags? I am teaching you today just how to do that with just ribbon, your hands, and a pipe cleaner. Follow along and you can make your own everyday bow. This is a great tutorial for crafters of all levels, and it’s a really fun way to add some personality to your projects. So why not give it a try? You might be surprised at how easy it is!
Supplies
- 1.5” 50 Yard Roll of Burlap Ribbon
- 1.5” 50 Yard Roll of White Ribbon
- 2.5” 50 Yard Roll of Cabana Stripe Ribbon
- 2.5” Burlap Ribbon
How To Make An Everday Bow
Step #1: Grab your 1.5” Burlap ribbon and pull a bit off from the spool. Create a tail the length you desire, and pinch it. Make a loop, running it together to add to the first pinched piece of ribbon, and then give a twist. Repeat to make a second loop the same way – loop, pinch, twist. Pull a matching section to create your 2nd tail and cut from the spool. This is the beginning component of your bow.
Step #2: Build on your next layer behind that first Burlap ribbon, repeat the same steps with your 1.5” solid White ribbon. Maintain that firm grip as you create another 2 loops and 2 tails. All together on your bow, you will have 4 loops and 4 tails. Always remember to twist your ribbons towards you so that the pretty pattern of your ribbon is seen. No one wants an ugly bow just because the pretty side is hidden.
Step #3: Repeat next with your 2.5” Cabana Stripe ribbon. “Loop, Pinch, and Twist” method to create your 3rd layer of this handmade bow. 2 more loops and 2 more tails. 6 of each altogether now.
Step #4: The last layer of your bow will repeat the same process. Use your 2.5” Burlap ribbon as you add 2 more loops and tails. For your finished bow, you should have 8 total loops and 8 tails.
Step #5: To secure your bow, grab your pipe cleaner and zip tie to have them handy. Your 3 middle fingers are holding your bow with a firm grip, maintaining the pressure. Lift your middle finger, and slide the pipe cleaner to be held in place on the back of the ribbon, Next slide the zip tie through from the front of the bow, squeezing in between your pointer finger and middle finger in the back. Connect the zip tie so it secures the ribbons and pipe cleaner together. Before cinching completely shut, fluff your loops and tails so they are all facing the direction you want. Pull tight when happy. Remove excess zip tie.
Step #6: Don’t forget to dovetail those ribbon tails to give your bow a finished look.
Step #7: Determine a spot where to add your bow on your Mini Home Wreath. I am placing mine just under the “M” and “E” on my HOME sign because that is my personal preference. But you do what you like. Work your pipe cleaner through to attach it. Adjust loops and tails to your liking to make it look as fabulous as it should.
That is it y’all! This 8 loop handmade bow took us less than 15 minutes. Let me remind you too that it is interchangeable with any combination of ribbons for any holiday decor you want to add. The sky’s the limit! These bows are your best friends when it comes to cute home decor. Perfect for those of us who have limited space and limited time, but not a limited desire to be extra cute with our home decor style.
FAQs
How To Choose Coordinating Ribbon?
Start by browsing a craft store or online. As you are browsing ideas will start coming to mind as you see all the different colors, patterns, and themes. Once you have an idea start comparing ribbons together and hold them next to each other if you are in a store. If the colors all match and look great then you have your ribbon selected. If one doesn’t look AMAZING with what you have then put it back and try again!
How To Pick Ribbon Material
I will start by saying you only want to work with wired ribbons. That will help you choose which ribbon material you want to select. Once you find some wired ribbon that caught your eye think about where your boy is going. That will help determine which material you should purchase for your bow.

Everyday Bow Tutorial
Materials
- 2 1.5 wired ribbon Burlap ribbon, White Ribbon
- 1 2.5" wired ribbon Cabana Stripe Ribbon
- pipe cleaners
- zip tie
Instructions
- Grab your 1.5” Burlap ribbon and pull a bit off from the spool. Create a tail the length you desire, and pinch it. Make a loop, running it together to add to the first pinched piece of ribbon, and then give a twist. Repeat to make a second loop the same way – loop, pinch, twist. Pull a matching section to create your 2nd tail and cut from the spool. This is the beginning component of your bow.
- Build on your next layer behind that first Burlap ribbon, repeat the same steps with your 1.5” solid White ribbon. Maintain that firm grip as you create another 2 loops and 2 tails. All together on your bow, you will have 4 loops and 4 tails. Always remember to twist your ribbons towards you so that the pretty pattern of your ribbon is seen. No one wants an ugly bow just because the pretty side is hidden.
- Repeat next with your 2.5” Cabana Stripe ribbon. “Loop, Pinch, and Twist” method to create your 3rd layer of this handmade bow. 2 more loops and 2 more tails. 6 of each altogether now.
- Last layer of your bow will repeat the same process. Use your 2.5” Burlap ribbon as you add 2 more loops and tails. For your finished bow you should have 8 total loops and 8 tails.
- To secure your bow, grab your pipe cleaner and zip tie to have them handy. Your 3 middle fingers are holding your bow with a firm grip, maintaining the pressure. Lift your middle finger, and slide the pipe cleaner to be held in place on the back of the ribbon, Next slide the zip tie through from the front of the bow, squeezing in between your pointer finger and middle finger in the back. Connect the zip tie so it secures the ribbons and pipe cleaner together. Before cinching completely shut, fluff your loops and tails so they are all facing the direction you want. Pull tight when happy. Remove excess zip tie
- Don’t forget to dovetail those ribbon tails to give your bow a finished look
- Attach bow to wreath of choice
Video
Just pin this Everyday Bow tutorial to save the instructions for later!