
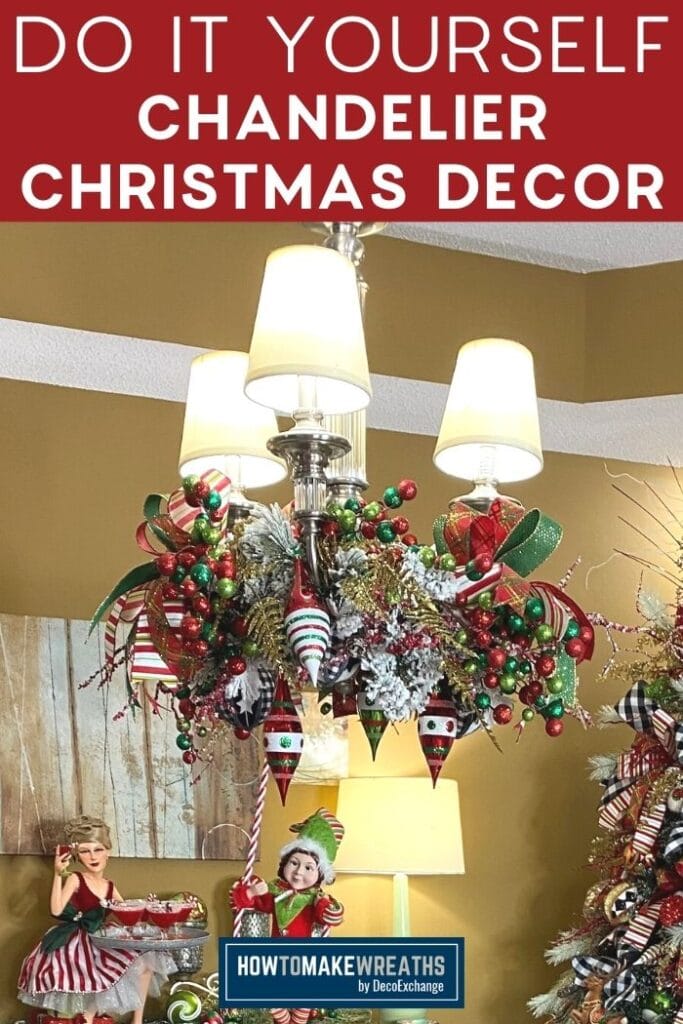
Want to learn how to decorate a chandelier for Christmas? Get the scoop on easy chandelier Christmas decor because just a few quick steps stand between you and a gorgeous Christmas chandelier!
Hey, y’all! We’re quickly coming up on my favorite season for decorating – the holidays. Wait, who am I kidding? Every season is my favorite season for decorating!
Today, we’re tackling something that I get asked about a lot: chandelier Christmas decor. And I understand why.
Chandeliers are usually in a prominent location but have an odd shape for decorating, so it might seem like a confusing piece to decorate.
After all, you can’t just put a wreath in it and call it good…
…or can you?
The short answer is yes, you can. However, that’s not what we’re doing today. We’re doing something even easier!
Hold on to your stockings, y’all, we’re decorating a Christmas chandelier like a pro today.
More Christmas Decorating Posts
Before we get started on our tutorial showing how to decorate a chandelier for Christmas, I want to make sure you know about a few of our other Christmas decor posts:
- How to Make a Simple Centerpiece
- Learn How to Decorate a Christmas Tree Like a Pro
- How to Make a DIY Christmas Centerpiece
- DIY Christmas Decor Tutorials
Chandelier Christmas Decor: How to Decorate a Chandelier for Christmas
We’re so excited to have guest designers Amy Smith with Ba Bam Wreaths and Nancy Brown from Gone Buggy Designs helping us transform our home for Christmas. They’ve put together a super fun tutorial showing you how to decorate a chandelier for Christmas.
There’s absolutely something special about family and friends coming together to decorate for the holidays. Last year, their visit was truly memorable – laughs were to be had far and wide, y’all!
Our Christmas Decorations
As we were preparing for their visit, we really wanted to get the house looking amazing for the holidays! Amy and Nancy were unbelievably helpful as they helped formulate a plan to get our home more festive than perhaps it’s ever been (and that’s sayin’ something because I love seasonal decorations).
We started with the Christmas tree. Then, we added some pillows and other decor pieces around. After that, we began to work on our large dining room table. Even with the festive place settings, it just wasn’t perfect until we added in the DIY centerpiece.
We took a look around, admiring all our hard work and the transformation our house had undertaken. Then, there came a moment where we seemed to almost gasp in unison…we had neglected to decorate the chandelier for Christmas!
We jumped right into correcting that oversight, and you get to benefit from it too since we’re showing you exactly how we did it!
Supplies Needed to Decorate a Christmas Chandelier
Here is every item that we used in our project. If you prefer a different color combination, feel free to use the colors and patterns that you want.
- Flocked Garland

- Decorations for the theme/Holiday/Season you are decorating for
- Zip Ties
- Pipe Cleaners
- Wired Ribbon


Video Tutorial For Christmas Chandelier
Now, it’s time to start decorating. If you’re a visual learner, take a look at this video tutorial we put together just for you!
Step-By-Step Instructions for Our Chandelier Christmas Decor
- Cut down garland to the length that you need.
- Interweave your garland throughout the chandelier.
- Fluff out the garland.
- Make sure and cover anything that’s already on the table, if needed (flocking will fly y’all).
- Tie the ends of your garland together.
- Add embellishments, picks, sprays, and garlands throughout the entire chandelier.
- Remember that each side will be viewed so try and spread out the design evenly.
- The garland will have branches and ties that you can use to attach items as needed.
- Zip ties or pipe cleaners can be added to secure anything loose or extra.
- Make a few hand bows and arrange them throughout the project. You can pre-make the bows before even starting on this project if you prefer.
- Add ornaments throughout the entire design (remember it can be seen from all directions!).
- Make sure and use openings on the bottom side of the ornament to add touches that hang down below the chandelier.
- Check out the design from the ground level and re-arrange sprays, garland, and ribbon to ensure that the design is evenly distributed.
That’s all there is to it! It’s a simple design, but also one that can be very easily adapted and modified for different seasons, holidays, or even color preferences.
Happy Christmas chandelier decorating, y’all!

Chandelier Christmas Decor Tutorial
Instructions
- Cut needed length of garland.
- Weave garland through your chandelier.
- Fill out garland.
- Cover anything that's already on the table so it doesn't get dirty as you decorate.
- Tie the ends of your garland together to create a continuous piece.
- Add all desired embellishment pieces to your garland.
- Make hand bows and arrange them throughout your garland.
- Add ornaments to all sides of your design.
- Take a look at your design from the ground level and rearrange anything that needs it.
Notes

We’d love to see all your Christmas decorations! Share your pics over at How To Make Wreaths Facebook Group.
If you are interested in more info on learning how to make wreaths, where to buy supplies, and being in a community of like-minded crafters, check out our Creative Coaching Subscription Group.


Wow! Incredibly beautiful!
Beautiful Great Decorating !
Thank you for posting this I’m going to try it. You make me feel brave♥️