
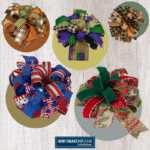
One of the most crucial parts of successful wreath-making is making DIY wreath bows. Since we receive lots of questions about how to do just that, we decided to create a tutorial to help. Here’s the ultimate guide on how to make a bow for a wreath that you’ve been waiting for!
Hey, y’all! If you’ve been hanging around here for any length of time, you’ll know I’m a huge fan of putting bows on wreaths. After all, what better way to jazz up a homemade wreath? Sure, you can (and I do!) use signs, but even with a sign, most wreaths need something MORE.
Making a bow for your wreath gives you the best “bang for your buck” so to speak. They’re affordable, high-impact statement pieces that can be done in any color or style.
One of the questions we get all of the time from readers is how to make a handmade bow. I know the standard method is to reach for a bow-making tool, but not every bow needs to be made that way. This DIY wreath bow is super simple and you’ll be able to make it in no time.
If you love the impact that bows make as much as we do, make sure you check out How To Make Bows: 6 Bow-Making Tutorials You Need, How To Make A 3-2-1 Layered Bow, and Handmade Bow Tutorial: The Damon Bow!

How To Make A Bow For A Wreath
We’re going to make a cute, simple, quick bow using ribbon from DecoExchange.com. You can make handmade bows in practically any color or combination of colors. If you need help choosing, the tips we share on how to choose ribbon colors and patterns should help.
Supplies Needed
Here’s a list of what you’ll need to make your DIY wreath bow.
How To Make A Bow For A Wreath
The process may look long, but if you follow along step by step, making a bow for a wreath will be much easier than you may think!
Step 1
Take your first 2.5″ ribbon and measure out a 7″ tail. Measure out (3) 7″ loops and another tail. Tie off with your pipe cleaner.
Step 2
Grab your second 2.5″ ribbon and measure out a 7″ tail. Next, measure out (3) 6.5″ loops and another 7″ tail. Place this ribbon on top of your first ribbon. Take a moment to make sure the loops are opposite each other and tie the bundle together with your pipe cleaner.
Step 3
Take your third 2.5″ ribbon and measure out a 6.5″ tail. Make (3) 6″ loops and another 6.5″ tail. Place this layer on top of your ribbon stack, making sure the 2 loops are opposite and tie the bundle together with your pipe cleaner.
Step 4
With your first 1.5″ ribbon, measure out a 6″ tail. Next, measure out (3) 6″ loops and another 6″ tail. Add this layer onto your ribbon stack, making sure the 2 loops are opposite, and use your same pipe cleaner to tie the bundle together.
Step 5
Take your second 1.5″ Ribbon and measure out a 6″ tail. Make (3) 5″ loops and another tail. Now place this ribbon onto your ribbon stack, making sure the 2 loops are opposite and tie it onto the bundle with your pipe cleaner.
Step 6
Finally, take your last 1.5″ ribbon and measure out a 6″ tail. Measure out (3) 4.5″ loops and your second tail. Place this ribbon onto your ribbon stack and tie the bundle together.
Step 7
Take a look at your bow and arrange your loops where you want them to be. Then, secure your ribbon together with your pipe cleaner or a zip tie.
Step 8
Hide your zip tie or pipe cleaner by cutting a strip of ribbon about 6″ long, removing the wires, folding it in 3rds, and wrapping it around the center of your bow. Once you have it wrapped, tie it off and trim off the excess ribbon.
Step 9
Give your bow one final fluffing, dovetail the ends, and your DIY wreath bow is done.
How to Make a Handmade Bow
Instructions
- Take your first 2.5″ Ribbon (this will be the base of your bow), dove tail it and measure out a 7″ tail. Then Pinch at the 7″ mark, measure out 14″, pinch it and twist it and bring the loop back around. This is your first of three loops for each layer. Follow the same steps and measurements three times. Tie off with your pipe cleaner.
- Take your second 2.5″ Ribbon, dove tail it and measure out a 7″ tail. Then Pinch at the 7″ mark, measure out 13″, pinch it and twist it and bring the loop back around. This is your first of three loops for this layer. Follow the same steps and measurements three times. Now place this ribbon onto your first ribbon, making sure the 2 loops are opposite and tie into the bundle.
- Take your third 2.5″ Ribbon, dove tail it and measure out a 6.5″ tail. Then Pinch at the 6.5″ mark, measure out 12″, pinch it and twist it and bring the loop back around. This is your first of three loops for this layer. Follow the same steps and measurements three times. Now place this ribbon onto your ribbon stack, making sure the 2 loops are opposite and tie into the bundle.
- Take your first 1.5″ Ribbon, dove tail it and measure out a 6″ tail. Then Pinch at the 6″ mark, measure out 11″, pinch it and twist it and bring the loop back around. This is your first of three loops for this layer. Follow the same steps and measurements three times. Now place this ribbon onto your ribbon stack, making sure the 2 loops are opposite and tie into the bundle.
- Take your second 1.5″ Ribbon, dove tail it and measure out a 6″ tail. Then Pinch at the 6″ mark, measure out 10″, pinch it and twist it and bring the loop back around. This is your first of three loops for this layer. Follow the same steps and measurements three times. Now place this ribbon onto your ribbon stack, making sure the 2 loops are opposite and tie into the bundle.
- Take your last 1.5″ Ribbon, dove tail it and measure out a 6″ tail. Then Pinch at the 6″ mark, measure out 9″, pinch it and twist it and bring the loop back around. This is your first of three loops for this layer. Follow the same steps and measurements three times. Now place this ribbon onto your ribbon stack, making sure the 2 loops are opposite and tie into the bundle.
- Review your bow and make sure most of your loops are where they need to be and then secure the stack of ribbon together using your pipe cleaner or a zip tie.
- Now we can hide the mechanics of the bow (whatever you used to secure it together) by cutting about a 6″ strip of ribbon, removing the wires, folding it in 3rds, and wrapping it around the center of your bow. Once wrapped tie it off and trim the excess ribbon.
- Give your bow one final fluffing and it is ready to be used in your wreath.
Video
FAQs
As you learn a new skill, you’re bound to have a few questions arise! Here are the answers to questions we frequently see from readers. If you have a question you don’t see answered below, please leave it in the comments so we can add it to the list!
Can I use a ribbon that doesn’t have wire when making a bow for a wreath?
Technically, yes you could. However, I highly recommend using a ribbon that has wire because it will hold its shape. Bows made with ribbons that don’t use wire tend to look sloppy, which is not what you want on your wreath!
What tools do I need to make bows and wreaths?
There are several tools you COULD use, but you don’t necessarily need them all. It really comes down to what kind of bow you want to make. Check out Bow Maker Tools- The Great Bow Debate for more helpful info!
A Few More Helpful Resources
If you’re interested in learning how to make bows using tools check out the other videos we have on How To Make Wreaths.
Share your handmade bows with us over at the How To Make Wreaths Facebook Group. We’d love to see all your creations! If you are interested in more info on learning how to make wreaths, where to buy supplies, and being in a community of like-minded crafters, check out our Creative Coaching Subscription Group.

Just pin this bow making tutorial below to find the instructions later!


Awesome Bow ! Thank You
thanks!
Great instructions, easy to follow, beautiful handmade bow
<3
Great job Tiffany!
she rocked it!
That is so easy to make that bow, especially since my hand hurt. Thank you for thinking about us.
glad you enjoyed it.
Beautiful bow , thank you
Beautiful bow
Very interesting. thanks
Thanks
The absolute best video instructions for making a bow that Ive ever seen!
Prettiest bow I’ve ever seen!
Did not see any video. I am a visual person
I rate this five stars but it won’t let me do it . Really good video which mine had turned out likes your more practice for me.x
What is the kit? I don’t see a link for the kit.
Hi Sonja! This is not a kit, just a tutorial on how we make a bow for a wreath. There are written instructions plus a supply list at the bottom of the post.
She referenced a kit more than once. Interested.
Fabulous! Thank you! I still need help with hand bows🤦♀️❤️
Fabulous! Thanks!
This has helped me because I still struggle with hand bows🤦♀️ X thanks x