
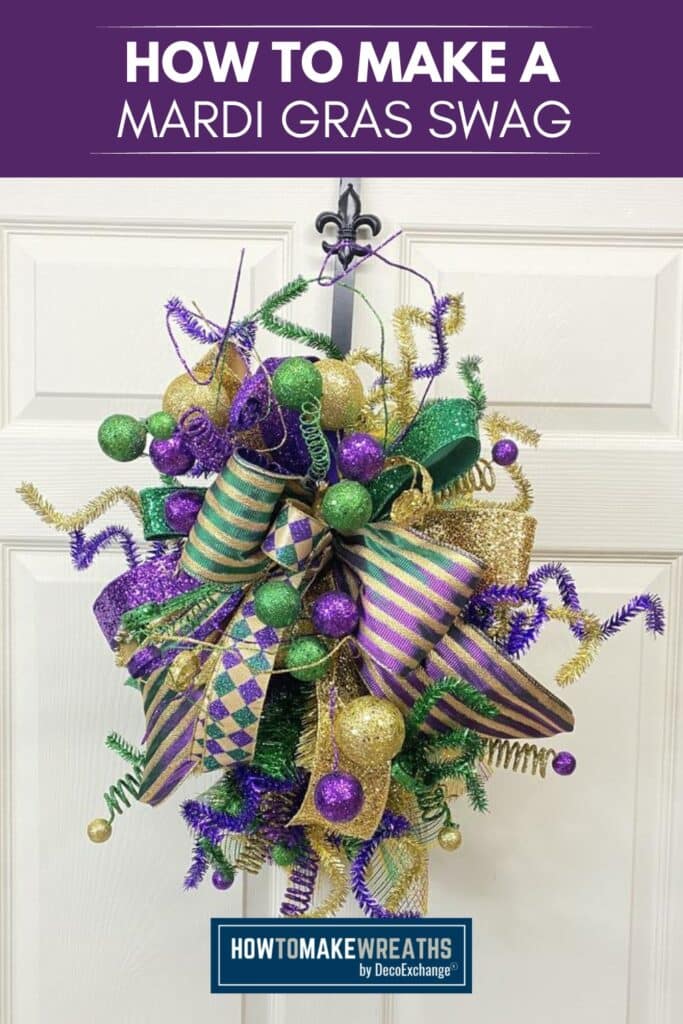
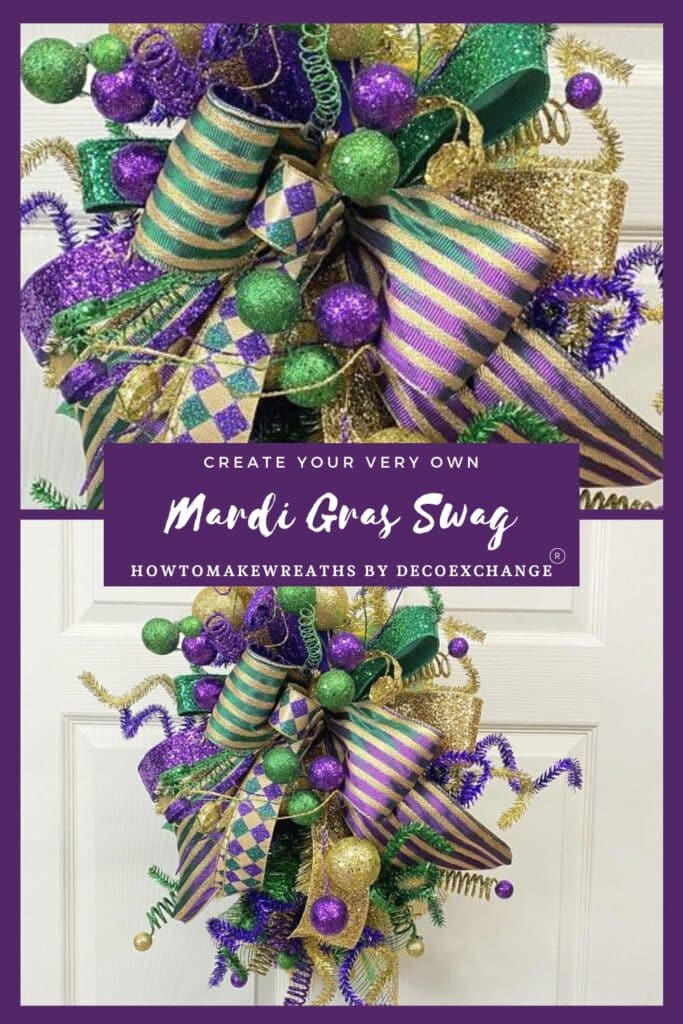
It’s time to start thinking about Mardi Gras decor, y’all! Today, I’m showing you how to make a fabulous Mardi Gras swag that is all about the bling! It’ll be the ideal complement to your other Mardi Gras decor.
Hey, y’all! Many of you know that Parker and I are from Louisiana. That means that Mardi Gras has a special place in our hearts.
I know the Mardi Gras season isn’t very long compared to the Christmas holiday season. But that’s ok! It may be a short season, but we pack a whole lot of fun and food into it.
Even if you aren’t from Louisiana, this is a holiday that is super fun to decorate for and celebrate! In the video below, I show you how to make a Mardi Gras swag that is fittingly full of baubles and glitter. I think you’re going to love this project!
It will pair perfectly with our Mardi Gras Centerpiece and Mardi Gras Wreath With Mesh And A Mask.
The Perfect Decor For A Mardi Gras Celebration
My favorite part of Mardi Gras has to be the food. There are just so many amazing things to eat! But that doesn’t mean there isn’t a whole lot else to celebrate too. Seeing the parades of people all decked out in costume is such a fun tradition.
And having a whole city decorated to the bursting point makes this maker extra happy.
When it comes to Mardi Gras, everything is over the top. The costumes, the food, and especially the decor are all a whole lot extra.
So, with that in mind, for this project, I pull out all the glitter ribbon and sprays that I can find. The result is a fun and fabulous swag that gives off all the celebratory vibes. I absolutely love a project that allows me to hold nothing back!
How To Make A DIY Mardi Gras Swag
This project starts with a basic swag, and then you get a surprise two-for-one!
Supplies Needed
Here’s everything you’ll need to make this project! I’ve included a few handy links to help you find certain items a little faster and easier.
- 10″ deco mesh
- 36″ swag base
- 4″ wired ribbon
- 2.5″ wired ribbon
- (3) 1.5″ wired ribbons
- Mardi Gras attachment (Mardi Gras top hat)
- Mardi Gras-themed picks, sprays, and ornaments (I use sprays, curly cue sprays, and balls)
- EZ Bow Maker
- Scissors
- Hot glue gun
- Wire cutters
- 1″ mounting square
- Pipe cleaners
Mardi Gras Swag Instructions
Just follow these step-by-step instructions to make your own Mardi Gras Swag decoration. Remember that Mardi Gras is supposed to be over the top, so the more decorations, the better!
Step 1
Trim about 1/3 off of the swag base and set it aside. Fluff out the remainder of your base.
Step 2
Next, take the 10″ mesh and make baby poofs all around the base.
Step 3
Now cut (9) 20″ strips out of the 10″ mesh. Turn each strip into a ruffle by curling the ends slightly and scrunching towards the center. Add a ruffle to each spot around the outside of the swag.
Step 4
Take your top hat and punch two holes in the brim that are about 2 inches apart. You can use a hole punch for this or any other tool you have on hand that will do the job.
Step 5
Next, attach a mounting square to the back of the hat (above where you punched the holes). Then attach pipe cleaners to all three spots.
Step 6
Attach the hat near the top of the swag using the pipe cleaners.
Step 7
Next, take your EZ Bow Maker and make your bow.
Take your 4″ ribbon and measure a 12″ tail and (2) 8″ loops.
Next, use the 2.5″ ribbon and repeat the same process but make your loops 7.5″.
Repeat with all three of the 1.5″ ribbons making your loops 1/2″ smaller each time.
Take 2 pipe cleaners, and twist the ends together to make one large pipe cleaner. Then remove your bow from the bow maker and use the pipe cleaner to twist and secure the center of your bow.
Attach your bow below the hat. Fluff the bow out and dovetail the ends.
Step 8
Now use the same 4″ ribbon that you used in your bow and add ribbon tails around your swag until it is as full as you want it.
Step 9
Trim your picks and sprays and use hot glue to add them in and around your bow, then add them to the swag. I do this in a triangle pattern and keep adding until I get the look I’m going for.
FAQs
If you have any questions about making this project, you’ve come to the right place! Here are some questions I frequently see readers ask about making Mardi Gras swag. Leave your question in the comments if you don’t see it already answered below.
Can I use hot glue instead of super glue in this project?
For this project, I only used glue to secure the mounting square on the back of the sign. Most often, I use super glue to secure mounting squares in place. However, sometimes, I use hot glue to ensure the best, strongest hold possible. But if you don’t have any hot glue, super glue will definitely do the trick!
Can I change the project colors and patterns?
Sure! Have fun playing with different ribbon patterns and colors, as well as different signs, etc. However, in order for it to be a Mardi Gras design, this project needs to have the signature colors of gold, green, and purple.
CHECK OUT MORE GRAPEVINE WREATHS
Make This Mardi Gras Swag For Your Customers
Whether you celebrate the whole Mardi Gras season or just Fat Tuesday, this Mardi Gras swag is perfect for your carnival decor. This project is perfect for putting you (or your customers) in the festive spirit! So, it’s time to hang your swags, grab your beads, and let’s get ready to party y’all!
If you love Mardi Gras decorations, make sure to check out some of our other popular designs:
- Deco Mesh and Ribbon Tail Mardi Gras Wreath
- How To Make A Mardi Gras Wreath With A Fleur De Lis
- Mardi Gras Swag
- 5-Minute DIY Mardi Gras Wreath
Need some help with any part of the wreath-making process? We’d love to lend a hand. This includes answering any questions about bow-making, wreath-making, or crafting in general! Look for what you need at How to Make Wreaths.
Don’t forget to check out more of our tutorials on How to Make Wreaths. Plus, come share with us over at the How To Make Wreaths Facebook Group.
If you are interested in more info on learning how to make wreaths, where to buy supplies, and being in a community of like-minded crafters, check out our Creative Coaching Subscription Group.

Mardi Gras Bow
Instructions
- Start with your 4" ribbon and measure a 12" tail. Twist the ribbon and add it to the EZ Bow Maker. Now make 2 8" loops then trim the ribbon from the spool.
- Next use the 2.5" ribbon and repeat the same process but make your loops a little smaller.
- Repeat with all three of the 1.5" ribbons making your loops smaller each time.
- Take 2 pipe cleaners and twist the ends together to make one large pipe cleaner.
- Finally, remove your bow from the bow maker and use the pipe cleaner to twist and secure the center of your bow.
Mardi Gras Swag
Materials
- 10" deco mesh
- 36" swag base
- 4" wired ribbon
- Mardi Gras attachment Mardi Gras top hat
- Mardi Gras themed picks, sprays, and ornaments I use sprays, curly cue sprays, and balls
- Hot glue gun
- Wire cutters
- 1″ mounting square
- Pipe cleaners
Instructions
- Take the swag base and trim off about 1/3 of it and set that aside. Fluff out the remainder of your base.
- Next, take the 10" mesh and use it to make baby poofs all around the base. (This will make more sense when you watch the video)
- Now cut 9 20" strips of the 10" mesh. Curl the ends slightly and scrunch towards the center to make ruffles. Add each ruffle around the outside of the swag.
- Take your top hat and punch two holes in the brim that are about 2 inches apart. You can use a hole punch for this or any other tool you have on hand that will do the job.
- Next attach a mounting square to the back of the hat, above where you punched the holes. Then attach pipe cleaners to all three spots.
- Attach the hat to the swag using the pipe cleaners that you secured to it. You'll want the hat towards the top of the swag.
- Next, attach your bow below the hat. Fluff the bow out and dovetail the ends.
- Now use the same 4" ribbon that you used in your bow and add ribbon tails around your swag until it is as full as you want it.
- Trim your picks and sprays and use hot glue to add them in and around your bow then add them to the swag itself. I do this in a triangle pattern and keep adding until I get the look I'm going for.
Video
If you’re a dog lover or know someone who is, check out our Support Dog Rescue t-shirts and click on the picture below!


