
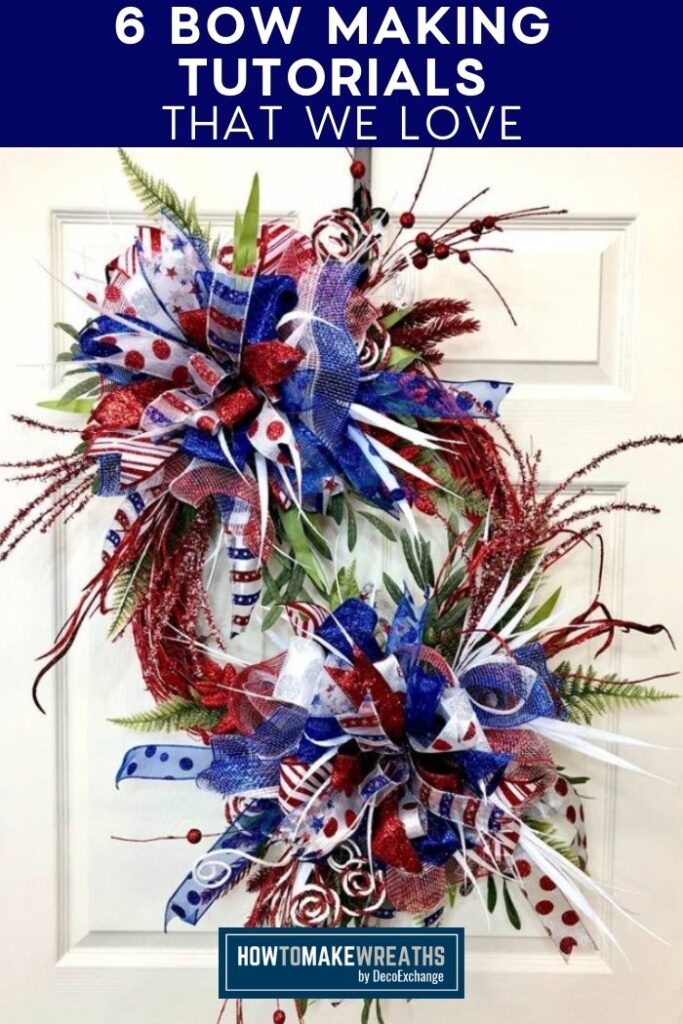
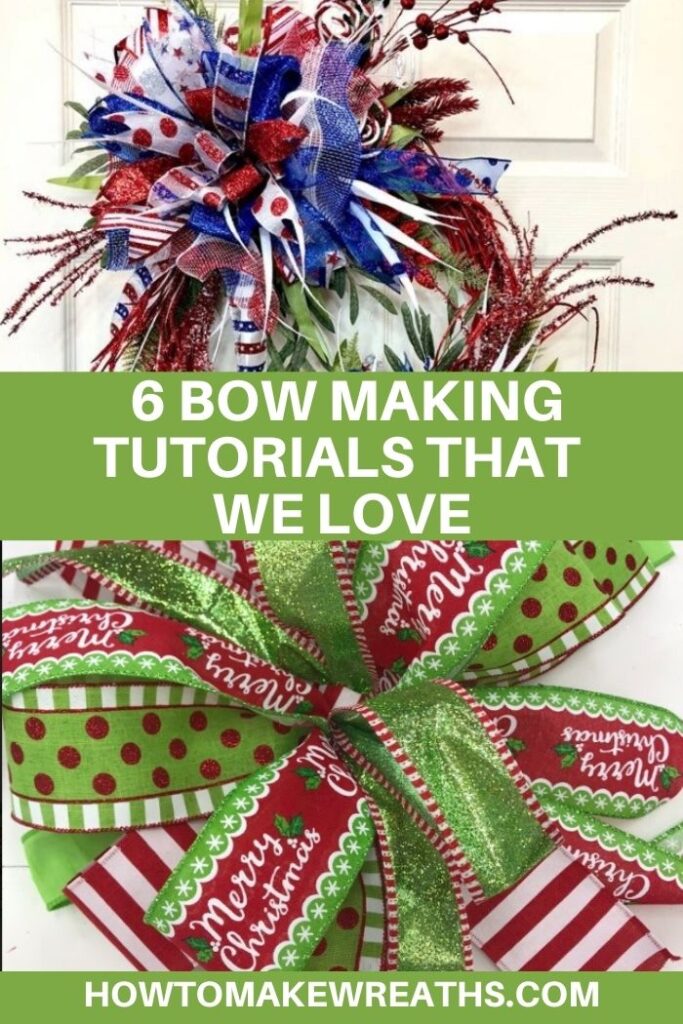
If you want to learn how to make bows, look no further than these 6 bow-making tutorials every wreath maker needs.
Y’all…our Pinterest friends love bow tutorials, so we figured why not make it nice and easy and wrangle up our favorite bow-making tutorials in one spot?
We have a mix of methods from using bow-making tools like the Pro Bow or EZ Bow Maker to handmade bows. So we know at least one of these tutorials will help you learn how to make bows the way you want!
How To Make Bows: Our Favorite Bow Making Tutorials
I’ve put together a bigger number of bow-making video tutorials, but we thought that might be too much. So we handpicked six that I think are perfect to get you rolling.
How To Make A Terri Bow 2-Ways
On a recent Facebook live, I used an EZ Bow Maker to make a Terri Bow. Can you spot them in the pic below?

Terri Bow by Hand
These bows consist of 6 different styles of ribbon, however, you can always use 3 patterns and use them each twice.

Terri Bow by Hand
Materials
- 1.5 wired ribbon 3 different patterns
- 2.5" wired ribbon 3 different patterns
- pipe cleaners
Instructions
- Using your 2.5″ ribbon, measure out 8″. Pinch it in the center, twist it, and slide it in so that the pretty side faces up.
- For this process we’re going to have two loops and two tails.
- Using 1.5″ ribbon repeat step #1 with a 1/2″ inch shorter loop, but leave your tail the same length as the previous layer.
- Repeat with this layering process with the smaller size ribbon on each layer.
- Remove the bow from the EZ Bow Maker and secure with a pipe cleaner.
- Add the bow to wreath with the pipe cleaners that hold the bows together.
Terri Bow With An EZ Bow Maker
Using the EZ Bow Maker for Terri Bows makes it quick and easy. You can usually craft a beautiful bow in less than 10 minutes!


Terri Bow on the EZ Bow Maker
Instructions
- Take your first 2 1/2" ribbon and measure an 8" tail. Next make a 6" loop on one both sides securing the center of your loops between the pegs on the EZ Bow Maker. Trim ribbon from spool.
- Repeat this process with your second 2 1/2" ribbon.
- Repeat again with the remaining 2 1/2" ribbons.
- Using your 1 1/2" ribbon use the same method but make your loops slightly smaller than your previous ones.
- Repeat with the remainder of your 1 1/2" ribbons.
- Take the 5/8" ribbon , measure an 8" tail and make one loop right at the center.
- Take two pipe cleaners and twist them together at one end to make one large pipe cleaner.
- Pinch your bow in the center and twist the pipe cleaners around your pinch to hold the bow together.
- Fluff your loops into a beautiful Terri bow.
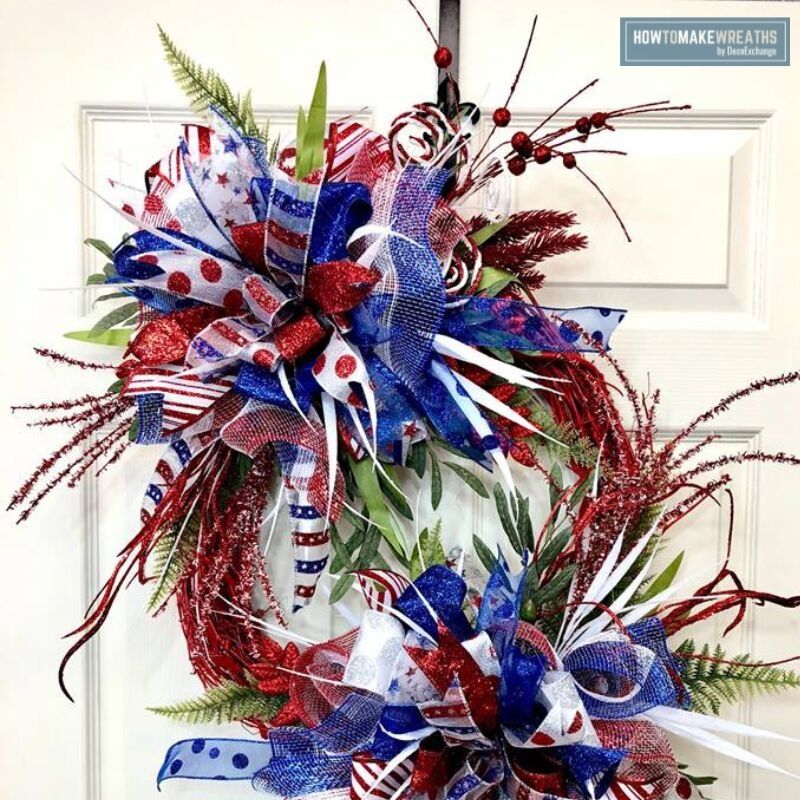
How To Make Bows On A Pro Bow Maker
Aren’t these patriotic-themed bows gorgeous? Check out this tutorial on how to make a wreath bow with a pro bow!
Make a Bow on a Pro Bow Maker
Instructions
- Start by measuring out a piece of 24-inch wire. You'll need 2 of these for each bow you make.
- Grab one of the wires that you just cut and fold it in half. Measure your first ribbon at 6 inches, give it a pinch, and tie it off with the wire.
- Take that ribbon and wrap it around your center peg. Give it a little pinch on the bottom then tie it with the wire and wrap the wire around the bottom peg. Tie if off on the top. This is your center loop.
- Take the second piece of cut wire and fold it in half. Work it through the bottom of the ribbon that is the newly created center ribbon and twist it off using the wire.
- Take your ribbon and loop up and around the center ribbon and around the next pegs on the left and right of the center ribbon. Then, tie it off at the bottom.
- At this point, you’ll do the same with your third ribbon as well. Follow the same steps of grabbing your third wire, folding in half, circling around the bottom center loop, and around the next two pegs on the left and right that are currently empty.
- For the final step of using up the four cut wires, do this exact same process again with the fourth ribbon and fourth wire.
- Repeat these same steps until you’ve come to the end of the pegs. On the final peg, I like to use two ribbons at a time (instead of just one) and loop around the bottom and tie it off just to get it a bit of extra pizzazz.
- Once tied, pull off the pegs and you’ve created your very own wreath bow!
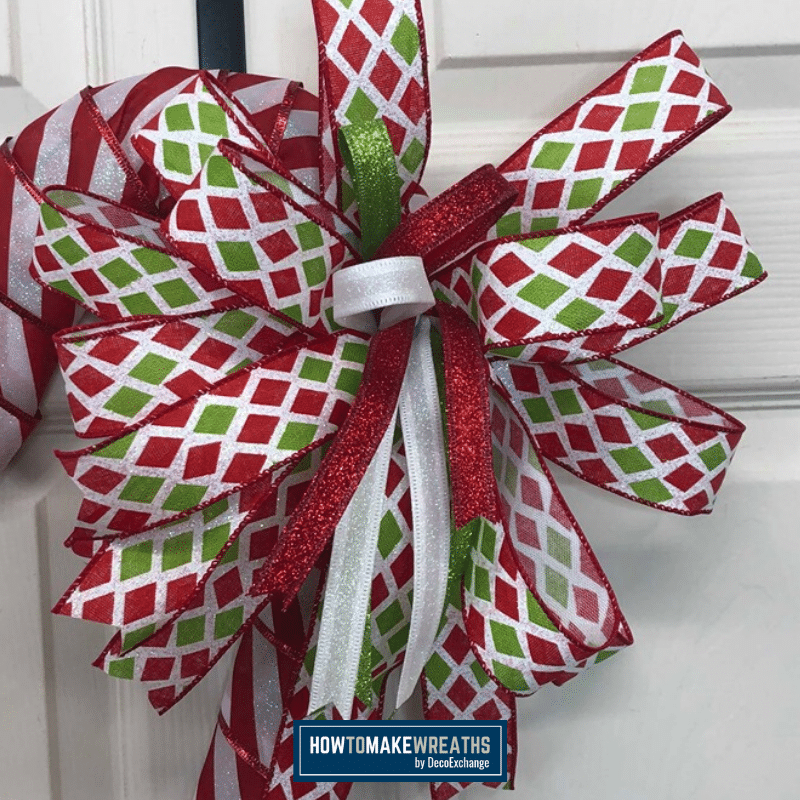
How To Make Bows by Hand
Y’all, don’t worry if you don’t have a bow maker tool. God gave you two, that’s right, your hands! Tiffany from Woodland Ridge Design helped us out with this great tutorial, watch it here.
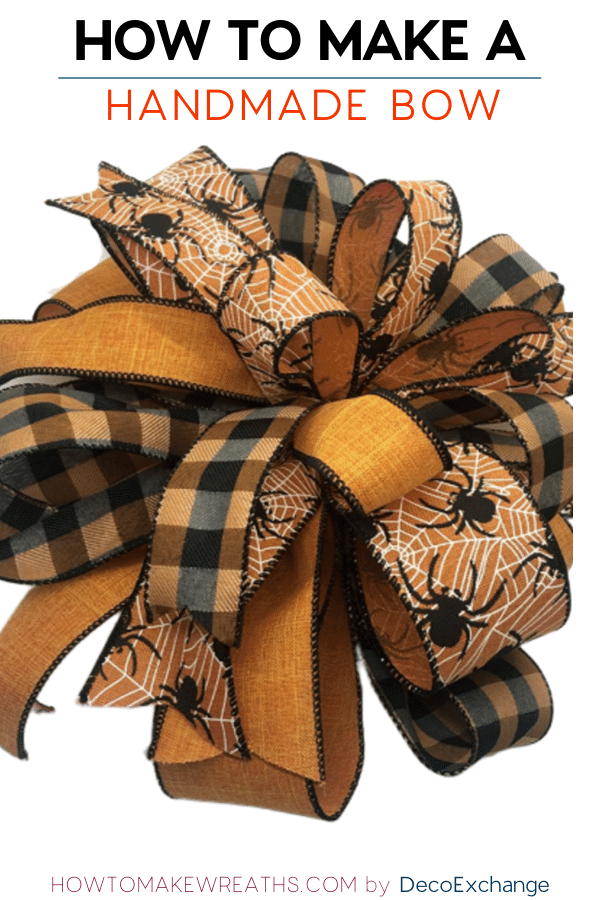

How to Make a Handmade Bow
Instructions
- Take your first 2.5″ Ribbon (this will be the base of your bow), dove tail it and measure out a 7″ tail. Then Pinch at the 7″ mark, measure out 14″, pinch it and twist it and bring the loop back around. This is your first of three loops for each layer. Follow the same steps and measurements three times. Tie off with your pipe cleaner.
- Take your second 2.5″ Ribbon, dove tail it and measure out a 7″ tail. Then Pinch at the 7″ mark, measure out 13″, pinch it and twist it and bring the loop back around. This is your first of three loops for this layer. Follow the same steps and measurements three times. Now place this ribbon onto your first ribbon, making sure the 2 loops are opposite and tie into the bundle.
- Take your third 2.5″ Ribbon, dove tail it and measure out a 6.5″ tail. Then Pinch at the 6.5″ mark, measure out 12″, pinch it and twist it and bring the loop back around. This is your first of three loops for this layer. Follow the same steps and measurements three times. Now place this ribbon onto your ribbon stack, making sure the 2 loops are opposite and tie into the bundle.
- Take your first 1.5″ Ribbon, dove tail it and measure out a 6″ tail. Then Pinch at the 6″ mark, measure out 11″, pinch it and twist it and bring the loop back around. This is your first of three loops for this layer. Follow the same steps and measurements three times. Now place this ribbon onto your ribbon stack, making sure the 2 loops are opposite and tie into the bundle.
- Take your second 1.5″ Ribbon, dove tail it and measure out a 6″ tail. Then Pinch at the 6″ mark, measure out 10″, pinch it and twist it and bring the loop back around. This is your first of three loops for this layer. Follow the same steps and measurements three times. Now place this ribbon onto your ribbon stack, making sure the 2 loops are opposite and tie into the bundle.
- Take your last 1.5″ Ribbon, dove tail it and measure out a 6″ tail. Then Pinch at the 6″ mark, measure out 9″, pinch it and twist it and bring the loop back around. This is your first of three loops for this layer. Follow the same steps and measurements three times. Now place this ribbon onto your ribbon stack, making sure the 2 loops are opposite and tie into the bundle.
- Review your bow and make sure most of your loops are where they need to be and then secure the stack of ribbon together using your pipe cleaner or a zip tie.
- Now we can hide the mechanics of the bow (whatever you used to secure it together) by cutting about a 6″ strip of ribbon, removing the wires, folding it in 3rds, and wrapping it around the center of your bow. Once wrapped tie it off and trim the excess ribbon.
- Give your bow one final fluffing and it is ready to be used in your wreath.
Video
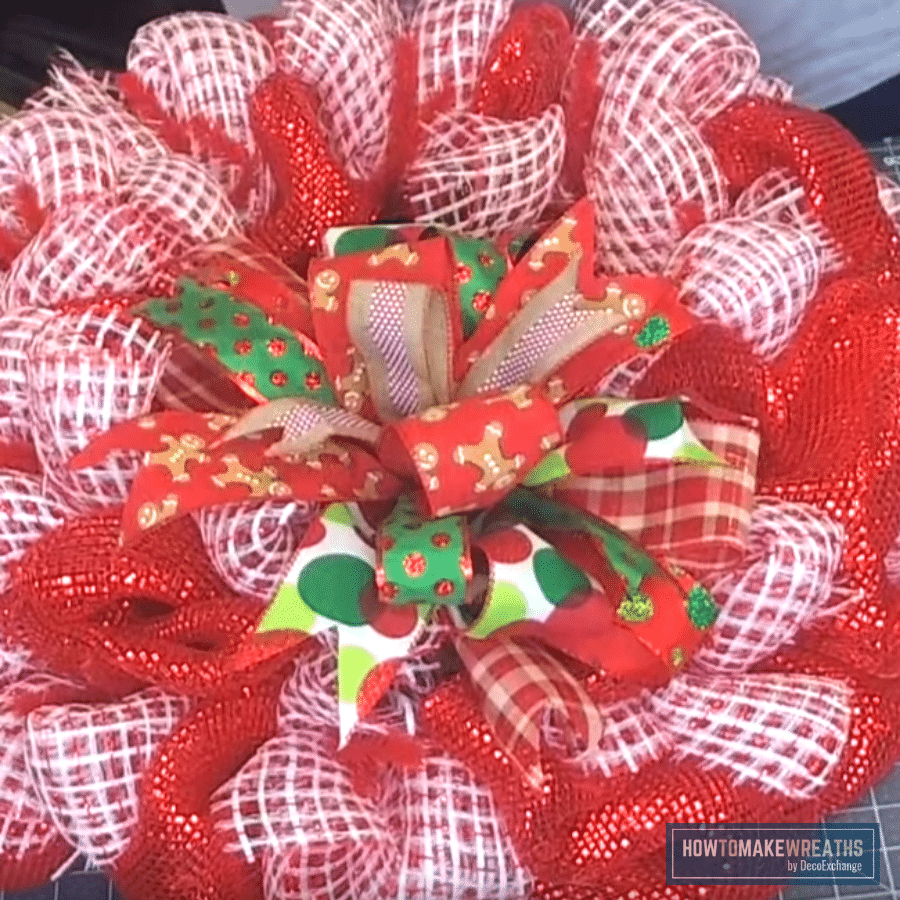
How To Make a 3-2-1 Bow
This multi-layered bow is very easy to make. In this tutorial, we used the EZ Bow Maker and you absolutely can create a bow in 5 minutes!
Make a 3-2-1 Bow
Instructions
- Taking your EZ Bow Maker and your 1.5-inch ribbon, make 3 6-inch loops on each side. When you’re done, cut a tail.
- Make 2 5.5-inch loops on each side. When you finish, cut the tails.
- Make a 5-inch loop on each side and cut to make a tail.
- Now take your 5/8-inch ribbon and add a single loop on one side with each ribbon. This will be used to fill up the center of your bow.
- Hold down the center and tie off with a pipe cleaner nice and tight.
- Fluff out the bow to finish up.
How To Make Bows: The Damon Bow
Can’t forget about the Damon bow y’all! You can watch the tutorial here. All it requires is some ribbon and wire!
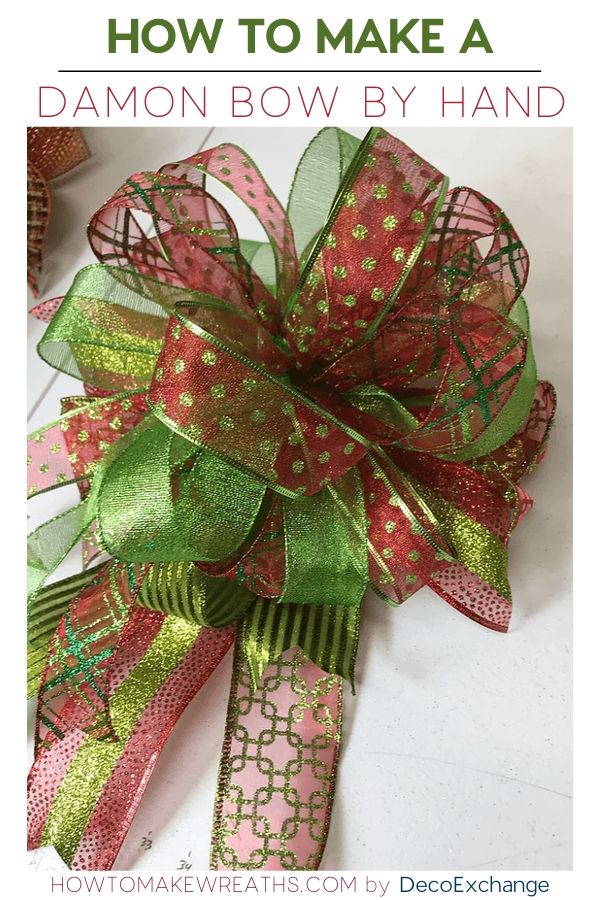
Damon Bow by Hand
Instructions
- Layer three ribbons, just like you would using the Pro Bow. Each loop should be 5 inches.
- Fold it over and pinch it while keeping them layered. Measure 10-inches and pinch it and twist it.
- Measure 10 inches. Twist.
- All right, this is the last three 1-1/2 inch loop that we have to do. Once we have that, we can pull our tails out. Trim them off.
- Pull them apart and fluff everything out.
- Add some Terri bow tails underneath it. Do that, and dovetail one end.
- Measure out 7 inches for the tail, then measure 14 inches. Fold it in half, rotate it, and do another 14 inches. And then measure out your 7-inch tail.
- Just going to wire them right into the bottom. So remember 7-inch tail, 14-inch loop.
- Fluff it out.
Do you have a favorite bow? How about a favorite method – bow making tool or good ol’ hands? Let us know in the comments below or join us in our How to Make Wreaths group on Facebook!
If you need any help with centerpiece-making, bow-making, wreath-making, or crafting in general, be sure to check out more of our tutorials on How to Make Wreaths.

Just pin this 6 bow making tutorials round up below to find the instructions later!


Trying to find the video you posted yesterday on making a wreath bow. It used two 1 1/2 in ribbons and one 2 1/2 in ribbon. Originally posted August 19, 2019 I think.
Hi Ria! Was it this one by chance?
https://www.facebook.com/decoexchange/videos/2474932692729715/
Thank You, I Appreciate the support!
How do you order the maker?
Hi! You can order the EZ Bow Maker at DecoExchange Thank you!
beautiful
I LOVE all of this ! Been a very hard year for me and my family! I see my creative side coming out againe!
Do you sell the wreath kits? I love all the how to videos but have trouble finding the right supplies.
Hi Janet, any wreath kits we have can be found on DecoExchange
I purchased the ez bowmaker from you and my sticks dont stay put, can you tell.me what to do.
Hi Lorraine, You have to really get those pegs in there and the best way is to take a small hammer or rubber mallet and hit it in until it’s in there and the pegs don’t move.
It looks like when you say “dove tail” you are talking about pinching the ribbon together similar to what would be done on a bow maker. Do you know that dove tail is a common term in carpentry? It’s often used for other things but it always means the coming together of two things joined like fingers, not just the coming together of one or even two things. For instance, if you take your hands and clasped them together interspersing your fingers together, one finger from each hand side by side until they are all interspersed together THAT is dove… Read more »
Beth, dove tail has always been the term used in reference to taking the tails of ribbon, folding it in half like a taco, and cutting the ends at an angle.