
Hey, Y’all! The fall season will be here before you know it, and it will be time to decorate your doors and porches with colorful fall foliage and pumpkins galore! I just love fall colors – they are so vibrant and beautiful. That’s why I love having a diy fall wreath on my front door to welcome visitors to my house.
Do you love the look of a designer fall wreath, but have no idea how to even start creating one? Do you walk into your local craft store and become overwhelmed by all of the choices?
I may know how to make beautiful wreaths now, but that wasn’t always the case. There was a time when I would look at beautiful fall wreaths and wish I could make one for my own door (and walls, and table, etc).
I remember that feeling of longing and frustration because I didn’t know how to do it myself. That’s why I’m writing today’s post. I want to show YOU how to make your own (simple) DIY fall wreath.
As a side note, I am writing this post mostly for people who know very little about making wreaths and just want a wreath for personal use. However, the process is a great way to start if you have dreams of making and selling wreaths! I always tell people who want to learn how to make wreaths for selling to start simple and get more complicated as you get more experience.

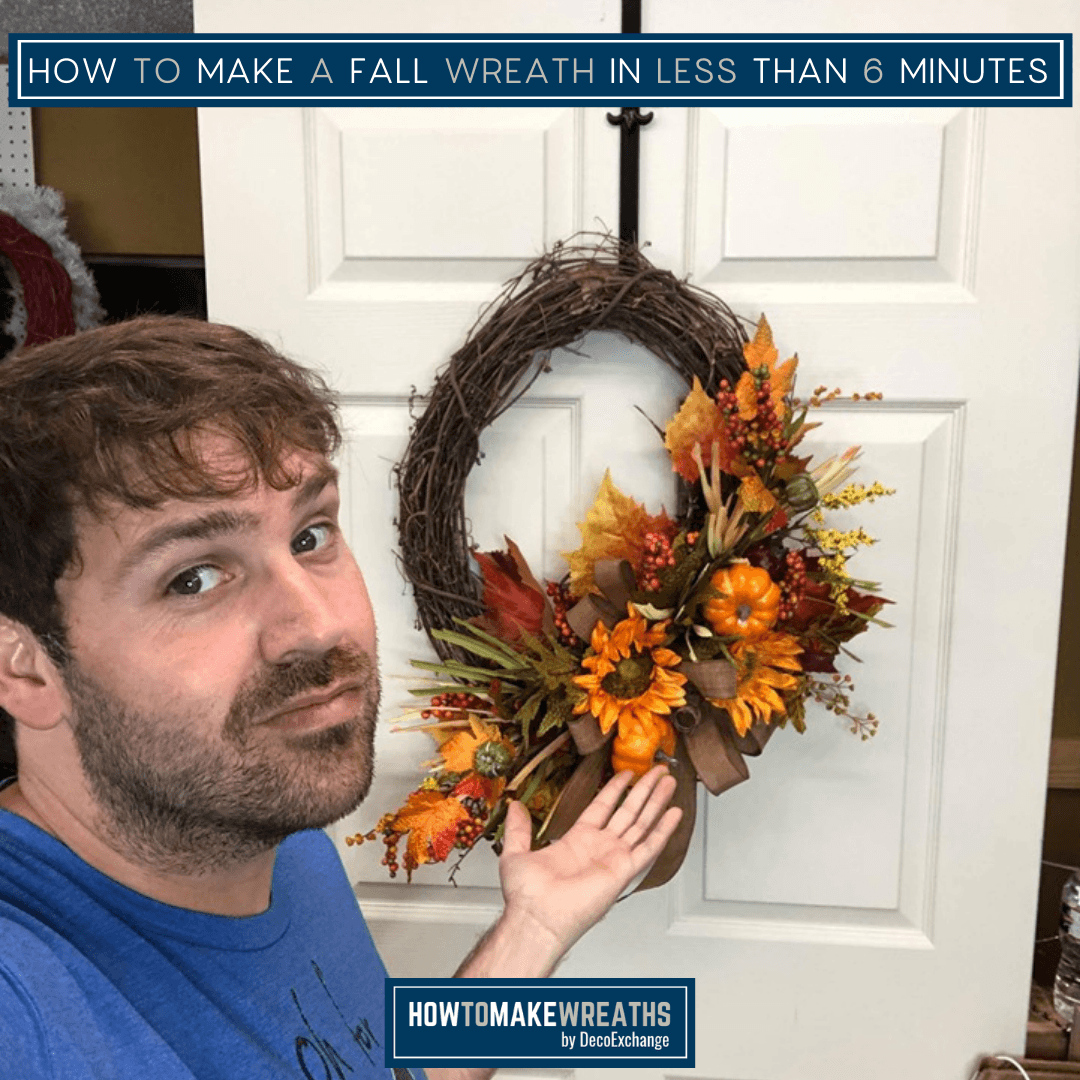
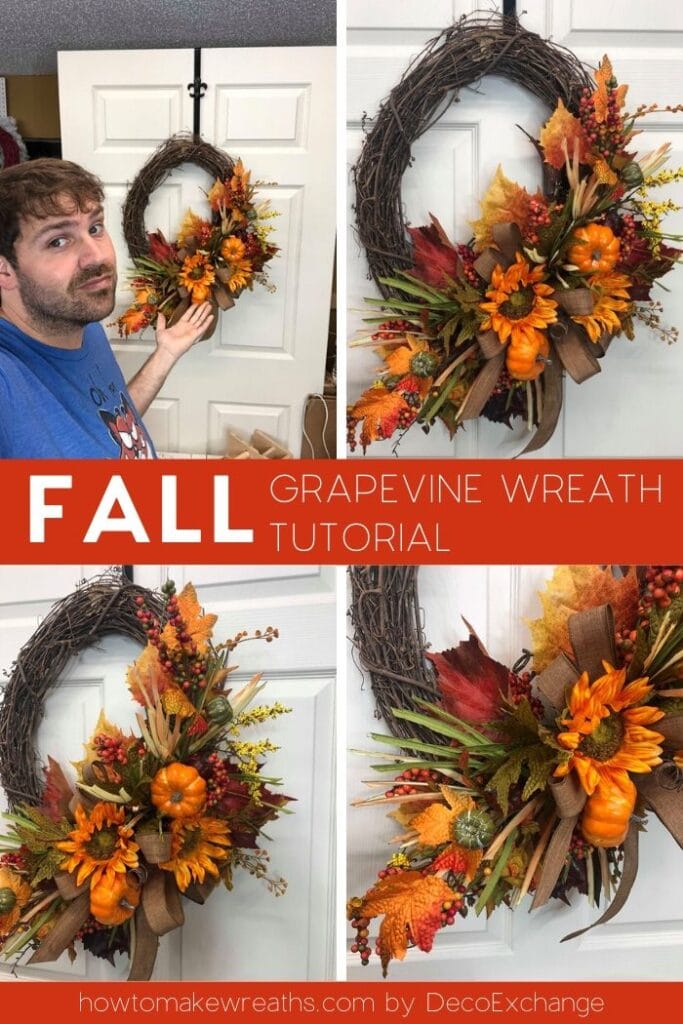
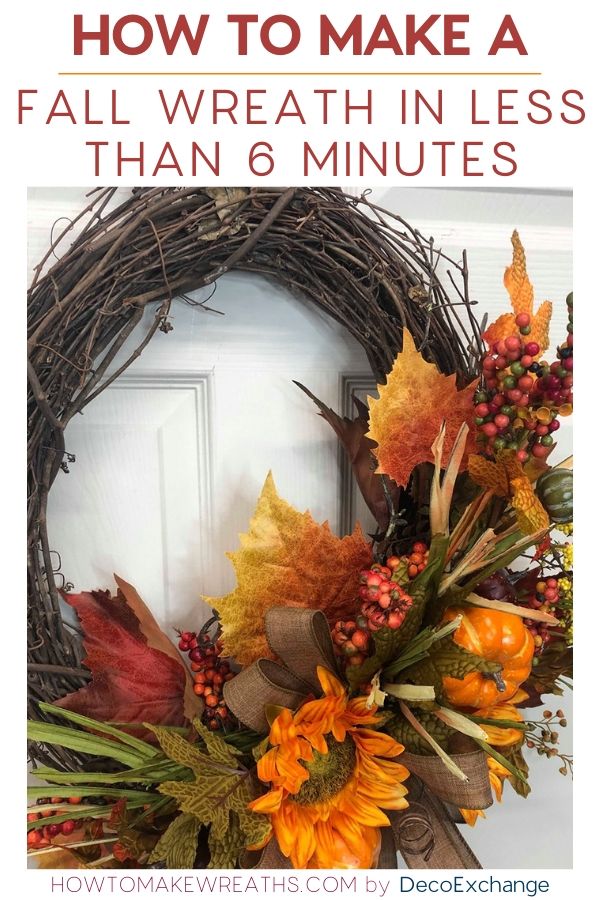
Your Very Own DIY Fall Wreath in Less Than 6 Minutes
We created a tutorial for a gorgeous designer fall wreath that only uses six simple pieces! And the best part is that it takes under six minutes to create! Anyone can make this DIY fall wreath and enjoy the variety of colors that the season has to offer!
Now, with this tutorial, you don’t have to be a floral expert to make a beautiful fall door wreath and enjoy the incredible autumn colors and textures. I’ll show you how to create a wreath that will impress your family, friends, AND neighbors in this short, easy-to-follow tutorial.
When you are done making this DIY fall wreath, you are going to feel like a champion. And your house is going to look pretty spectacular!
Fall Wreath Tutorial
Trust the process here. Follow the video closely and no matter what your wreath-making skill level, you’ll soon have a fall wreath on your door that friends will be asking you to make for them too!
Fall Wreath Supply & Tool List
Read through this list and gather whatever supplies you don’t already have. You can purchase many of them on DecoExchange. If you need one of the few items that aren’t available on DecoExchange, you can find them on Amazon or at a local craft store.
- 18 inch oval grapevine wreath
- 2 Fall foliage picks
- 2 decorated stems with pumpkins, sunflowers,and berries
- Stem cutter
 (not required but makes it easier to cut large stems)
 - Wire cutters
- Floral wire
- 1.5 inch burlap wired ribbon
- Hot glue gun (optional)
- Hot glue sticks (optional)
- EZ Bowmaker


 (optional)
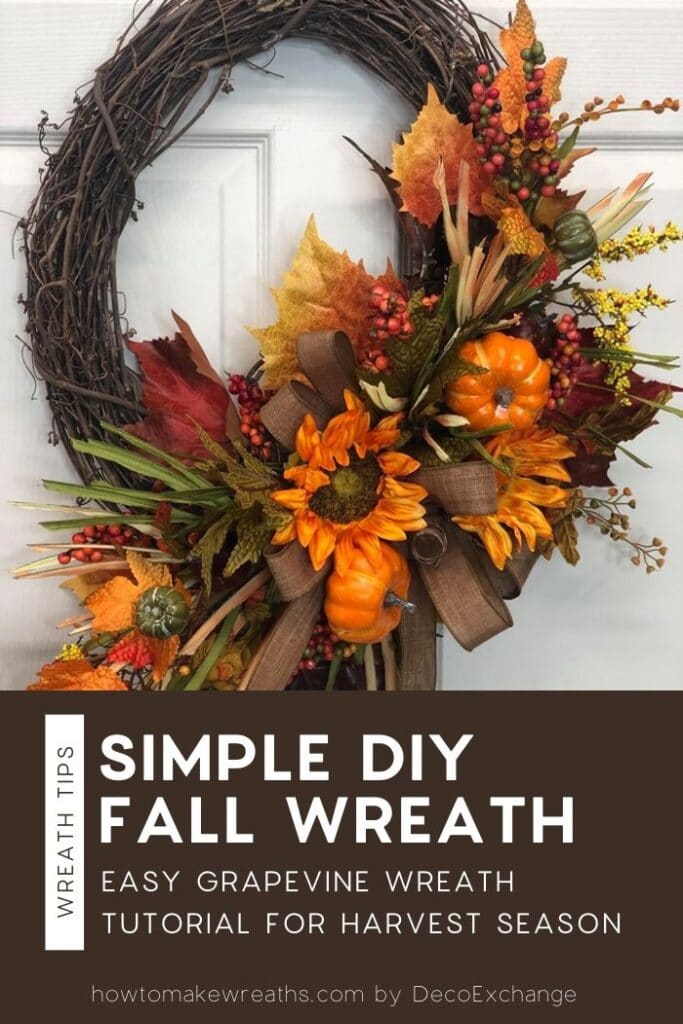
How to Make a Fall Wreath Instructions
Use the video above along with these instructions to help you create your fall wreath. Are you ready to get started? Let’s dive in and create a DIY fall wreath for your door.
1. Trim Your Picks
Start by using your stem cutter or wire cutters to trim the excess length from your picks. I like to trim the skinny part of the floral pick off, just where it starts to thicken (several inches).
2. Add A Fall Foliage Pick To Your Grapevine Wreath Base
Insert the first fall foliage pick into the bottom of the grapevine wreath. Make sure to curve your stem so that it follows the natural shape of the wreath. Pro tip: insert the pick at an angle to keep the stem from protruding out of the back of the grapevine.
3. Hot Glue Your Stems Into The Wreath
If you plan to make this wreath to sell, hot glue all of your stems into the wreath. If you are making this wreath for your personal door, there’s no need for glue. You can reuse this wreath for other seasons by simply switching out the stems!
4. Add Another Fall Foliage Pick
Next, add the second fall foliage pick to the top of the wreath, facing in the opposite direction. Again, curving your stem to the natural flow of the wreath.
5. Add A Decorated Fall Stem
Add your first decorated fall stem to the bottom of the wreath by layering it on top of the fall foliage pick. This will create a full look.
6. Add Another Decorated Stem
Add your second decorated stem to the top of the wreath by layering it on top of the fall foliage. Now you have fullness at the top and bottom of the wreath.
7. Trim Off Excess Stems
Now check the back of the wreath and trim off any excess stems with your wire cutters. You don’t want to scratch your door.
8. Make A Bow
Let’s make the bow! Measure a 14 inch tail of wired ribbon and insert it into the EZ Bowmaker. Using your EZ Bowmaker, make a six-inch loop on both sides. You will have three loops total on both sides, making each additional loop slightly smaller. Trim another 14-inch tail. Use floral wire and wrap it tightly around the bow. Be sure to check out our bow tutorials, if you need additional help.
9. Attach Your Bow
Using the floral wire to secure it to the grapevine, attach the bow in between the top and bottom floral picks. Adjust your bow and florals so that they look full.
10. Hang This Beauty Proudly On Your Door!

Designer DIY Fall Wreath
Materials
- 1 wire cutters
- 1 stem cutter
- 1 piece hot glue gun
- 1 pack glue sticks
- 1 piece EZ Bow Maker
- 1 piece grapevine wreath 18"
- 2 picks fall foliage picks
- 2 stems fall decorative stems (pumpkins, sunflowers,and berries)
- 1 spool Floral Wire
- 1 roll 1.5 wired ribbon
Instructions
- Insert the first fall foliage pick into the bottom of the grapevine wreath. Make sure to curve your stem so that it follows the natural shape of the wreath. Pro tip: insert the pick at an angle to keep the stem from protruding out of the back of the grapevine.
- If you plan to make this wreath to sell, hot glue all of your stems into the wreath. If you are making this wreath for your personal door, there’s no need for glue. You can reuse this wreath for other seasons by simply switching out the stems!
- Next, add the second fall foliage pick to the top of the wreath, facing in the opposite direction. Again, curving your stem to the natural flow of the wreath.
- Add your first decorated fall stem to the bottom of the wreath by layering it on top of the fall foliage pick. This will create a full look.
- Add your second decorated stem to the top of the wreath by layering it on top of the fall foliage. Now you have fullness at the top and bottom of the wreath.
- Now check the back of the wreath and trim off any excess stems with your wire cutters. You don’t want to scratch your door.
- Measure a 14 inch tail of wired ribbon and insert it into the EZ Bowmaker.
- Make a six-inch loop on both sides. You will have three loops total on both sides, making each additional loop slightly smaller.
- Trim another 14-inch tail.
- Use floral wire and wrap it tightly around the bow.
- Using the floral wire to secure it to the grapevine, attach the bow in between the top and bottom floral picks. Fluff out your bow and florals so that they look full.
Related Post: Bow Making Fun Using the EZ Bow Maker
That’s it, y’all! I told you that it was easy! Now, you know the secret to creating a designer fall wreath that didn’t take hours to make or break the bank.
All it takes is six simple pieces and less than six minutes of your time! If you’re interested in more info on learning how to make wreaths, where to buy supplies, and being in a community of like-minded crafters, check out our Creative Coaching Subscription Group.
We would love to see your beautiful fall wreaths! Please share pictures of them with us over at the How To Make Wreaths Facebook Group.
We Think You’ll Love These Other Fall Wreath Tutorials


Absolutely love this….. thanks for sharing your talent!
Love it!
I’m glad I found you love ,love,you store stuff out thanks
I’m glad I found your store love it
Love it