
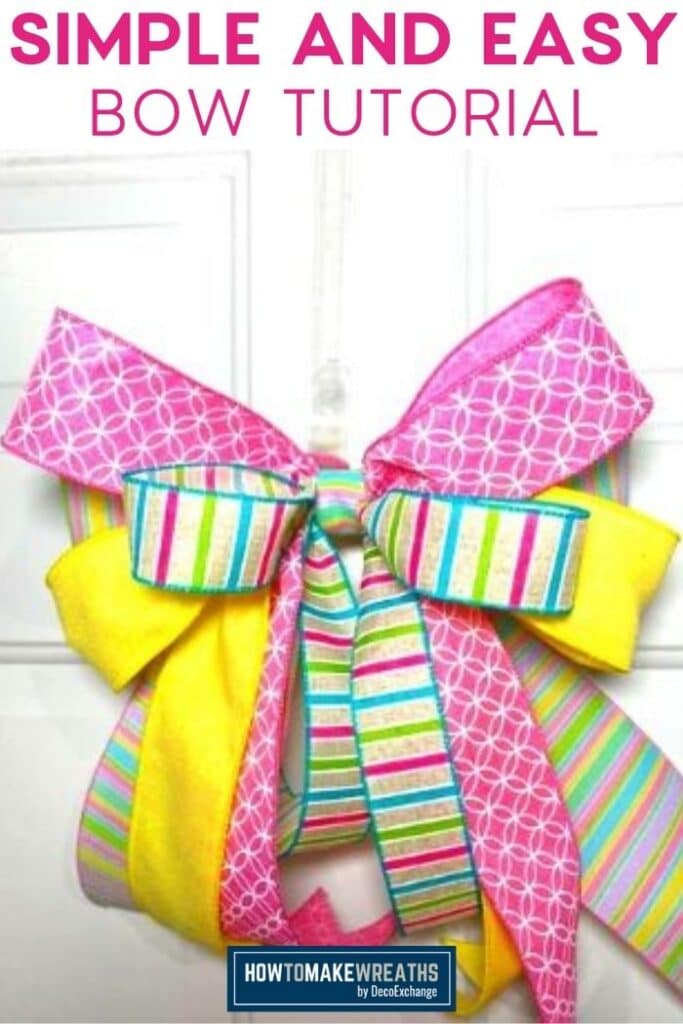
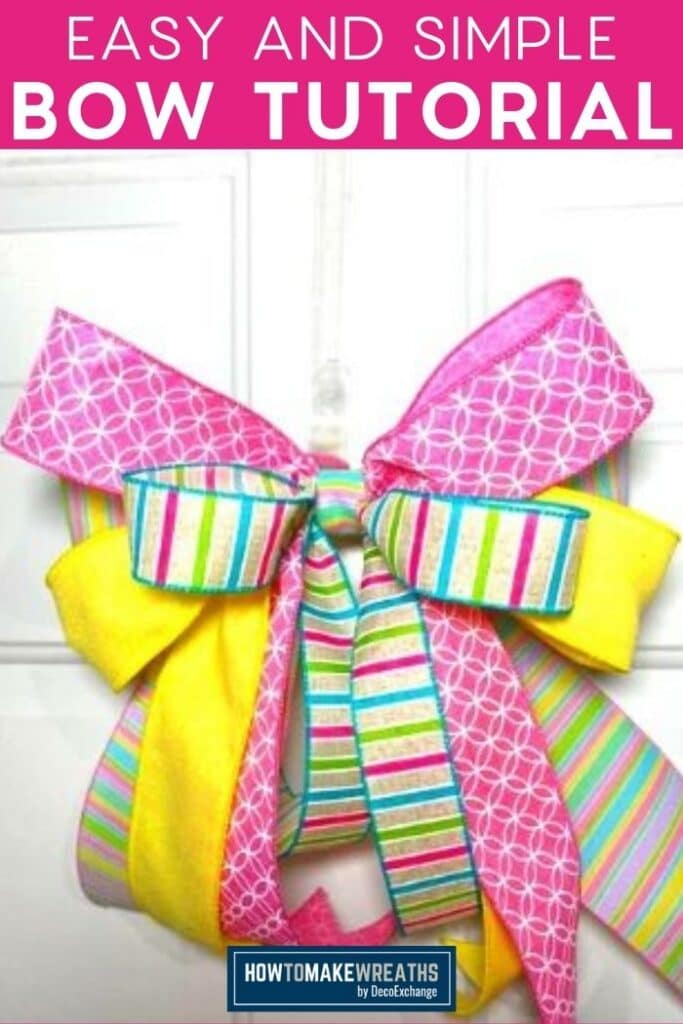
Want to learn a quick and simple bow tutorial? In this post, Parker demonstrates how to make a simple bow in just about 15 minutes! This project is fun, bright, and best of all, EASY to make.
Hey, y’all. Bow-making is tricky when you first start learning how to make one. They can get pretty complex! It’s all too easy to feel confused as you learn how to make bows. That’s why I wanted to offer a simpler option for anyone just beginning their journey on making bows and wreaths – or anyone who wants to try another technique!
As you’ll see from this tutorial, this project is super easy to make, and it’s the perfect technique to try if you’re just getting started with wreath-making. I also show you an easy trick I learned for making the center look finished and professional.
Perfecting this technique will mean you’ll be able to add to wreaths for all occasions. If you’re looking for tips on how to choose ribbon colors and patterns for your bows, we have a whole blog post about that.
Make A Simple Bow Tutorial
Often when we are making wreaths, especially when we are first starting out, we want to dive in and do all. the. things. At once.
That can definitely be fun and can produce some gorgeous creations. But, sometimes we need to just get back to basics. The video below will show you how to make a simple bow and, even though I’m no professional, it turns out really well!
Supplies Needed To Make A Simple Bow
- EZ Bow Maker
- 1 4″ wired ribbon
- 1 1.5 wired ribbon
- 2 2.5″ wired ribbon
- Pipe cleaners
- Hot glue gun and hot glue
How To Make A Simple Bow
Using the EZ Bow Maker makes the process so much simpler which is why I’m using it in the video. If you like the idea of making perfectly even bows every time you can snag yours at DecoExchange.
I made this multi-layered bow using some pretty spring ribbon that I found in the warehouse. I’m using three different ribbon widths and multiple patterns but you can use any combination that looks good to you!
- Grab your ribbon and EZ Bow Maker.
- Take your 4″ ribbon and measure 12″ tails and (2) 6″ loops.
- Grab your 2.5″ ribbon and measure 12″ tails with (2) 5.5″ loops.
- With your second 2.5″ ribbon, measure 12″ tails and (2) 5″ loops.
- Finally, take your 1.5″ ribbon and measure 12″ tails with (2) 5″ loops.
- Grab your pipe cleaner and wrap it around the center as you carefully pull it off the EZ Bow Maker. Twist nice and tight to secure.
- Cut a strip of your 4″ ribbon and fold in half and then in half again. Tie it around the middle to cover the pipe cleaner. Secure it with a dab of hot glue on the back.
Didn’t that run out well for just a few minutes of work? If you are looking for different types of bows to make with the bow maker, you can check out this post that Damon did and learn other styles!
Y’all, this super simple tutorial will show you how to make bows that are perfect for all occasions. You’ll be able to whip them out in no time which will let you spend more time on other things like shopping for florals and designing your next project!
Learn How To Make More Bows
The fun thing about making bows is that there are so many possibilities! Let your creativity soar after you check out these ideas:
- Multi-Ribbon Bows by Hand
- Terri Bow Tutorial: Make a Bow Using the EZ Bow Maker
- How to Make Terri Bows By Hand
- How To Make Bows For a Wreath – with Video
- Bow–Making Fun using the EZ Bow Maker
- How to Make a Terri Bow using Pro Bow the Hand
If you need any help with centerpiece-making, wreath-making, making bows, or crafting in general, be sure to check out more of our tutorials on How to Make Wreaths.
We would love to see your beautiful wreaths! Please share with us over at the How To Make Wreaths Facebook Group.
If you’re interested in more info on learning how to make wreaths or being in a community of like-minded crafters, check out our Creative Coaching Subscription Group.
Simple and Quick Bow Tutorial
Materials
Instructions
- Get your EZ Bow Maker and ribbons.
- With the 4" ribbon, measure 12" tail and (1) 6" loop on each side.
- Next, take your 2.5" ribbon, measure 12" tail and 1 loop on each side slightly smaller.
- Then take your other 2.5" ribbon, measure 12" tail and 1 loop on each side slightly smaller.
- Now, take your 1.5" ribbon, measure 12" tail and 1 loop on each side slightly smaller.
- Then get your pipe cleaner and wrap around the center of your bow. Twist nice and tight.
- Take your 4" ribbon, cut a strip. Fold in half and then in half again. Tie around the middle of the bow to cover the pipe cleaner. Hot glue in the back to secure it.
Just pin this simple bow tutorial to save these instructions for a later time!

If you’re a dog lover or know someone who is, check out our Support Dog Rescue t-shirts and click on the picture below!


Love the colors!!!
Great job Parker!!🎀