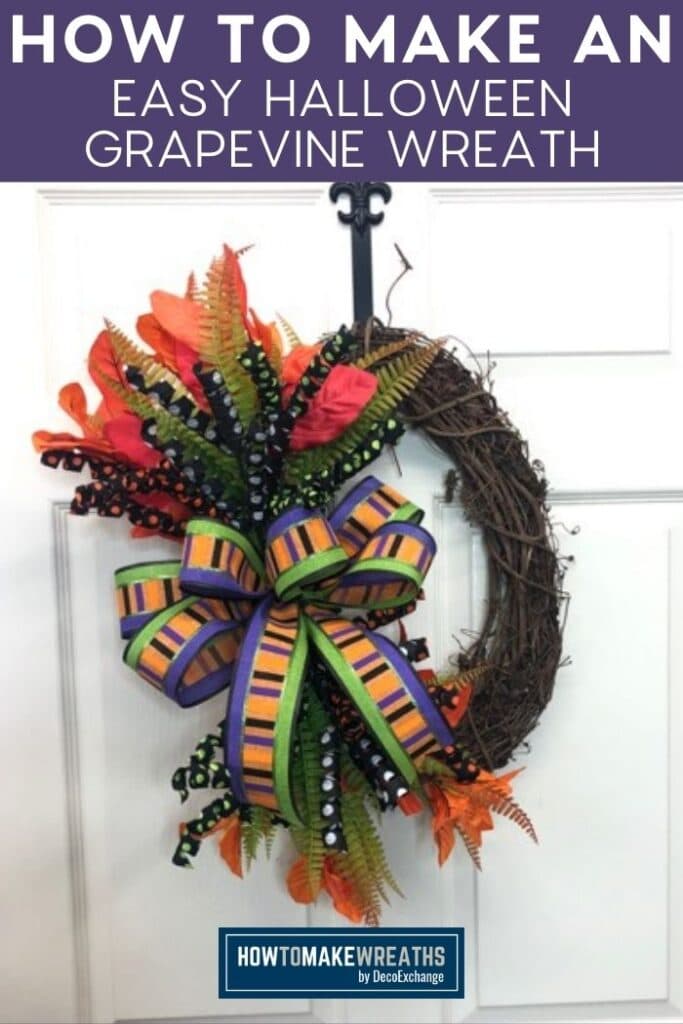
Learn how to make a gorgeous Halloween grapevine wreath for the season. This colorful wreath will look great on any front door and is great for people who want to be festive without using typical Halloween symbols!
Hey, y’all! Ok, so I decided to take a challenge. Parker worked really hard to put these Halloween kits together. I didn’t have to do it, and then I got to be challenged to make something amazing with all the kits they put together.
It was kind of a fun exercise!
This Halloween grapevine wreath tutorial is for Kit #4. It’s really simple and easy to put together. That means you’ll be decorating for Halloween in no time…if you haven’t started already!
And, if you are a Craftpreneur, this wreath design is a quick way to start building up your holiday inventory. This is the time to start making those holiday selections so that you have plenty in stock when customers are ready to buy!
Note: If you love Halloween wreath designs, be sure to also check out our Eat Drink and be Scary Halloween Wreath, DIY Halloween Ghost Wreath, or Witch and Broom: Halloween Deco Mesh Wreath.
How To Make A Halloween Wreath
So we’re going to make a cute, simple, (and best of all) quick grapevine wreath for Halloween. Of course, you’ll need some supplies to make this wreath, and I’ve included a list of everything you’ll need.
But remember, y’all can always substitute ribbons, colors, and leaves to make it your very own wreath design. If you don’t have much time, this Halloween wreath only takes 20 minutes or less to make. And, it will make a great addition to your front door or your storefront.
DIY Halloween Wreath Supplies & Tools List:
- 18″ oval Grapevine
- Horizontal Stripe Talisman Orange/Purple/Black
- 6 Polka-dot Curly Picks (2 Black/Green, 2 Black/Orange, 2 Black/White)
- Magnolia Leaf Satin Bush
- 2 Boston Fern Bush – Green/Brown
- Zip ties

- EZ Bow Maker

Halloween Wreath Kit Instructions
Simply follow these instructions to put this grapevine wreath together for Halloween!
Step 1
Split your bright orange bush (or the greenery of your choice) in half by folding half of the stems down.
Step 2
Layer one of your greenery bushes into the top leaves and then one into the bottom section.
Step 3
Add your 3 curly picks into the top half and then add your 3 curly picks into the bottom half.
Step 4
Place a zip tie around all your stems to keep them together. It should look like two bundles of goodies touching tip to tip.
Step 5
Place the talisman on top of one side of your grapevine and then secure into the grapevine with a zip tie.
Step 6
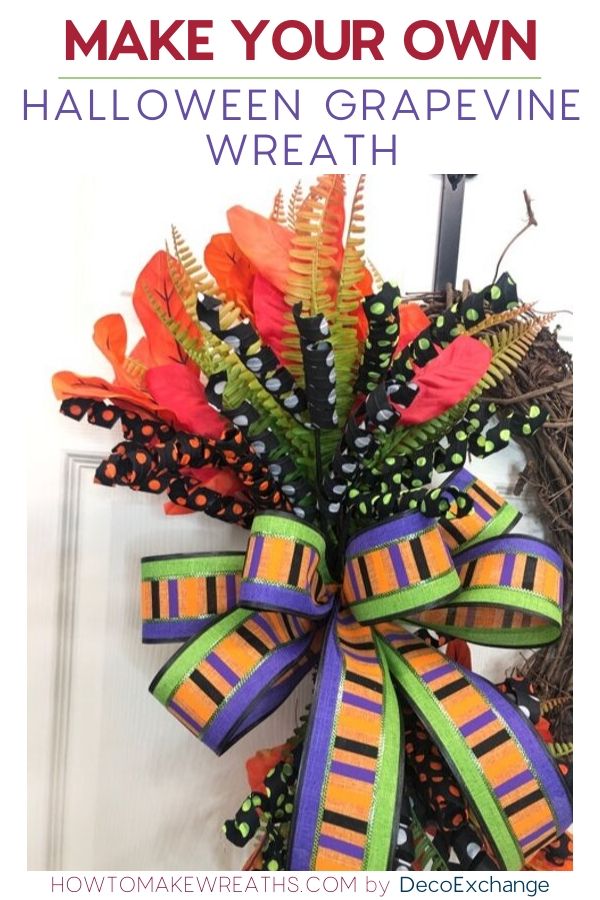
Start blending your layers of greenery and picks together so that it doesn’t look like a bucket of Neapolitan ice cream! You want it well-blended so that it looks like one cohesive design.
Make sure your stems match the curve of your grapevine. If they don’t just give them a slight tug/bend until they do. Fluff out your curly picks.
Step 7
Using the EZ Bow Maker make a simple bow to add to your wreath. For this one, I did (2) 6” loops on each side, and then (1) 5” loop on each side. I used zip ties to hold the bow together. Then, I cut a small strip of matching ribbon and tied it around the center of the bow to hide the zip tie.
Step 8
Attach the bow into the void space on the wreath. You can use a zip tie to hold it into the wreath.
Dovetail the ribbon tails by folding them in half and then cutting from the non-wired side to the wired side. You should be cutting at a downward angle.
TIP: Make sure that your stems are all cohesive. If any stick out too far, just bend them down a bit to help make it look like they’re one big happy family, and there aren’t any oddballs.
CHECK OUT MORE FALL GRAPEVINE WREATHS
Make This Halloween Grapevine Wreath Yourself
All right. That’s it, y’all! Isn’t this wreath fun and colorful? If you’re interested in other Halloween kits, check out what we have in stock on DecoExchange.
In case you can’t find any kits in stock, check out these Halloween wreath designs:
- Simple Spider DIY Halloween Wreath
- How to Make A Halloween Door Hanger
- DIY Halloween Wreath – Video Tutorial
If you need any help with centerpiece-making, bow-making, wreath-making, or crafting in general, be sure to check out more of our tutorials on How to Make Wreaths.
We would love to see your beautiful wreaths! Please share with us over at the How To Make Wreaths Facebook Group.
If you’re interested in more info on learning how to make wreaths or being in a community of like-minded crafters, check out our Creative Coaching Subscription Group.


DIY Halloween Grapevine Wreath
Materials
- 18-inch oval grapevine wreath
- Horizontal Stripe Talisman orange/purple/black
- Curly Picks 2 Black/Green, 2 Black/Orange, 2 Black/White
- Greenery sprays Magnolia Leaf Satin Bush
- Greenery sprays Boston Fern Bush
- Zip ties
- EZ Bow Maker
Instructions
- Fold half the stems down to split the bush in half.
- Take your other greenery and layer it into your design, half of from the top and half of it from the bottom.
- Insert 3 curly picks into the top half and 3 curly picks into the bottom half.
- Use zip ties to bunch the pieces together into 2 groups that seem to meet together in the middle.
- Place the talisman into the top half of the grapevine and use a zip tie to secure it in place.
- Adjust your greenery and picks to blend everything together into one beautiful cohesive design. Fluff out your curly picks.
- Grab your EZ Bow Maker to create a simple bow for your wreath. Make (2) 6” loops on each side, and then (1) 5” loop on each side. Use zip ties to hold the bow together and wrap a small strip of matching ribbon around the center of the bow to hide the zip tie.
- Attach the bow with zip ties and dovetail the ribbon tails.
Just pin this quick and easy Halloween grapevine wreath tutorial to save these instructions for later!