
Centerpieces sell like hotcakes! Customers want to use them all through the year, not just during the holidays. Coach Jordan is here to show us how to make a beautiful purple and cream fall centerpiece that your customers will buy (almost) faster than you can make.
Hey, y’all! We’ve been making a bunch of centerpieces lately. Why? Easy – customers WANT them. A Craftpreneur’s business is only successful if they make what customers want, so we’re making centerpieces. 😂
Plus, centerpieces offer a terrific opportunity for wreath makers because they are an ideal complement to wreaths. That means that if you can create matching designs, you have a great chance at having customers who buy BOTH!
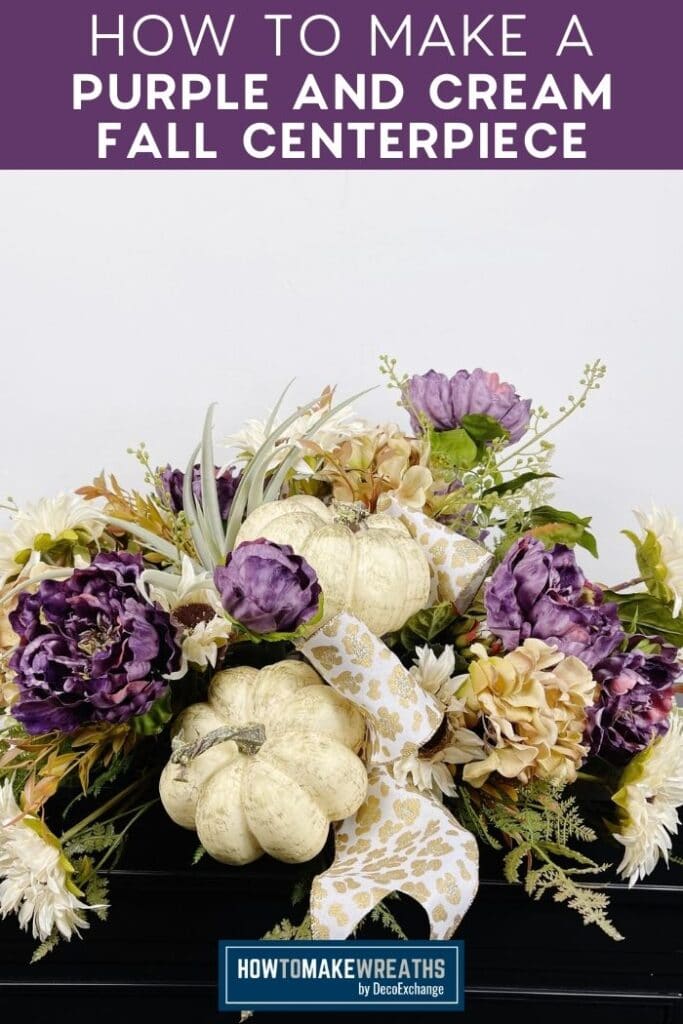
Today we have Coach Jordan here with another centerpiece tutorial. Today’s design is a purple and cream fall centerpiece that is stunning. Get ready to hear the cha-ching of your online shop selling out!
Let’s dive into this new fall centerpiece design!
Note: Want to see more centerpiece ideas? Check out our holiday designs for Christmas, Valentine’s Day, and Mardi Gras. We also have an everyday simple centerpiece, spring centerpiece, and magnolia centerpiece designs you may love.
How To Create A Fall Centerpiece
Centerpieces like this one are a little more complex than our simple centerpiece, but still easy to create. With just a few supplies and around 30-45 minutes, you’ll accomplish great things.
Supplies Needed
Here’s everything you’ll need to complete this project. I have included links to some items to make them easier to find.
- 1 small wooden plank
- 1 foam block made from spray foam
- Large air plant succulent
- 2 greenery sprays
- 1 bunch of brown and orange greenery sprays
- 4-5 stems of faux white sunflower florals
- 2 greenery sprays (with large purple florals)
- 2 greenery sprays (with cream Dahlia florals)
- Wispy greenery sprays
- 2 mini faux pumpkins
- (1) 4” white ribbon with gold snow leopard print
- Faux moss
- Floral stakes
- Stem cutter
- Needle nose pliers
- Bolt cutters
- Pipe cleaners
- Scissors
- Hot glue and glue gun
Instructions
Are you ready to see how easy it is to create your own fall centerpiece? Just follow this step-by-step guide.
Note: This arrangement will end up being about 36 inches wide, so it’s perfect for large tables, mantles, and more!
Step 1
Add spray foam to a wooden block. The foam will hold your centerpiece pieces in place. Set it aside and let it dry for at least 24 hours (follow the instructions on the package).
Step 2
Once your board and foam are ready, take your needlenose pliers and poke a hole into the top, towards one end of the foam “block.” Dab some hot glue on the end of your faux succulent and insert it into the hole you just created.
Step 3
Next, take your two greenery stems and cut the smaller stems off of the main stem. Add some hot glue to the bottom of each stem and insert it into the foam block, making your way around all sides (and top) of the foam.
Grab the orange and brown greenery and repeat the same process, spreading them out between the green pieces.
Step 4
Now, grab your white sunflower florals and use the stem cutter to trim the stems shorter and separate the flowers. One at a time, add hot glue to the stem ends and insert them into the foam throughout the design.
Step 5
Repeat Step 4 again, this time inserting the large purple florals throughout the design on the foam block.
Step 6
Next, grab a floral stake and one of your faux pumpkins. Hot glue one end of the floral stake and insert it into the bottom of the pumpkin. Then insert the stake into the foam block where you see space for the pumpkin.
Repeat the same process with your second pumpkin, inserting it into the area a little above your other pumpkin.
Step 7
Take your 4” ribbon and make a very quick bow with 8” tails and (2) 5” loops. Wrap a white pipe cleaner through the middle and twist tightly to secure it in place.
Add hot glue to the ends of the pipe cleaner and insert them into your foam block between your pumpkins.
Make another identical bow and insert it into the other side of your design to balance it out.
Step 8
Next, let’s add a few ribbon tails. Cut (4) 10” tails out of the same ribbon and insert them into the foam throughout your design.
Step 9
Grab the Dahlia floral stems and cut them apart to separate them. Add a dab of hot glue to the ends and insert them into the foam throughout the design.
Step 10
After adding a dab of hot glue to the wispy greenery stems, insert them one at a time throughout the design to add a touch of whimsy.
Step 11
Take your faux moss and hot glue it anywhere you see exposed areas of foam to hide it. Adjust any florals or ribbons that need adjusting, dovetail the ribbon tails, and your purple and cream fall centerpiece is done!
Add A Fall Centerpiece To Your Decor!
Isn’t this centerpiece GORGEOUS?
We have been having a blast exploring more centerpiece designs because they sell SO well. We love making them because they’re fun and have a great ROI for Craftpreneurs.
Many people use centerpieces as a “one and done” decor piece, so they’re willing to pay a little more for the convenience.
As always, please feel free to take the liberty of transforming this basic design idea into something very much your own by adding your own design elements to it!
If you love fall designs, check out our other popular fall-themed projects!
- Fall Harvest Wreath
- Designer Fall Grapevine Wreath With A Pumpkin Sign
- How to Make a Hello Fall Mesh Wreath
- How To Make A Simple Fall Grapevine Wreath
- Fall Grapevine Wreath
How did your centerpiece turn out? Show us by sharing a picture of your creations with us over at the How To Make Wreaths Facebook Group.
If you are interested in more info on learning how to make wreaths, where to buy supplies, and being in a community of like-minded crafters, check out our Creative Coaching Subscription Group.


Purple and Cream Fall Centerpiece
Materials
- Wooden plank
- Spray foam
- Large air plant succulent
- 2 greenery sprays
- 1 greenery sprays brown and orange-colored
- 4-5 floral stems white sunflowers
- 2 floral stems with large purple blooms
- 2 floral stems with cream Dahlia blooms
- 2 greenery sprays wispy variety
- 2 Faux pumpkin
- 1 4" wired ribbon white with gold snow leopard print
- Faux moss
- Floral stakes
- Stem cutter
- Needle nose pliers
- Bolt cutters
- Pipe cleaners
- Scissors
- Hot glue gun
Instructions
- Make a "block" with spray foam on your wooden block. Let it set until dry (about 24 hours).
- Once ready, poke a hole into the top of the foam with your needlenose pliers. Dab some hot glue on the end of your faux air plant and insert it into the hole you just created.
- Cut the smaller greenery stems off of the main stems. Add some hot glue to the bottom of each stem and insert it into the foam block throughout the design.Grab the orange and brown greenery and repeat the same process, spreading them throughout the green pieces.
- Using the stem cutter, cut the stems of the white sunflower florals shorter and separate the flowers. Add hot glue to the individual stem ends and insert them into the foam throughout the design.
- Repeat Step 4 again, this time inserting the large purple florals throughout the centerpiece.
- Hot glue one end of a floral stake and insert it into the bottom of one of your pumpkins. Then insert the other end of the stake into the foam block where you see space for the pumpkin.Repeat the same process with your second pumpkin, inserting it into the area a little above your other pumpkin.
- Take your 4” ribbon and make a very simple bow with 8” tails and (2) 5” loops. Wrap a white pipe cleaner through the middle and twist tightly to secure it in place. Insert the pipe cleaner ends into your foam block between your pumpkins.Make another identical bow and insert it into the other side of your design to balance it out.
- Cut (4) 10” tails out of the same ribbon and insert them into the foam throughout the centerpiece.
- Grab the Dahlia floral stems and cut them apart. Add a dab of hot glue to the ends and insert them into the foam throughout the design.
- Insert the wispy greenery stems throughout the design for texture.
- Hot glue faux moss anywhere you see exposed areas of foam to hide it. Adjust any florals or ribbons that need adjusting, dovetail the ribbon tails, and your purple and cream fall centerpiece is done!
Video
Just pin this purple and cream fall centerpiece tutorial below to find the instructions later!


Absolutely STUNNING!!!!